Perennials

Aloe Vera Is Forgiving of Neglect — and Unforgiving of Attention

Margaret Chen

Margaret Chen

Flower & Ornamental Specialist · Updated April 2026

How to grow aloe vera — vintage botanical illustration showing the plant in detail

Aloe Vera at a Glance

Sun

Sun

6+ hours bright light daily

Soil pH

Soil pH

6.0-7.0

Water

Water

Every 2-3 weeks in spring/summer

Spacing

Spacing

24-36"

Height

Height

2-3 feet

Soil type

Soil

Well-draining cactus/succulent mix

Lifespan

Lifespan

perennial

Get your personalized growing data

Enter your zip code for frost dates, growing season, and soil type.

There is a particular kind of heartbreak reserved for aloe vera growers: the plant you expected to be indestructible sitting on your windowsill, leaves gone soft and translucent, base collapsing into mush. It feels like a personal failure. How do you kill something that supposedly thrives on neglect?

The answer is always the same. You watered it.

Aloe vera is one of the most misread plants in cultivation. Its reputation as an easy houseplant is genuine but incomplete. It tolerates neglect beautifully. It does not tolerate the habits most of us carry from growing other houseplants — the attentive waterings, the moisture-retentive soil, the "just in case" top-ups when the leaves look a little dull. Those instincts, correct for a peace lily or a fern, are quietly lethal for a plant that evolved in landscapes where rain comes infrequently and soil dries in hours.

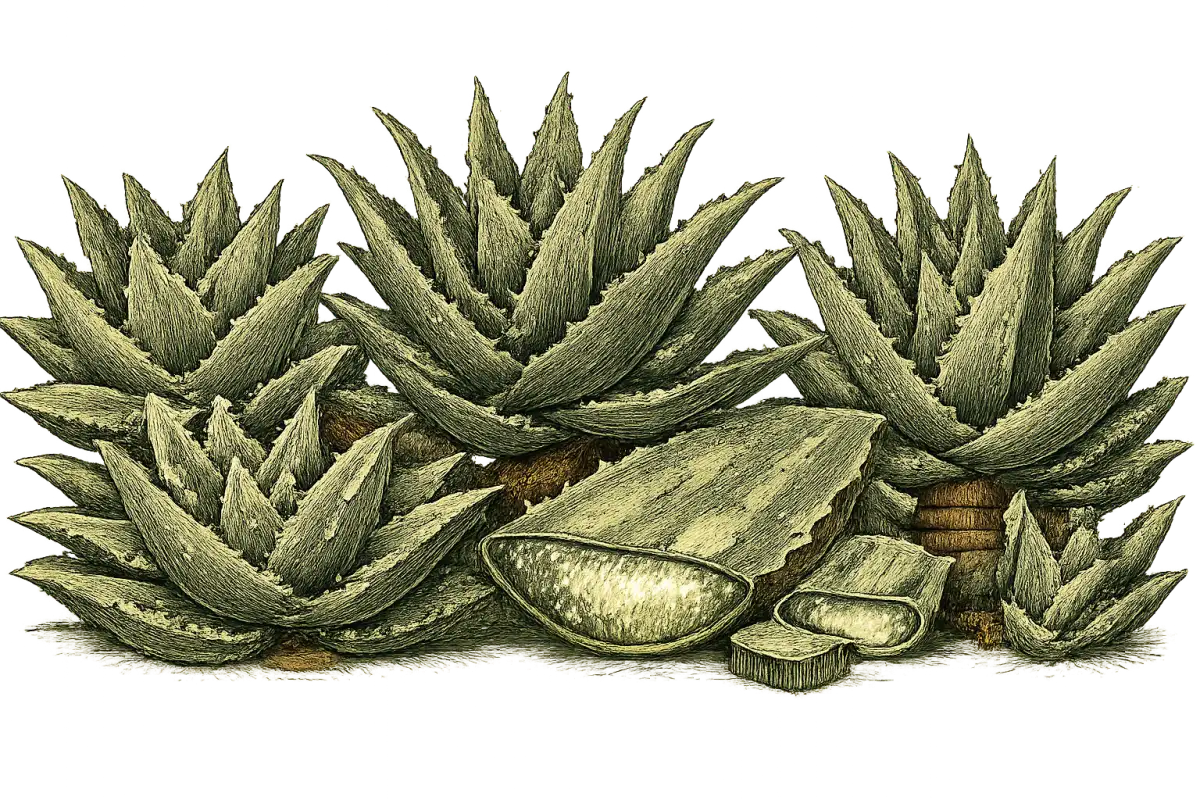
Get the watering right, get the soil right, and aloe vera becomes the low-maintenance companion it promises to be. The right specimen in the right zone and the right container looks stunning, too — that architectural rosette, those fleshy blue-green leaves tapering to a point, the occasional surprise of a flame-orange flower spike rising three feet above the foliage. It is not merely useful. It is genuinely beautiful.

This guide covers what the plant actually needs, zone by zone, mistake by mistake, so you can grow aloe the way it wants to be grown rather than the way instinct tells you to treat it.


Quick Answer: Aloe Vera Growing at a Glance

USDA Zones (outdoor perennial): 9 through 11

USDA Zones (container/indoor): 4 through 8

Light: 6+ hours of bright light daily; south- or west-facing window indoors

Soil: Fast-draining cactus/succulent mix; water must exit the pot within seconds

Soil pH: 6.0–7.0

Watering method: Soak-and-dry; water only when the top 1/3 of soil is completely dry

Indoor watering frequency: Every 2–3 weeks in summer; every 4–6 weeks in winter

Outdoor watering (zones 9–11): Established plants often need no supplemental water

Temperature: Ideal 55–80F indoors; lethal below 25–30F

Pot: Terra cotta with drainage holes; only 5–10% wider than the root ball

Propagation: Division of pups (offsets) only — leaf cuttings will rot, not root

First gel harvest: Plants 3–4 years old; outer leaves only; never more than 1/3 at once

Mature size (indoors): 12–18 inches; outdoors 2–3 feet tall and wide

Primary species for medicinal use: Aloe barbadensis miller exclusively


The Watering Problem (Why So Many Aloe Plants Die on Windowsills)

Before anything else in this guide matters, I need you to sit with this idea: aloe vera does not need your care in the way other plants do.

It evolved in arid environments where rain is infrequent and soil dries rapidly between events. The fleshy leaves are not decorative — they are reservoirs, carrying weeks of water internally so the plant can survive extended drought. When you replicate desert conditions, the plant thrives. When you replicate the moist, attentive conditions of a tropical houseplant, the roots sit in wet soil they were never designed to tolerate, cells rupture, fungal pathogens move in, and root rot takes hold with astonishing speed.

Overwatering is the cause of more aloe deaths than every other problem combined. It is not close.

What makes this so treacherous is the feedback loop. Overwatered aloe looks sick — leaves go soft and pale and translucent. Most growers interpret sick-looking leaves as a signal to water more. More water accelerates the rot. The plant collapses. The grower concludes aloe is difficult. Aloe is not difficult. The instinct was simply wrong.

The Soak-and-Dry Method

The correct approach is called soak-and-dry, and it is exactly what it sounds like. Check the soil before every watering by inserting your finger 1–2 inches into the mix. If there is any moisture at all, wait. Come back in a few days and check again. When the top third of the soil is completely dry — not slightly damp, completely dry — water thoroughly. Pour slowly and evenly until water flows freely from the drainage holes. Let the pot drain for ten to fifteen minutes. Empty the saucer. Then do not water again until the soil dries.

In summer, this cycle takes roughly two to three weeks indoors. In winter, when the plant is dormant and using almost no water, the same cycle can stretch to four to six weeks. Never follow a calendar for aloe watering. A small terra cotta pot on a sunny winter windowsill may dry in ten days; the same plant in a large plastic pot in a dim room may stay moist for a month. The only reliable indicator is the soil itself.

A few techniques that do not work and should be discarded entirely:

Small, frequent sips keep the top layer perpetually damp without properly saturating deep roots. This is the worst possible pattern for aloe — it creates surface moisture without the deep-wet-then-dry cycle the plant needs.

Misting the leaves does nothing for hydration and can promote fungal issues on the foliage. Water the soil, always.

Ice cubes — a recurring social media myth — shock the roots with cold and deliver negligible water volume. Use room-temperature water.

Reading Your Plant: Overwatered vs. Underwatered

Overwatered aloe and underwatered aloe both look unwell, and telling them apart matters because the treatments are opposite. Here is how to distinguish them.

An overwatered aloe feels soft, squishy, and heavy. Leaves are mushy and may appear translucent or water-soaked. Brown patches look wet, not dry. The base of the plant may feel spongy at the soil line. In advanced cases, there is a musty, rotting smell from the soil. This is a serious situation requiring immediate intervention — stop watering, unpot the plant, and inspect the roots.

An underwatered aloe feels thin, papery, and light. Leaves curl inward as the plant draws moisture from its own tissue. Tips go brown and dry. The leaf surface wrinkles slightly. This is a low-urgency situation. Water thoroughly and the plant recovers within days, though the dry tips will not repair themselves on affected leaves.

If you genuinely cannot tell which problem you have, underwater. Aloe recovers from dryness reliably. It often does not recover from overwatering.


Soil and the Container: Setting Up the Right Foundation

Watering is the most important variable in aloe care, but it does not operate in isolation. The soil and container you choose determine how quickly the root zone dries — and whether careful watering actually translates to a healthy plant.

The Soil Rule

Water must flow through the soil and out the drainage holes within seconds. If it pools on the surface, drains in a slow trickle, or leaves the pot feeling heavy for several days after watering, the mix is wrong and root rot is only a matter of time regardless of how carefully you water.

Standard potting soil is formulated to retain moisture. For tropical houseplants, that is exactly what you want. For aloe vera, it is the wrong tool entirely. Potting mix stays wet for days after watering, creating the waterlogged conditions aloe roots cannot survive.

The simplest solution is a commercial cactus and succulent mix, available at any garden center. Popular options include Miracle-Gro Cactus, Palm & Citrus, Black Gold Cactus Mix, Espoma Cactus Mix, and — for growers who want particularly fast drainage — Bonsai Jack Succulent Mix. Some commercial cactus mixes still retain more moisture than ideal; if your soil stays wet for more than a few days after watering, add perlite at 25–30% by volume.

If you prefer to mix your own, two reliable recipes:

Standard DIY Mix: 50% regular potting soil, 50% perlite

Premium DIY Mix: 50% regular potting soil, 25% perlite, 25% coarse horticultural sand (never fine play sand or beach sand, which compact between soil particles and make drainage worse, not better)

A few materials to avoid entirely: vermiculite (holds water like a sponge), potting soil with water-retaining crystals or gels (designed specifically to maintain moisture), and garden soil from your yard (too heavy, prone to compaction, and may carry pathogens).

The Container

Terra cotta — unglazed clay — is the ideal aloe container, and it is not a close call. The porous walls allow moisture to evaporate from all sides, not just the surface, which means the soil dries faster and root rot risk drops significantly. Glazed ceramic and plastic retain moisture longer and require more careful watering discipline to compensate.

More important than material, however, is drainage. Every aloe pot must have at least one drainage hole, without exception. A beautiful pot without drainage is not a container for aloe — it is a slow trap. Water will pool at the bottom regardless of how little you add, the lowest roots will rot first, and the damage will be invisible until it spreads upward through the plant.

If you love a decorative pot without holes — and many of the nicest ones lack them — use it as a cache pot. Keep the aloe in a plain draining pot inside it. Remove the inner pot to water, let it drain completely, then return it to the decorative sleeve.

One more critical point on sizing: choose a pot only 5–10% wider than the plant's root ball, and when repotting, go up no more than 1–2 inches in diameter. This feels counterintuitive — the instinct is to give the plant room to grow. But an oversized pot holds a large volume of soil that the roots cannot access or dry out, and that unused soil stays wet long after the root zone has dried. The result is functionally the same as overwatering, even with a perfect watering schedule. Aloe actually prefers being slightly root-bound. It is healthier that way.


Aloe Vera by Zone: What to Grow and How

Aloe vera's outdoor hardiness is limited. Aloe barbadensis miller — the true aloe vera, and the only species appropriate for medicinal gel — grows as a carefree outdoor perennial only in zones 9 through 11. Everywhere else, it is a container plant that visits the outdoors in summer and winters inside.

But "container plant" is not a consolation prize. A well-grown indoor aloe in a terra cotta pot on a bright south-facing window is a genuinely lovely thing — that compact, spiky rosette with its faint blue-green cast catches winter light beautifully. And for growers in cooler zones who want cold-hardy aloe relatives for the outdoor garden, there are excellent options.

What zone are you in?

Enter your zip code for frost dates, growing season, and soil type.

Cold Zones (4–6): The Indoor Houseplant Strategy

In zones 4 through 6, winter lows range from –30F to 0F. Aloe barbadensis miller cannot survive outdoors year-round in these zones under any circumstances. It is an indoor plant here, full stop.

The good news is that aloe is an excellent indoor plant for this use case. It stays compact indoors — typically 12 to 18 inches — requires little attention through the long winter months, and earns its windowsill space in every season with its structural form.

Standard Aloe barbadensis miller is the right choice for indoor growing in these zones. No special cultivar selection is needed. The plant adapts readily to indoor conditions as long as light and watering requirements are met, and any healthy specimen from a garden center or nursery will perform well. Place it in a south-facing or west-facing window for the 6+ hours of bright light it needs. An east-facing window works but growth will be noticeably slower.

For growers who want more ornamental variety alongside their medicinal aloe, a few smaller options are worth exploring:

Aloe aristata (Lace Aloe) is the most cold-tolerant aloe species, though it does not produce medicinal gel. It stays compact, tolerates lower light better than A. barbadensis, and makes an interesting textural companion in a succulent display.

Aloe juvenna (Tiger Tooth Aloe) produces small stacking rosettes in an unusual upright form — architectural and interesting on a shelf arrangement.

Aloe 'Christmas Carol' is a compact hybrid with dark green leaves marked with red spots, particularly appealing in winter light.

Summer outdoor placement is absolutely worth pursuing in these zones. Once all frost danger has passed — typically late May to early June in zones 4 and 5, slightly earlier in zone 6 — aloe can spend the warm months on a patio or deck. It grows faster, colors up more richly, and benefits from the stronger light. Bring it back inside before nighttime temperatures drop below 50F, typically September in zones 4–5 and October in zone 6. And never move it directly from an indoor windowsill to full outdoor sun — more on that in the mistakes section.

Zone 7: Container Culture With One Outdoor Exception

Zone 7 experiences hard freezes regularly in winter, making outdoor aloe barbadensis miller impractical. Container culture remains the right strategy.

One species, however, opens a door for gardeners who want a permanent outdoor aloe planting. Aloe aristata (Lace Aloe) tolerates brief cold snaps to 10–15F and can survive zone 7b winters in sheltered, well-drained locations. It will not produce medicinal gel, but planted in a south-facing spot with excellent drainage — ideally a raised bed — it brings that distinctive aloe silhouette to the outdoor garden year-round. Aloe striata (Coral Aloe) is marginal in zone 7b; it can work in a raised bed with frost cloth protection during hard freezes, but it is a gamble rather than a certainty.

For the medicinal plant, keep Aloe barbadensis miller in containers and follow the same summer outdoor placement strategy as zones 4–6.

Zone 8: The Transitional Zone

Zone 8 occupies an interesting middle ground. Occasional hard freezes occur but mild winters are common. Aloe barbadensis miller cannot reliably survive zone 8 winters in the ground, but in zone 8b — the warmer half — containers can stay outdoors year-round in sheltered microclimates, placed against a south-facing wall with frost cloth kept nearby for freeze events. In zone 8a, bring containers indoors or to an unheated garage (which works as long as temperatures stay above 40F) for winter.

For growers who want cold-hardy aloe species in the zone 8 landscape:

Aloe aristata is reliable across both 8a and 8b — full sun to light shade, well-drained soil. Aloe striata (Coral Aloe) performs well in zone 8b in a raised bed or rock garden setting. Aloe brevifolia (Short-Leaf Aloe) is another solid option for zone 8b, forming low rosettes that work well in rock gardens with excellent drainage. None of these produce the classic medicinal gel; they are landscape ornamentals.

Zone 9: Outdoor Growing With Frost Protection

Zone 9 is where aloe vera becomes a true landscape plant. Winter lows of 20–30F mean frost occurs, but Aloe barbadensis miller can live in the ground year-round with sensible precautions. This is the northernmost zone where outdoor aloe vera is genuinely practical.

Site selection matters enormously here. Choose a south- or west-facing exposure for maximum warmth. Drainage is the top priority — raised beds, slopes, or heavily amended soil only; low-lying areas where cold air pools or water collects after rain are to be avoided. Soil pH should sit between 6.0 and 7.0.

When freeze warnings are issued, cover plants with frost cloth. More importantly, ensure the plant is dry going into any freeze event — wet soil combined with cold temperatures damages roots far faster than cold alone. A dry, established aloe tolerates brief frost to 32F without permanent damage; a recently watered one in saturated soil is far more vulnerable. Keep frost cloth on hand, and resist the temptation to water in the days before a forecast cold snap.

Beyond Aloe barbadensis miller, two varieties deserve mention for zone 9 landscapes. Aloe arborescens (Torch Aloe) grows to 6–10 feet and produces spectacular red-orange flower spikes — a dramatic background plant for large beds and slopes. Aloe 'Blue Elf', a compact hybrid reaching 1–2 feet, is one of the most reliable landscape bloomers available, with prolific orange flowers on a drought-tough frame. Both share similar frost tolerance to A. barbadensis.

Zones 10–11: Carefree Outdoor Perennial

In zones 10 and 11, aloe vera becomes what its reputation promises everywhere: essentially effortless. Plant it in the ground and step back.

Outdoor-grown aloe reaches 2–3 feet tall and wide, considerably larger than indoor specimens. It produces pups freely and forms impressive colonies over time. It flowers readily outdoors — tall spikes reaching up to 3 feet, carrying tubular yellow to orange blooms that attract hummingbirds. In the hottest inland areas of zones 10 and 11, afternoon shade prevents leaf scorch; coastal zone 10 can take full sun without issue. Established plants in these zones may require no supplemental irrigation at all — rainfall alone is typically sufficient.

The planting calendar is flexible here. Early fall — after the intense summer heat has passed but while the soil is still warm — gives roots the best establishment window before any cool weather arrives. Spring after frost risk is a solid second choice.

For larger-scale landscape use, several species complement Aloe barbadensis miller beautifully in zones 10–11. Aloe arborescens at 6–10 feet makes a striking background or screening plant. The statuesque Aloe ferox — reaching 6–10 feet with dramatic orange-red candelabra flowers — functions as a bold architectural specimen. Aloe plicatilis (Fan Aloe), with its unusual strap-like leaves arranged in precise fans, grows to 5–8 feet and commands attention as a focal point. Aloe 'Blue Elf' at 1–2 feet works in mass plantings, containers, and borders.

Quick Reference: Top Varieties by Zone Group

Zone GroupRecommended VarietiesTypeStrategy
4–6A. barbadensis miller, A. aristata, A. juvennaIndoor containerHouseplant year-round; summer patio optional
7A. barbadensis miller, A. aristataContainer + sheltered outdoorContainer primary; A. aristata in zone 7b landscape
8A. barbadensis miller, A. aristata, A. striata, A. brevifoliaContainer / cold-hardy outdoorContainer for medicinal; cold-hardy species in landscape
9A. barbadensis miller, A. arborescens, A. 'Blue Elf'In-ground with frost protectionLandscape plant; frost cloth on standby
10–11A. barbadensis miller, A. arborescens, A. ferox, A. plicatilis, A. 'Blue Elf'In-ground perennialCarefree landscape plant; minimal irrigation once established

Light and Placement: Where Aloe Actually Belongs

Aloe vera has an undeserved reputation as a low-light plant. It is not. It is a full-sun succulent that tolerates indoor conditions — there is a meaningful difference between those two things.

The plant needs at least 6 hours of bright light daily. Indoors, a south-facing or west-facing window is ideal. An east-facing window works but growth will be slower. North-facing windows are insufficient — if that is all you have, supplement with an LED grow light running 12–14 hours daily.

The clearest sign of insufficient light is etiolation: the stem elongates as the plant stretches toward the nearest light source, leaves grow pale and floppy, and the compact architectural form the plant is known for dissolves into something leggy and unattractive. The plant survives this way for quite a long time before the symptoms become obvious, which is part of why placement errors persist. A genuinely thriving aloe is compact, upright, deep green — sometimes with a faint blue cast — and firm. A suffering aloe in low light looks progressively worse over months, losing the precise form that makes it beautiful in the first place.

Rotate the pot a quarter turn weekly to keep growth even. Without rotation, the plant leans dramatically toward the light source and the rosette shape becomes lopsided.

One genuine light hazard indoors: intense afternoon sun through west-facing glass can scorch even established aloe. If you notice white or brown patches appearing on leaves near a west window during peak summer hours, a sheer curtain provides just enough filtration. This is less common than the inverse problem of insufficient light, but worth knowing.

For temperature, aloe is comfortable in the 55–80F range that most homes maintain naturally. The real dangers are cold drafts from windows and doors in winter (glass surfaces can radiate cold that brings temperatures near the pane 20–30F below room temperature), heating vents (hot, dry blasts desiccate leaves), and cold window glass that the leaves are physically touching. Keep the plant away from all three.


Planting, Repotting, and Propagation

When and How to Repot

Aloe prefers being slightly root-bound and does not need repotting often — every two to three years is typical. The signals that the time has come: roots visibly circling the bottom of the pot or growing from the drainage holes, pups crowding the mother plant so thoroughly that the whole container feels packed, or the plant becoming top-heavy and prone to tipping.

When you do repot, spring or early summer is the right time. The plant is entering its active growth phase and will recover fastest.

The procedure: water lightly one to two days before, then tip the pot sideways and slide the plant out. Inspect every root — trim any brown, mushy, or dead roots cleanly with sterilized scissors or pruners. Select a new pot only 1–2 inches wider than the old one. Add fresh cactus mix and plant at the same depth the aloe was growing previously. Then — critically — do not water for three to five days. Repotting damages fine roots; wet soil on wounded root tips invites rot. Resume normal watering after one week, starting conservatively.

Avoid repotting in fall or winter. The plant is dormant, recovery is slower, and root rot risk is higher in cold conditions.

Propagating from Pups

This is the one reliable way to make more aloe plants, and it requires patience rather than skill. Pups — baby plants growing from the base of the mother on underground runners — are the only viable propagation route. Aloe vera cannot be propagated from leaf cuttings. This is a widespread misconception drawn from general succulent care advice. Leaf cuttings placed in soil or water will not develop roots. They rot. Every time.

Wait until pups are at least 2–3 inches tall with their own small root system before separating them. Spring or early summer is ideal. Remove the entire plant from its pot, shake away enough soil to see the connection points, and cut each pup away with a clean, sharp knife, ensuring the pup retains some of its own roots. Set both the pup and the mother plant in a spot with good air circulation and indirect light, and allow the cut surfaces to callus for one to two days before potting.

Plant the pup in a small pot with dry cactus mix. Wait five to seven days before the first watering — that cut surface must seal before it meets moisture. Begin with a light watering after the first week and gradually increase to normal frequency over the following two to three weeks. Pups are more vulnerable to overwatering than established plants, so lean conservative.


The Mistakes That Kill Aloe Plants

These are ranked by how frequently they result in plant death. If you read nothing else in this guide, read these.

Mistake #1: Overwatering — The Overwhelming First Cause

We have covered this, but the ranking bears emphasizing. Overwatering kills more aloe plants than every other problem combined. The fix is the soak-and-dry method described above, executed faithfully. Check the soil. Always. Every time.

A subtler version of this mistake is watering on a fixed schedule — "water every Sunday" regardless of what the soil actually feels like. This works in summer and becomes lethal in winter, when the plant is dormant and using a fraction of the water it needs in warm months. A weekly summer schedule can become chronic overwatering by December without the grower changing anything. The calendar is not a reliable guide for a dormant succulent. The soil is.

Mistake #2: A Pot Without Drainage Holes

No drainage hole means water pools at the bottom of the pot permanently. No amount of careful watering prevents it. The gravel layer trick — placing a layer of gravel at the bottom of a drainage-free pot to "create drainage" — does not work. It creates a perched water table, where water sits at the soil-gravel interface and keeps the root zone saturated. This is basic soil physics; capillary action prevents water from moving freely from fine-pored soil into coarse-pored gravel below. The only drainage solution is an actual hole that allows water to exit the pot.

Mistake #3: Wrong Soil

Standard potting soil, leftover from other houseplants, is the wrong medium for aloe. It stays wet for days after watering, and even careful soak-and-dry watering cannot make up for a mix that does not drain. The fix is straightforward: use cactus/succulent mix, or the DIY blends described above. This is one of those cases where the right choice is also the simpler one.

Mistake #4: Moving Indoors to Outdoors Without Hardening Off

Spring arrives, the temperatures are lovely, and it seems entirely logical to put the aloe outside for fresh air and sun. Within 24 to 48 hours, white or brown scorched patches appear on the leaves. The damage is permanent on affected tissue — those leaves will carry the marks until they are eventually replaced by new growth, which can take months to years.

The cause is not heat or outdoor conditions per se, but the dramatic difference in light intensity between an indoor windowsill and direct outdoor sun. Even a bright south-facing window delivers a fraction of the light energy of full outdoor exposure. The fix is a four-week hardening-off process: one week in full outdoor shade, one week in two to three hours of morning sun, one week at four to five hours, and finally full outdoor placement in week four. Never skip this process, even in mild conditions.

Mistake #5: An Oversized Pot

The instinct is generous but counterproductive. A pot much larger than the root ball holds a volume of soil that the roots cannot dry out quickly enough. That excess wet soil creates conditions for root rot even when watering is otherwise correct. Choose a pot only 5–10% wider than the current root ball and go up no more than 1–2 inches when repotting.

Mistake #6: Cold Damage

Aloe vera cannot survive sustained temperatures below 25–30F. Even brief exposure below 32F causes tissue damage if the plant is wet. In zones 4–8, leaving the plant outdoors past the first fall frost is a common point of failure. Less obvious: placing a pot on a cold windowsill where the glass radiates cold, or storing in an unheated garage that drops below freezing. Symptoms of cold damage — water-soaked, translucent leaves darkening to brown — look disturbingly similar to overwatering symptoms. If your plant was exposed to cold, that is the likely cause.

Mistake #7: Attempting Leaf Propagation

Leaf cuttings do not root in aloe vera. They rot. This is well-documented and consistently true despite the general succulent advice that treats leaf propagation as universal. If your aloe has no pups yet, wait. A mature, healthy plant produces them reliably.

What zone are you in?

Enter your zip code for frost dates, growing season, and soil type.


Pests, Diseases, and Root Rot Rescue

Aloe vera is relatively low-maintenance from a pest standpoint. It attracts fewer insects than most houseplants, and outdoor specimens in zones 9–11 benefit from natural predator populations. The overwhelming threat is root rot — not a pest or disease in the traditional sense, but a cascade of damage initiated by waterlogged conditions.

Recognizing Root Rot Early

Early-stage root rot is salvageable if caught quickly. Watch for leaves shifting from deep green to pale or yellowish, a softness when leaves are gently squeezed, and water-soaked brown spots on lower leaves. The soil may smell musty. At this stage, the plant is telling you something is wrong before the damage becomes irreversible.

Advanced root rot looks dramatically worse: leaves turn translucent and gelatinous, the base of the plant feels mushy at the soil line, lower leaves fall away with minimal pressure, and there is a distinct rotting odor. The roots, if you unpot and examine them, are dark brown to black and disintegrate between your fingers. Healthy roots are white to light tan and snap cleanly.

Rescuing an Overwatered Plant

For mild to moderate rot, act immediately. Remove the plant from its pot, shake off every bit of old soil, and cut away all brown or mushy roots with clean scissors sterilized in rubbing alcohol. Cut until you see only firm, white tissue — err toward removing more rather than less. Let the plant air-dry for two to three days in bright indirect light with good airflow. Repot in completely dry, fresh cactus mix in a clean pot (bleach-wash the old pot with a 1:9 bleach-to-water solution if reusing it). Do not water for seven to ten days. When you resume watering, use a more conservative schedule than you did before the rot occurred. Monitor closely for four to six weeks.

For severe rot where the base and stem are mushy, the existing root system cannot be saved. Lay the plant on a clean surface and cut the stem cleanly above the rot line, slicing upward until every cross-section shows firm, green tissue with no brown discoloration or soft spots. Let the cut end callus for three to five days in indirect light with good airflow. Plant the calloused end 1–2 inches deep in dry cactus mix and mist very lightly after one week — just enough to slightly moisten the surface. New roots form in two to four weeks. Do not water normally until new leaf growth appears, confirming roots have established. The full process takes four to eight weeks.

Common Pests

Mealybugs are the most frequent aloe pest: small, white, cottony masses appearing in leaf axils, on leaf undersides, and at the base. For mild infestations, dab directly with a cotton swab soaked in 70% isopropyl alcohol. Moderate infestations respond to a 50/50 alcohol-and-water spray or insecticidal soap. Severe cases require weekly neem oil applications for three to four weeks. Isolate any affected plant immediately.

Scale insects look like small brown or tan bumps adhered to leaves and stems. Scrape them off manually, then follow up with neem oil or horticultural oil spray every seven to ten days for three to four cycles to catch the mobile juvenile stage.

Spider mites appear as fine webbing on leaf undersides and create a stippled or silvery surface on affected leaves. They thrive in hot, dry conditions — common near heat vents in winter. Dislodge with a strong water spray, then apply neem oil weekly for three to four weeks.

Fungus gnats hovering near the soil surface are almost always a signal that the soil is staying too moist. Let it dry more thoroughly between waterings and the habitat for their larvae disappears.

Aloe mite (Aceria aloinis) is the most serious pest concern and the hardest to manage. These microscopic mites cause warty, tumor-like galls on leaves and stems — irregular growths that can appear green, pink, or reddish. There is no reliable cure once galls are established; the mites live protected inside the tissue. Remove and destroy all affected growth, cutting well below visible galls with alcohol-sterilized tools. If more than 30–40% of the plant is affected, discard it entirely and do not propagate from it. Inspect any new aloe before purchasing and quarantine new plants for two to four weeks.


Harvesting Gel: What to Know Before You Cut

One of the central reasons people grow aloe vera is access to fresh gel for burns, skin irritation, and topical care. It is a genuine benefit of the plant, but a few guidelines make the difference between a good harvest and a damaged plant.

Only use Aloe barbadensis miller for medicinal purposes. There are over 500 aloe species, and other ornamental aloes may not be safe for topical use. The standard aloe vera sold at most US garden centers is A. barbadensis miller, but confirm before applying gel medicinally.

Only harvest from plants at least 3–4 years old. Younger plants have less gel and do not tolerate harvesting well. The plant needs to be mature enough to give and recover.

Always select an outer, lower leaf — the oldest, thickest, most mature tissue. Never harvest more than one-third of the plant at once.

Cut the leaf cleanly at the base with a sharp, clean knife. The plant will seal the wound naturally. Wash the harvested leaf under running water, then stand it upright in a glass for 10–15 minutes to drain the yellow latex layer — the aloin. Aloin is a potent laxative and a skin irritant; it should not make it into your gel. Lay the drained leaf flat, slice off the spiny edges, and separate the green skin from the clear inner gel. That clear gel is what you want. If it has any yellow tint, rinse under water. Apply fresh immediately, or store in an airtight container in the refrigerator for up to one week. For longer storage, blend the gel and freeze it in ice cube trays.


Companion Planting and Design: Aloe in Context

For gardeners in zones 9–11 where aloe lives outdoors, it is one of the most versatile design elements available — simultaneously architectural, soft-textured, and virtually maintenance-free. The rosette form offers strong contrast against fine-leaved ornamental grasses, flowering ground covers, and the rounded forms of agave relatives. The orange flower spike, when it comes, is a seasonal surprise worth designing around.

In landscape settings, Aloe arborescens serves as a bold background plant with its branching form and vivid flower clusters. Aloe 'Blue Elf' works beautifully in mass plantings along borders, its prolific orange blooms appearing in late winter and early spring when color in the garden is often scarce. Aloe barbadensis miller itself sits comfortably in herb gardens and mixed beds where both beauty and utility matter.

For indoor display, the compact rosette form of standard aloe vera pairs well with other succulents in a collection — the clean, upright geometry of aloe against the flatter, spreading form of echeveria, or the cascading quality of string of pearls in a nearby pot, creates the kind of composed visual arrangement that holds a shelf together. Terra cotta containers in warm earth tones complement the blue-green leaves better than white ceramic. The plant looks its best in winter, when shorter days and brighter indoor light give the leaves their deepest color — which makes it an unexpectedly useful design element during a season when most houseplants look tired.

What zone are you in?

Enter your zip code for frost dates, growing season, and soil type.


Frequently Asked Questions

Can I grow aloe vera outdoors in a cold climate?

Not in the ground, no. Aloe barbadensis miller is cold-hardy only to about 25–30F, which means outdoor survival is limited to zones 9–11. In zones 4–8, grow it in containers indoors with optional summer patio placement. If you want a cold-hardy outdoor aloe in zones 7–8, Aloe aristata (Lace Aloe) tolerates brief cold to 10–15F and can overwinter outdoors in sheltered, well-drained locations — though it does not produce medicinal gel.

How do I know if my aloe needs water?

Insert your finger 1–2 inches into the soil. If it feels moist at all, wait. Water only when the top third of the potting mix is completely dry. In summer, this typically means every two to three weeks indoors. In winter, every four to six weeks or less. The soil, not the calendar, is the reliable indicator.

Why are my aloe leaves turning soft and pale?

In the vast majority of cases: overwatering. Soft, pale, or translucent leaves with water-soaked brown spots are the classic early symptoms of root rot. Stop watering immediately, let the soil dry completely, and unpot the plant to examine the roots if symptoms persist. If roots are brown and mushy, follow the rescue procedure described above.

Can I use any aloe plant for burns and skin care?

Only Aloe barbadensis miller — true aloe vera — should be used for topical medicinal purposes. Other aloe species may not carry the same beneficial gel properties, and some are mildly toxic. Confirm your species before harvesting. When you do harvest, drain the yellow aloin latex layer before using the gel — aloin is a laxative irritant that should not be applied to skin.

Why won't my aloe leaf cutting root?

Because aloe vera cannot propagate from leaf cuttings. Unlike echeveria, sedum, and many other succulents, detached aloe leaves will rot before they root, without exception. The only reliable propagation method is dividing pups — the small offset plants that grow from the base of a mature mother plant. If your aloe has no pups yet, wait until it does.

My aloe grew really tall and floppy — what happened?

This is etiolation, caused by insufficient light. The stem elongates as the plant stretches toward available light, and the leaves lose the turgid, upright structure that makes aloe so visually compelling. Move the plant to a south- or west-facing window, or add a grow light running 12–14 hours daily. The existing stretched growth will not revert — you are waiting for new, properly-formed leaves to grow in over time — but with adequate light, the plant will stop stretching and begin producing compact, healthy foliage.


The Bottom Line

Aloe vera rewards restraint. The growers who get it right are not the ones doing more — they are the ones resisting the impulse to do more. Less water than feels intuitive. A smaller pot than seems generous. Soil that drains faster than looks normal. A window that gets real sun, not ambient light.

Do those things, put the right species in the right zone, and aloe vera becomes everything its reputation promises: an unfussy, beautiful, useful plant that earns its place on any windowsill or in any garden bed for years to come. It will not demand much of you. All it asks is to be left a little drier than your instincts suggest.

Source material for this guide was drawn from extension service research and expert cultivation resources covering aloe vera care for indoor and outdoor growers across US climate zones.

Where Aloe Vera Grows Best

Aloe Vera thrives in USDA Zone 10. Explore each zone's complete guide for growing tips, companion plants, and seasonal advice.

Also possible in: Zone 9 (challenging but possible with the right conditions).

Not sure of your zone? Look it up by zip code →