Short-Season Zones (3-5): Make Every Week Count
In zones 3 through 5, your growing season is compressed. The good news for dill is that cool temperatures and shorter days actually delay bolting, giving you a longer foliage window per planting than gardeners in warmer zones get. The challenge is that your window for fall succession sowings is tight — you need to stop sowing by late July in zone 4 or you will not get a usable harvest before frost.
Dukat is the variety I recommend most often for cold-zone gardeners who want foliage. It was developed in Denmark for leaf production, which tells you something about its cold-season credentials. Dukat produces exceptionally fine, fragrant fronds with high essential oil content, which means better flavor than most varieties. It is slower to bolt than standard dill in cool conditions and holds its foliage quality longer into warm weather than older cultivars. This is your workhorse for zones 3-5.
Fernleaf is the other strong option for cold zones, particularly if space is tight. It is a compact dwarf variety, reaching only 18 inches compared to the 3-4 feet of standard varieties, and it was an All-America Selections winner in 1992 — a designation that actually means something because AAS trials are conducted across diverse North American conditions. Fernleaf is slow to bolt, makes an excellent container plant if needed, and its compact habit means you can fit more plants in a small bed to maximize your short season.
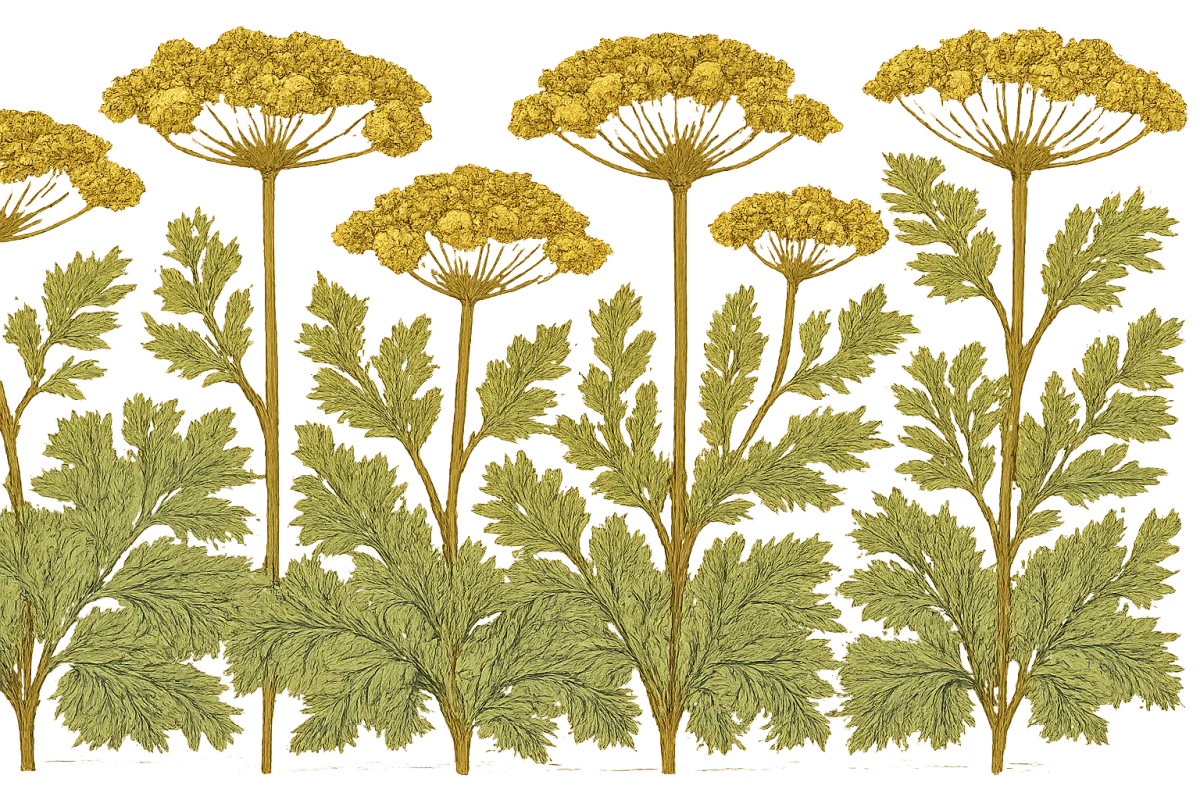
For seed production in zones 3-5, Mammoth (also sold as Long Island Mammoth) is the standard choice. It grows tall — sometimes 4-5 feet — and produces large, dense seed heads that are ideal for pickling dill. The tradeoff is that Mammoth bolts faster than foliage varieties, so do not plant it expecting a long cutting season. Plant it when you want seeds. In cold zones, start your Mammoth succession early so it has time to complete its seed-set cycle before hard frost.
Temperate Zones (6-7): The Most Flexible Window
Zones 6 and 7 are where dill growing is most forgiving. You have a long enough season to run three to four successions of foliage crops plus a dedicated seed crop, and your spring and fall windows are both productive. Heat comes later than in warmer zones, giving early sowings a genuine long foliage phase.
Bouquet is the most widely available all-purpose variety and a reliable performer in zones 6-7. It reaches 3 feet, produces both good foliage and usable seed heads, and has moderate bolt resistance. It is not the most exciting variety — think of it as the reliable default. If you cannot find specialty seeds locally, Bouquet will be on the shelf and it will do its job.
Superdukat is worth seeking out if you prioritize flavor. It is an improved version of Dukat with even higher essential oil content — reportedly 40-50% more aromatic than standard varieties according to some cultivar trial data. For cooking applications where dill flavor matters most, this is the better choice. It is slower to bolt than Bouquet and produces genuinely superior-tasting fronds.
Herkules is a compact, semi-dwarf variety that performs well in zone 6-7 gardens where space is limited. It stays under 2 feet, making it useful for intercropping with other vegetables. Its bolt resistance is good in temperate conditions, though not as strong as Fernleaf in heat.
For the zone 7 gardener who wants both foliage and seeds from the same season, the practical approach is to plant Dukat or Superdukat for your spring foliage successions and let one planting go to seed in midsummer. Then sow Bouquet in late August for a fall foliage crop, which will hold beautifully in the cooling temperatures of September and October in zone 7. Fall-grown dill in zones 6-7 is genuinely underutilized. The cool weather dramatically slows bolting, the flavor is excellent, and fresh dill in October is a pleasant surprise when most of the garden has shut down.
Warm and Hot Zones (8-10): Work the Shoulder Seasons
In zones 8-10, dill is not a summer crop. Full stop. Summer heat in these zones pushes dill to bolt within two to three weeks of germination. This is not a slow-bolt variety problem or a watering problem. It is physics. Trying to grow dill for foliage in July in zone 9 is a waste of seeds and effort.
What works in warm zones is treating dill as a cool-season crop with two growing windows: late winter through spring, and fall through early winter. In zone 8, direct sow in late February through March and again in September through October. In zones 9-10, your primary window is October through February, with a brief spring window in February and March before heat arrives. These shoulder-season plantings give you the cool temperatures that delay bolting and produce the best flavor.
For warm zones, Fernleaf and Dukat remain the best choices for foliage because their compact habit and bolt resistance give you the longest usable window before heat ends the game. Fernleaf in particular, with its dwarf stature, can be grown in containers that you move to afternoon shade as temperatures rise, buying you an extra week or two of harvest.
Mammoth works well in zone 8-9 for fall-planted seed crops. Sow it in September, let it overwinter in mild climates, and it will set a substantial seed crop the following spring before summer heat arrives. This timing aligns naturally with spring pickling season.
One important note for zone 9-10 gardeners: dill self-seeds enthusiastically in mild climates. If you let one plant go to seed in your garden, you will have volunteer dill appearing in cool months for years. Some gardeners in Southern California and coastal zones treat dill as a semi-permanent garden resident that self-maintains through volunteer seedlings, requiring only thinning rather than active sowing. This is worth letting happen.
Quick Reference Table: Top Picks by Zone Group
| Zone Group | Top 3 Varieties | Primary Use | Why |
|---|
| 3-5 | Dukat, Fernleaf, Mammoth | Foliage / Seed | Cold tolerance; slow bolt; compact for short seasons |
| 6-7 | Superdukat, Bouquet, Herkules | Foliage / Dual-purpose | Long season flexibility; high oil content; reliable availability |
| 8-10 | Fernleaf, Dukat, Mammoth | Cool-season foliage / Seed | Bolt resistance in shoulder seasons; container-friendly |
Direct Sowing: The Decisions That Lock In Your Season
Dill has one non-negotiable requirement at planting time: it must be direct sown. The plant develops a taproot almost immediately after germination, and any disturbance to that taproot — including transplanting from a nursery pot or seed tray — causes the plant to stall, struggle, and bolt early as a stress response. If you have ever bought a nursery-grown dill transplant and watched it immediately shoot up and flower within two weeks, this is why. The damage was done before it arrived in your garden.
This means you cannot start dill indoors. You cannot buy transplants. You sow seeds where you want them to grow, and you thin rather than transplant.
Timing by Zone
Zones 3-5: Direct sow as soon as the soil can be worked in spring — typically late April through May. Dill seed germinates in soil temperatures as low as 50-60 degrees Fahrenheit, and cool-season sowings hold foliage longer than warm-season ones. Begin succession sowings every 2-3 weeks through late June. Sow a final succession in late July for a fall crop, adjusting by a week or two based on your average first frost date.
Zones 6-7: Begin direct sowing in late March through April when soil temperatures reach 60 degrees. Run succession sowings every 2-3 weeks through early July. Restart in late August through September for fall production. Fall-grown dill in these zones is excellent and underutilized.
Zones 8-10: Sow in late September through October for the primary cool-season growing window. A brief spring window in late February through March works before summer heat. Skip summer entirely.
Site Selection
Choose a spot with 6-8 hours of direct sun minimum. Less than 6 hours produces weak, thin stems that flop over and bolt faster than well-sunlit plants. Dill grown in partial shade is not productive dill.
Soil should be well-drained. Dill is surprisingly tolerant of lean, dry soils once established — it is native to Mediterranean regions and southwestern Asia where soils are not particularly rich. Avoid heavy clay that stays wet. Sandy loam is ideal. If your best sunny spot has heavy soil, work in some coarse sand and compost to improve drainage before sowing.
One critical siting note: keep dill away from fennel. The two plants will cross-pollinate if grown near each other, producing seed with muddled, off-flavor characteristics. Keep them at least 30 feet apart or grow only one of the two each season. Also keep dill away from carrots, parsley, and other members of the Apiaceae family to avoid competition and potential cross-pollination of seed crops.
The Sowing Process
Step 1: Prepare a shallow seedbed. Rake the surface smooth, removing clods and debris. Dill seed is tiny and needs good soil contact for germination. Do not dig deeply — a shallow preparation is better than deep cultivation for a direct-sown crop.
Step 2: Sow seeds shallowly. Press seeds into the top 1/4 inch of soil. Dill seed needs light to germinate. Burying it deeper than 1/4 inch reduces germination rates significantly. Many growers simply scatter seed on a prepared surface and press it in with a board or the back of a hand.
Step 3: Water gently. Keep the surface consistently moist until germination, which takes 7-14 days depending on soil temperature. A light mist twice daily is better than a heavy soaking that moves tiny seeds around.
Step 4: Thin to final spacing. Once seedlings are 2 inches tall, thin to 12-18 inches apart for full plants grown to maturity. If you are harvesting young and frequently, 6-8 inch spacing works. Do not skip thinning — crowded dill produces weak plants that bolt faster.
Step 5: Mark your succession calendar. Sow the next batch 2-3 weeks out. Set a reminder. This is the step most people skip, and it is the reason most people run out of dill in July.
Watering Dill: Consistent, Not Heavy
Dill does not need much from you in the watering department, which is part of its appeal as a crop. Once established, it tolerates moderate drought and actually grows better in drier conditions than in wet ones. The real watering challenge is the germination and establishment phase — getting seeds to germinate and young seedlings established in dry summer soil.
During Germination
The surface soil must stay consistently moist from sowing until germination. Dill seed is small and the radicle (first root) must reach moisture immediately upon emergence. If the surface dries out during the 7-14 day germination window, germination fails and you resow. Use a gentle spray — a hose-end mist setting or a watering can with a fine rose head. Heavy watering moves seeds and creates surface crusting that blocks emergence.
Established Plants
Once dill seedlings have their first true leaves, water needs drop considerably. Target roughly 1 inch of water per week, adjusting for rainfall. Deep, infrequent watering is appropriate for established dill — the taproot reaches down well below the surface and can access moisture from a considerable depth. Consistent moisture slows bolting compared to the drought-stress cycle, but dill does not want to sit in wet soil.
Avoid overhead watering late in the day. Wet foliage overnight encourages fungal issues. Water at the base or use drip irrigation if you have it installed. Morning watering that allows leaves to dry quickly is always preferable.
Overwatering is the more common problem in home gardens, particularly for gardeners who are accustomed to keeping herbs consistently wet. Wet soil reduces essential oil concentration in the foliage — dill grown in slightly dry conditions has better flavor than dill grown in perpetually moist soil. This is counterintuitive but consistent with the plant's Mediterranean origins.
Feeding Schedule: The Less-Is-More Rule
Dill is one of the crops that rewards restraint with fertilizer. Heavy feeding, particularly with high-nitrogen fertilizers, pushes rapid vegetative growth but accelerates the lifecycle and brings bolting on faster. You are essentially paying to shorten your harvest window.
For most garden soils with average organic matter, no supplemental fertilizer is needed for dill. If your soil is notably poor — sandy, low-organic-matter ground that struggles to support other vegetables — a single application of balanced, low-nitrogen fertilizer at sowing time is appropriate. Incorporate a small amount of compost into the top few inches of the seedbed before sowing. That is usually sufficient.
If you are growing dill in containers, the calculation changes. Container media has no soil ecosystem to mineralize nutrients over time, and nutrients leach out with every watering. A diluted liquid fertilizer at half the recommended rate, applied every three to four weeks, keeps container-grown dill productive without pushing it to bolt. Use a balanced formulation — something like a 5-5-5 or 10-10-10 at half strength — rather than a high-nitrogen product.
Do not fertilize at all once dill has begun to show signs of bolting — when the central stem starts to elongate and the flower head begins to form. Feeding at this stage does not reverse the process. It just accelerates it.
One timing note worth understanding: dill in the seedling stage is more fertilizer-sensitive than mature plants. Avoid high-concentration fertilizer near seedlings — root burn will set young plants back at the most vulnerable phase of their development. If you are applying granular fertilizer, keep it away from the seedling base and water in thoroughly.
Managing Dill Through the Season: Harvest, Succession, and Letting Go
Dill does not require the pruning management that a woody perennial herb like rosemary does. But there are specific interventions through the season that make the difference between a productive planting and a mediocre one.
Harvesting Foliage
Begin harvesting dill fronds once the plant has at least four to five sets of leaves. Earlier than this and you remove too much of the plant's photosynthetic capacity. Harvest by snipping individual stems with clean scissors or snips. Take from the outer portions of the plant and leave the central growing point intact. Never remove more than one-third of the plant at one cutting.
Harvest in the morning after dew has dried. Essential oil concentration is highest in cooler morning temperatures, meaning better flavor. Morning harvest also means the cut surfaces dry quickly, reducing the risk of fungal issues at the wound site.
Use harvested foliage fresh if possible — fresh dill loses volatile compounds quickly. For storage, wrap loosely in damp paper towel and refrigerate for up to a week, or freeze in an airtight container for longer storage. Drying concentrates but changes the flavor profile; most cooks prefer fresh or frozen for finesse applications and dried for long-cooked dishes where the distinction matters less.
Delaying Bolting (Slightly)
You cannot stop bolting. You can delay it a few days to a week by removing the central flower stalk as soon as you see it beginning to elongate — before the flower head opens. This is called "deadheading" though the more accurate term here is "stalk removal." The plant responds by sending energy to side shoots briefly, giving you one more flush of harvestable foliage before it bolts in earnest. This is not a permanent fix. It is a week's grace period. Use it, then pull the plant and sow your next succession.
Harvesting Seeds
If seed is your goal, let selected plants bolt and complete their flowering cycle without interference. Dill seed heads (umbels) mature from the outside in. Seeds are ready to harvest when they turn from green to tan-brown and begin to feel firm. The window between mature and shattered (seeds falling naturally) is short — about a week. Watch closely.
Cut seed heads in the morning before the heat of the day, which causes shatter. Hold a paper bag under each head and cut the stem above it, tipping the head into the bag. Seeds continue to ripen slightly after harvest, so spread them on a screen in a warm, well-ventilated spot for a week before final cleaning and storage. Store in an airtight container in a cool, dry location. Properly stored dill seed maintains viability for three to four years.
The Mistakes That Kill Dill Yields
Most dill failures are human decisions, not pest or disease problems. Here are the ones we see most often.
Mistake #1: Transplanting Instead of Direct Sowing
This is the most common and most consequential error. Gardeners start dill indoors to "get a head start" or buy nursery transplants because it seems easier. The result is a stressed plant with a disturbed taproot that bolts immediately and produces almost nothing. Dill has no transplant tolerance. Disturb the taproot and the plant shifts into reproductive mode as a stress response. There is no recovery from this. Direct sow every time, without exception.
Mistake #2: Planting One Crop and Expecting Continuous Harvest
A single dill planting will give you foliage for two to four weeks before it bolts, depending on the variety and the season. That is the biological reality. Gardeners who plant one batch in May and expect dill all summer are going to be disappointed every single time. The solution is mechanically simple — sow a new batch every two to three weeks — but it requires building the habit of succession sowing into your garden routine. This is not difficult. It just requires intention.
Mistake #3: Planting Dill in Partial Shade
Dill grown in less than 6 hours of direct sun is weak, floppy, slow-growing, and bolts faster than sun-grown plants. The flavor is also inferior — essential oil production in the foliage is driven in part by light intensity. A partly shaded bed might seem like a reasonable compromise for a "shade-tolerant" herb, but dill is not shade-tolerant. It is a sun plant. Give it your sunniest available spot.
Mistake #4: Over-Fertilizing with High-Nitrogen Products
The instinct to fertilize vigorously to produce big, lush plants backfires with dill. High nitrogen accelerates the plant's lifecycle. You get rapid green growth followed by rapid bolting, and your harvest window shrinks rather than extends. Lean soil with adequate organic matter is better for sustained foliage production than heavily amended, nitrogen-rich ground. If your dill is bolting faster than expected and you have been generous with fertilizer, that is likely part of the cause.
Mistake #5: Growing Dill Near Fennel
This one is easily avoided and frequently overlooked. Dill and fennel cross-pollinate readily when grown near each other. The resulting seed will not grow true to type, and the flavor of harvested seed may be poor. If you grow both herbs — and many gardeners do, since they look similar and are often planted for similar purposes — maintain at least 30 feet of separation. Given that most home gardens are not 30 feet wide, the practical advice is to grow only one or the other in any given season, or in separate garden beds with physical barriers between them.
Mistake #6: Skipping the Fall Succession
Gardeners in zones 6-9 routinely leave a profitable late-season window unused. Dill sown in late August or September produces some of the best foliage of the year — the cooling temperatures slow bolting dramatically, the days are shortening (reducing the day-length bolting trigger), and the plants hold their foliage in usable condition much longer than spring plantings. Fall dill is genuinely better than summer dill in terms of harvest duration and flavor quality. Treat it as a separate crop, not an afterthought.
Pests and Diseases
The honest summary: dill is a low-maintenance crop when it comes to pests and diseases. Most established dill plants will complete their lifecycle without serious intervention. That said, a few problems are common enough that knowing what to look for saves you a harvest.
Pests
Parsley worm (Black Swallowtail caterpillar) is the most iconic dill pest and also the most benign. The caterpillar of the black swallowtail butterfly — green with black and yellow bands — feeds heavily on dill, fennel, and other Apiaceae family members. It can defoliate a plant quickly, which is genuinely damaging if your dill patch is small. The management question is a values one: these caterpillars become native butterflies, which are pollinators with broader garden value. Many gardeners make a deliberate choice to plant extra dill specifically to feed them, harvesting their own needs first and leaving the rest. If the population is genuinely damaging your crop, hand-pick caterpillars and relocate them rather than spraying. Bacillus thuringiensis (Bt) is effective if chemical intervention is needed, but consider the tradeoff with the butterfly population.
Aphids colonize dill, particularly in the early season when plants are soft and new growth is abundant. Look for clusters of small, soft-bodied insects on stems and the undersides of leaves, often accompanied by sticky honeydew residue and distorted new growth. Dill aphids are usually managed effectively by natural predators — lady beetles and lacewings are attracted to dill and will work through aphid colonies without any help from you, if you do not spray broad-spectrum insecticides that kill beneficials. For heavy infestations, a strong stream of water dislodges aphids from stems effectively. Insecticidal soap is a targeted option if pressure is severe.
Armyworms and cutworms occasionally target dill seedlings at the soil line, clipping them off overnight. Young seedlings in the first week or two after germination are most vulnerable. Cutworm collars — small cylinders of cardboard or plastic placed around seedlings and pushed an inch into the soil — are effective physical barriers. Diatomaceous earth around seedlings provides additional deterrence. Bt (specifically Bt kurstaki or Bt aizawai for armyworms) is effective for severe infestations of either pest.
Carrot rust fly larvae tunnel into dill roots in some regions, causing yellowing and wilting that can look like drought stress. The adult fly is small and green-bodied with red eyes. Row covers from sowing through late spring, when adult fly populations peak, are the most effective preventive measure. Crop rotation — not growing Apiaceae family crops in the same location in consecutive years — reduces soil-level larval populations over time.
Diseases
Damping off is the most common disease problem with dill and almost always occurs at the seedling stage. Caused by soilborne fungi including Pythium and Rhizoctonia species, it causes newly germinated seedlings to collapse at the soil line — the stem appears water-soaked and pinched, and the seedling falls over and dies. Damping off is triggered by cool, wet, poorly draining soil conditions. The fix is primarily cultural: sow in well-drained soil, avoid overwatering during germination, ensure good air circulation, and do not sow into cold soil (below 50 degrees Fahrenheit) where germination is slow and seedlings sit vulnerable for extended periods. If damping off has been a persistent problem in a specific bed, consider treating the seedbed with a biofungicide containing Bacillus subtilis before sowing.
Powdery mildew appears as a white to gray powdery coating on leaves and stems, typically in midsummer when temperatures are warm and humidity is moderate. It is primarily aesthetic early in its progression but reduces photosynthetic capacity in severe cases. Dill that is bolting anyway is not worth treating for powdery mildew — let it go to seed. For plants you want to continue harvesting, improve air circulation by thinning any overcrowded plantings, water at the base rather than overhead, and avoid late afternoon irrigation. Neem oil or a diluted baking soda solution provides some suppression if applied early in the infection cycle.
Leaf blight caused by Alternaria species produces brown, irregular spots on foliage, often with yellow halos. It spreads in wet weather and is more common in years with abundant spring rainfall. Affected tissue is not usable for harvest. Management is primarily cultural — avoid overhead irrigation, ensure plant spacing allows good air movement, and remove and dispose of heavily affected foliage rather than composting it. In severe cases, copper-based fungicide provides some protection when applied preventively.
Cercospora leaf spot produces small, circular tan spots with dark borders on dill foliage. Like Alternaria blight, it is favored by wet conditions and spreads via water splash. The same cultural practices apply: drip irrigation, adequate spacing, and removal of diseased material. Neither leaf spot disease is typically severe enough to warrant preventive fungicide applications in a home garden planting.
When to intervene is straightforward for dill: if the problem is affecting more than about a third of harvestable foliage on plants you are still actively harvesting, act. If plants are near bolting anyway, skip intervention and focus on your next succession planting. Dill's short lifecycle means most pest and disease problems resolve themselves as you pull spent plants and begin new successions. The system is self-correcting if you are sowing regularly.