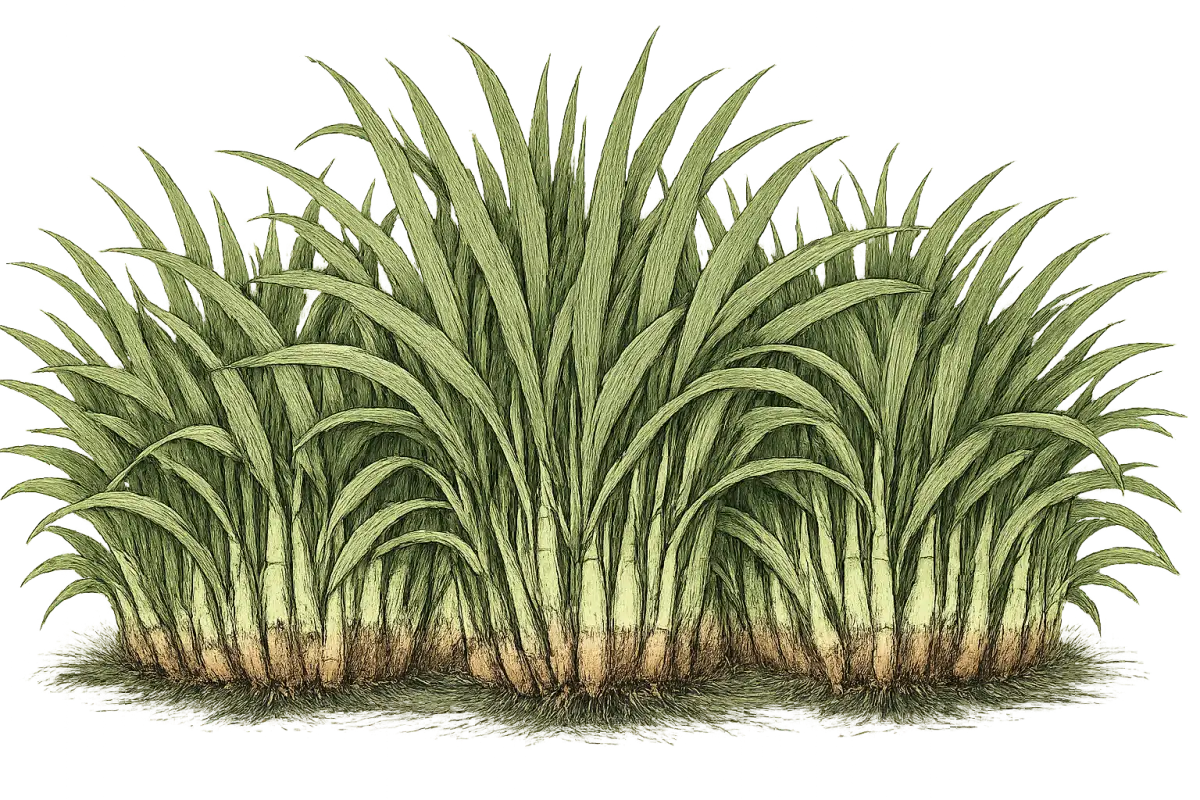
Cold Zones (3-5): Grow It Hard, It Comes Back Harder
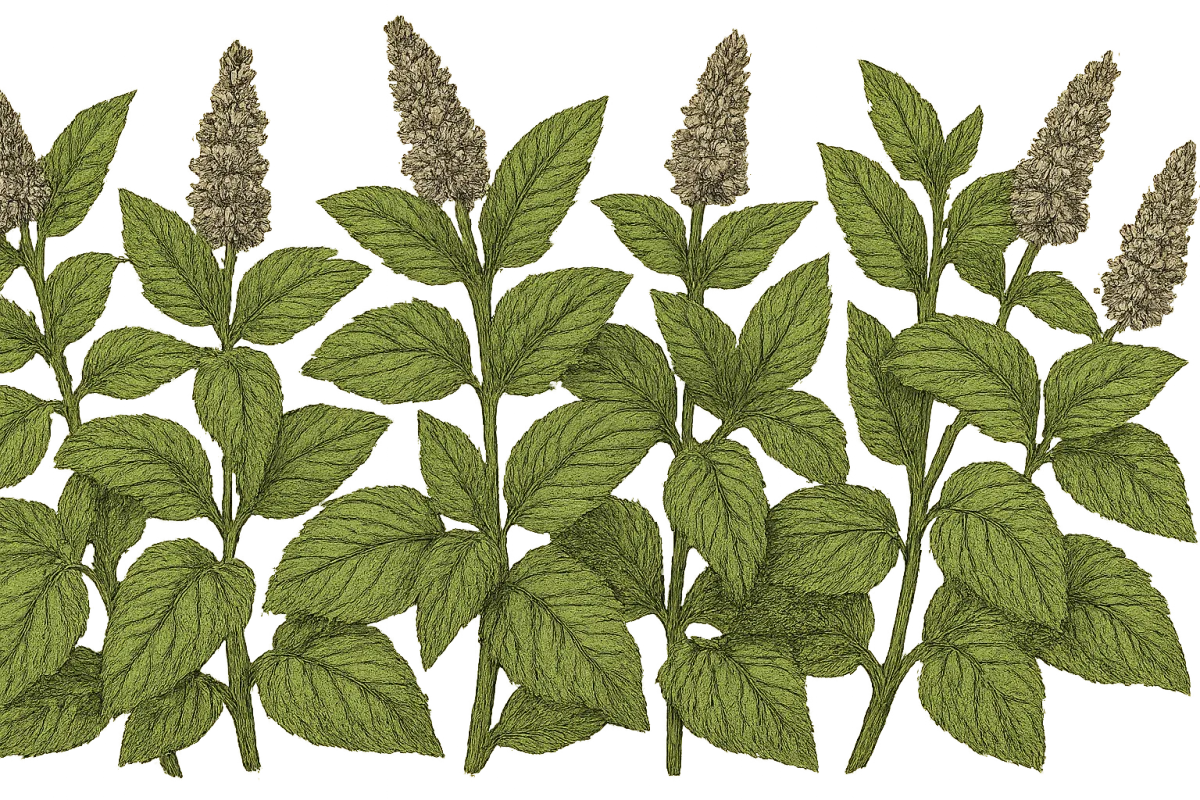
The good news about cold zones is that most mint species are genuinely cold-hardy perennials. Spearmint (Mentha spicata) and Peppermint (Mentha × piperita) both handle zone 3 winters reliably when given adequate mulching before the ground freezes. The plants die back completely to the ground, the rhizomes survive in dormancy, and they re-emerge in spring with no drama. In many zone 3 gardens, mint is one of the first things to push through in April.
Spearmint is the workhorse for cold-zone culinary use. It has the classic bright, sweet mint flavor — the one that shows up in teas, mint sauce, salads, and cooked lamb dishes. It is milder than peppermint, which makes it more versatile in the kitchen. If you grow only one mint variety, spearmint is the practical choice for zone 3-5 growers.
Peppermint (Mentha × piperita) is the high-menthol option and is equally cold-hardy. The flavor is sharper, more intense, and more medicinal than spearmint. It is the correct choice for peppermint tea, infused oils, and any use where you want pronounced cooling intensity. It is a hybrid species that does not produce viable seed — you must start from divisions or transplants.
For cold-zone growers who want something beyond the basics, Chocolate Mint (a cultivar of Mentha × piperita) is worth the space. It has a distinct minty-cocoa scent and flavor that comes through in dessert applications, hot chocolate, and confectionery. It performs well in zones 3-5 with the same winter care as standard peppermint.
Corsican Mint (Mentha requienii) is the one cold-zone exception — it is only reliably hardy to zone 6 and needs protection below that. If you're in zone 3-5 and drawn to its tiny, low-growing habit, grow it as an annual or bring it indoors for the winter.
Temperate Zones (6-8): The Full Menu Is Available
Zone 6-8 growers have the widest variety selection and the easiest growing conditions. Mint thrives here. The question is what you're growing it for.
For general culinary use, Kentucky Colonel Spearmint is considered by many herbalists and chefs to be the finest spearmint cultivar available. Large leaves, robust flavor, exceptional performance in fresh applications. It's the variety Southern bourbon mint julep recipes were built around, and the flavor difference from generic spearmint is real and noticeable.
Mojito Mint (Mentha × villosa) deserves a mention here specifically because it is distinct from common spearmint and widely misunderstood. It's the traditional mint used in Cuban mojitos — larger leaves, slightly furry texture, milder and sweeter flavor than spearmint with none of the sharpness of peppermint. If you're growing mint specifically for cocktails, this is the correct variety. It handles zone 6-9 heat well and performs particularly well in warm summers.
Apple Mint (Mentha suaveolens) produces large, woolly leaves with a softer, fruit-tinged mint flavor. It is less aggressively minty than spearmint, which makes it excellent for fruit salads, beverages, and applications where you want mint flavor without overwhelming the other ingredients. Zone 5-9 hardy.
Pineapple Mint (Mentha suaveolens 'Variegata') is a variegated form of apple mint with cream-edged leaves. The flavor is mild and fruity. It is more ornamental than most mints while remaining fully edible and useful. Zone 6-9.
For zone 7-8 growers dealing with hot, humid summers, Water Mint (Mentha aquatica) is worth considering in areas with naturally moist or periodically wet soil. It tolerates wet conditions that would rot most herbs and provides reliable production in humid southeastern climates where other mints sometimes struggle with fungal pressure.
Warm Zones (9-11): Treat It as an Annual or Get Clever
Zone 9-11 is where mint shifts from easy perennial to something that requires more thought. Most temperate mint species struggle in sustained summer heat — they bolt, lose flavor quality, and look ratty by July. The good news is that mint's growing season in these zones runs fall through spring rather than spring through summer, which is almost the inverse of northern growing patterns.
In zones 9-11, plant mint in October or November. It will grow vigorously through the cool season, producing peak flavor from November through April. By late spring, heat causes it to bolt and decline. You can either pull it and replant in fall, or cut it back hard and mulch it heavily through summer to see if it re-emerges in cooler weather.
Spearmint and Peppermint both follow this pattern in warm zones and are the most heat-tolerant of the common culinary types. Spearmint in particular persists better through hot periods than peppermint when given afternoon shade and consistent moisture.
Pennyroyal (Mentha pulegium) is the warm-climate exception that actually prefers heat. It is far more heat-tolerant than culinary mints and grows well in zones 6-9. Important caveat: pennyroyal is not a culinary herb. It is toxic if ingested in significant quantities and should never be used in cooking or beverages. Its traditional uses are as a ground cover, pest deterrent, and historical medicinal plant. If you have children or pets who might eat garden plants, skip pennyroyal entirely.
For zone 10-11 growers who want fresh mint year-round, container growing with afternoon shade positioning is the most reliable approach. Move containers to protected spots during the hottest months.
Quick Reference Table: Top Picks by Zone Group
| Zone Group | Top Varieties | Type | Why |
|---|
| 3-5 | Spearmint, Peppermint, Chocolate Mint | Mentha spicata / piperita | Cold-hardy to zone 3; reliable perennial return |
| 6-8 | Kentucky Colonel, Mojito Mint, Apple Mint | Various Mentha | Wide flavor range; thrives in temperate summers |
| 9-11 | Spearmint, Mojito Mint | Mentha spicata / villosa | Best heat tolerance; grow as cool-season annual |
Planting Day: The Decisions That Lock In Your Harvest
Timing by Zone
In zones 3-6, plant mint outdoors after the last frost date when soil temperature has reached at least 50°F. Mint is not as frost-sensitive as most herbs, but new transplants benefit from settled spring conditions. Start plants indoors 8-10 weeks before last frost if you want to get a head start.
In zones 7-8, you can plant in early spring or in fall. Fall planting — September through October — allows the plant to establish roots before cold weather and gives you a running start for spring production.
In zones 9-11, plant in October through December. The cool season is your primary growing window. Planting in spring or summer in warm zones means fighting the heat from day one.
Site Selection
Mint is one of the more shade-tolerant culinary herbs, but it still wants a minimum of 6 hours of direct sunlight for peak flavor production and vigorous growth. In zones 7 and warmer, afternoon shade is actively beneficial — it reduces moisture stress and helps maintain flavor quality through the heat of the day.
Avoid spots with standing water or heavy clay that drains slowly. Mint likes consistent moisture but cannot tolerate waterlogged roots. Well-drained soil with good organic matter content is the target.
Choose your containment method before you plant, not after. Retrofitting containment around an established mint plant is a miserable job. Decide whether you're growing in pots, in a buried container, or in a dedicated bed with physical barriers, and set that infrastructure up before the plant goes in the ground.
The Planting Process
Mint is almost always started from divisions or transplants rather than seed. Most culinary mint varieties, especially peppermint, are hybrids that don't come true from seed or don't produce viable seed at all. Buy transplants or get divisions from an established plant.
Step 1: Prepare your containment. For buried containers, sink the container to within 2-3 inches of the rim. For pot growing, choose a container at least 12 inches in diameter and depth with drainage holes. Fill with well-draining potting mix.
Step 2: Amend the soil. Mint performs best in soil enriched with compost. Mix several inches of aged compost into the top 8-10 inches of planting soil. Aim for a loose, moisture-retentive but well-draining texture.
Step 3: Plant at the right depth. Set transplants at the same depth they were growing in their nursery container. Bury rhizome divisions 1-2 inches below the soil surface, oriented horizontally. Firm the soil around the root zone and water in well.
Step 4: Space plants 18-24 inches apart if you're planting multiple starts. They will fill the space quickly — this gives each plant enough room to establish without immediately competing with its neighbors.
Step 5: Mulch immediately. Apply 2-3 inches of organic mulch around plants, keeping it pulled back from direct contact with stems. Mulch retains moisture, moderates soil temperature, and suppresses competing weeds.
Step 6: Water deeply. Give newly planted mint a thorough initial watering to settle the soil around the roots and eliminate air pockets. Keep the soil consistently moist through the first two to three weeks while the plant establishes.
Watering: Moisture Is What Mint Wants, Waterlogging Is What Kills It
Mint's water needs are simpler than most herbs but still require attention. The plant wants consistent moisture — not wet, not dry, but reliably damp. In practice, this means checking the top inch of soil and watering when it begins to dry out.
The target is 1-2 inches of water per week during the growing season, delivered through a combination of rainfall and supplemental irrigation. In hot summer conditions, established plants may need watering every other day. In cool spring or fall conditions with regular rainfall, you may not need to irrigate at all.
What Consistent Moisture Actually Means
Mint's preference for consistent moisture does not mean soggy soil. The distinction matters. Mint roots need oxygen as well as water, and soil that stays saturated deprives roots of both. Phytophthora root rot and Pythium root rot — the fungal pathogens that cause the most damage to mint — thrive in exactly these waterlogged conditions.
The practical test: squeeze a handful of soil from the root zone. It should form a loose ball that crumbles when pressed. If it drips water or forms a dense, compacted mass, the soil is too wet. If it falls apart immediately and feels dry, it needs water.
Container-Grown Mint Needs More Attention
Container mint dries out significantly faster than in-ground plants. In hot weather, a small pot of mint may need daily watering. This is the main downside of the all-container approach — it creates a more demanding irrigation schedule.
The solution is to choose the largest container practical for your space and check moisture daily in hot periods. Self-watering containers with reservoir bottoms can reduce the frequency of manual watering and maintain more consistent moisture levels, which mint appreciates.
Drip Irrigation for Larger Plantings
If you're maintaining a larger in-ground mint planting, drip irrigation or soaker hoses deliver water efficiently without wetting foliage — an important consideration since wet leaves encourage the fungal diseases that mint is prone to. Set emitters to deliver slow, consistent moisture at the root zone and let the soil surface dry slightly between cycles.
Avoid overhead watering where possible. Getting water on mint leaves repeatedly, especially in humid conditions or late in the day when leaves don't dry quickly, invites Verticillium wilt and fungal leaf spot diseases.
Feeding Schedule: Mint Is a Light Eater, Not a Starved One
Mint does not need heavy fertilization. It is not a fruiting crop with high nutritional demands. Over-fertilizing mint — especially with high-nitrogen formulations — produces lush, rank growth with diluted flavor and increased susceptibility to aphid pressure. More nitrogen means more pests. It is a real tradeoff.
The Basic Approach
For in-ground mint in decent garden soil amended with compost, you may not need to fertilize at all. Annual compost additions provide sufficient nutrients for steady, productive growth. If your soil is genuinely poor — sandy, nutrient-depleted, or never amended — a balanced liquid fertilizer (10-10-10 or similar) applied every four to six weeks during the active growing season is appropriate.
For container-grown mint, fertilize more regularly. Container plants lose nutrients through leaching with each watering, and they don't have access to the natural nutrient cycling of a garden bed. Apply a balanced liquid fertilizer every four to six weeks from spring through early fall.
What Not to Use
Avoid high-nitrogen fertilizers. The goal is steady, moderate growth — not a nitrogen-fueled explosion of soft, flavorful-on-paper but watery-tasting-in-practice leaves. Mint grown in heavily fertilized conditions consistently delivers inferior flavor compared to the same varieties grown in moderated, compost-amended soil.
Stop all fertilization about six weeks before your expected first frost date. Late-season feeding stimulates soft new growth that won't harden off before cold, increasing winter injury.
A Note on Flavor and Nutrition
Here is the counterintuitive truth about mint nutrition: modest stress — slightly less water, slightly less fertility than optimum — often produces better-flavored mint than pampered, maximally fertilized plants. The essential oils responsible for mint's flavor concentrate when the plant is working slightly harder. This is not a license to neglect your plants. It's a reason not to overindulge them.
Pruning Mint: The More You Cut, the Better It Gets
Mint is one of the few plants that genuinely improves with aggressive harvesting. Regular cutting keeps the plant bushy, productive, and vegetative — constantly generating new leafy growth with peak flavor. Left unpruned, mint bolts to flower, flavor quality drops, and the plant becomes a leggy, open mess.
Pinching and Harvesting as Pruning
From the time the plant reaches 4-6 inches tall, you should be regularly pinching out the growing tips. Pinching — removing the top set of leaves from each stem — stimulates branching, which means more growing tips, which means more harvestable mint. Do this every week or two during the active growing season.
When harvesting for kitchen use, cut stems back by about one-third, just above a leaf node. Do not strip a plant bare in a single harvest — leave at least two-thirds of the stem and foliage. The plant needs leaves to photosynthesize and rebuild.
The Midsummer Hard Cut
When mint begins to bolt — sending up flower spikes — cut the entire plant back to 2-3 inches above the soil. This feels drastic. It works. The plant will flush new vegetative growth within two to three weeks, reset its vigor, and provide a second wave of fresh, high-flavor leaves for the rest of the season. If you allow mint to fully flower and set seed, production quality declines and the plant diverts energy away from the leafy growth you want.
Fall Preparation in Cold Zones
In zones 3-6, after the first frost kills the above-ground growth, cut the dead stems back to soil level and apply 3-4 inches of mulch over the root zone. The mulch protects rhizomes from freeze-thaw cycles that can heave and damage them. Remove the mulch in early spring as growth resumes.
The Mistakes That Actually Kill Mint Yields
These are the failures we see most often — not from disease, not from pests, but from decisions made by the grower. Fix these and you will have more mint than you know what to do with.
Mistake #1: Not Containing It Before You Plant
This is the mistake from which all others follow. An uncontained mint plant is not a garden asset — it's a weed problem with a culinary reputation. Once mint rhizomes have spread through a mixed bed, removing them requires digging out the entire area and hand-sorting every piece of root from the soil. This is hours of unpleasant work. The prevention takes five minutes and a buried pot. Do the prevention.
Mistake #2: Planting One Variety Because Mint Is Mint
This is flavor laziness. Spearmint and peppermint taste nothing alike. Kentucky Colonel Spearmint and Mojito Mint taste different from each other. If you have a specific use case — cocktails, tea, lamb sauce, fresh herb garnish — buy the variety that matches it. The flavor compounds in mint vary dramatically between species and cultivars. Taste before you plant if you can. It matters.
Mistake #3: Letting It Flower Without Intervention
The moment mint enters flowering mode, leaf flavor quality begins to decline. The plant is allocating resources to reproduction rather than the essential oil production that creates that characteristic flavor. Growers who let their mint bloom and go to seed in midsummer and then wonder why the fall growth tastes flat are experiencing this directly. Cut the plant back hard when you see flower spikes forming. Every time. It will come back with better-flavored growth.
Mistake #4: Growing in Too Much Shade
Mint tolerates partial shade. It does not thrive in heavy shade. A plant grown in dense shade produces thin, elongated stems, sparse leaf coverage, and significantly reduced essential oil content — meaning dramatically less flavor. In warm zones, afternoon shade is beneficial. Morning sun with afternoon shade is the ideal, not the reverse. A plant that gets shade all morning and sun all afternoon in July is getting the worst of both worlds.
Mistake #5: Overwatering Container Plants
Container mint is particularly vulnerable to overwatering because pots hold moisture differently than garden soil, and many growers respond to a slightly wilted-looking plant by immediately adding more water. Check the soil before you water. If the top inch is still moist, wait. Consistent overwatering in containers leads to root rot faster than almost any other management error. The soil should dry slightly between waterings — not completely, but enough that the top layer is no longer wet to the touch.
Mistake #6: Failing to Divide Every Few Years
A mint planting that is never divided becomes increasingly unproductive over time. The center of the root mass grows dense and woody, the most vigorous young rhizomes are pushed to the edges, and overall yield drops. Every two to three years, dig up the entire planting, discard the old, congested center, and replant the vigorous younger sections from the perimeter. This resets the planting's productivity and keeps it generating the lush, high-flavor growth that makes mint worth growing.
Pests and Diseases
Mint is a reasonably tough plant that benefits from some natural protection — its essential oils deter a range of pest insects that would otherwise cause problems. That said, several specific threats can cause real damage, and knowing what to look for keeps a minor problem from becoming a crop failure.
Pests
Mint aphids (Ovatus crataegarius) are the most common pest problem on mint, clustering on tender new shoot tips and the undersides of young leaves. They feed by extracting plant sap, causing distorted, curled new growth. Heavy infestations produce a sticky honeydew coating that supports sooty mold growth. Identification is straightforward: look for dense clusters of small, soft-bodied insects, usually green or yellow-green, on actively growing shoot tips. The first line of defense is a forceful spray of water to dislodge colonies — mint's vigorous growth habit means it recovers quickly. Avoid broad-spectrum insecticide sprays that kill beneficial predator insects like lady beetles and parasitic wasps, which naturally regulate aphid populations. If infestations are severe and persistent, insecticidal soap applied directly to colonies is effective and breaks down quickly without residual effects.
Spider mites thrive in hot, dry conditions and are most problematic for container mint during summer heat. Infested plants show pale, stippled foliage — the signature of mite feeding — and heavy infestations produce fine webbing on the undersides of leaves and between stems. Spider mites are most easily controlled through cultural management: keep plants well-watered during hot periods (moisture stress accelerates mite outbreaks), increase air circulation around container plants, and use forceful water sprays on affected foliage. Neem oil or insecticidal soap are effective organic options for severe infestations.
Mint flea beetles are small, shiny, dark beetles that feed by making tiny shotgun-hole punctures in mint leaves. Damage is typically cosmetic rather than severe enough to threaten plant health, but heavy pressure reduces harvestable leaf quality. Row covers or floating covers provide physical exclusion. Diatomaceous earth applied around the base of plants deters movement of soil-dwelling larval stages.
Cutworms occasionally target young mint transplants, cutting stems at soil level overnight. If transplants are disappearing at the base, cutworms are the likely culprit. Inspect the soil around affected plants and remove larvae by hand. Plastic collar barriers around transplant stems — pushed 2 inches into the soil — provide effective physical protection.
Diseases
Mint rust (Puccinia menthae) is one of the most serious fungal diseases of mint and is visually distinctive. Look for orange, yellow, or brown powdery pustules on the undersides of leaves, with corresponding yellow spots on the upper surface. Infected plants should be cut back hard and the removed material bagged and disposed of — not composted, as the fungal spores survive composting conditions. Improve air circulation through pruning and spacing, avoid overhead watering, and remove fallen leaf debris promptly. Severely infected stock should be destroyed and replaced with certified disease-free transplants.
Verticillium wilt infects mint through the soil and causes progressive wilting, yellowing, and dieback despite adequate soil moisture. The disease is soilborne and persistent — once established in a garden bed, it can remain viable for years. There is no curative treatment. Remove and destroy infected plants, avoid replanting susceptible species in the same area, and consider container growing to sidestep contaminated garden soil entirely. Rotating mint to a new location every three to four years reduces Verticillium buildup.
Powdery mildew appears as a white or gray powdery coating on leaf surfaces, most commonly in conditions of high humidity with poor air circulation. Unlike rust, it does not require wet foliage to spread — it actually favors humid air with dry leaf surfaces. Cut back severely affected growth, improve spacing and air circulation, and avoid overcrowded plantings. A baking soda spray (one tablespoon per gallon of water) or potassium bicarbonate-based fungicide provides some suppression in early-stage infections.
Botrytis gray mold (Botrytis cinerea) shows up as grayish-brown, fuzzy mold growth on damaged or dying plant tissue, especially in cool, humid conditions or on plants crowded together with poor airflow. It enters through wounds and damaged tissue. Prune out affected growth, remove dead leaf debris from around plants, and improve air circulation. Avoid overhead watering and crowded planting conditions that maintain leaf wetness.
When deciding whether to intervene with a product, apply this standard: cosmetic damage affecting a handful of leaves does not warrant a spray. Active spread of a disease like mint rust or Verticillium wilt that threatens the entire planting warrants immediate action — cultural first (remove affected material), then targeted organic product only if cultural controls are insufficient.
Harvesting Mint: Flavor Peaks Before Flowering, Not After
Timing your harvest correctly makes a significant difference in the flavor quality of what you bring into the kitchen. Mint's essential oil content — the concentration of compounds responsible for its characteristic flavor and scent — reaches its peak just before the plant comes into flower. This is the moment to harvest most aggressively.
The practical implication: don't wait until you need mint and then take whatever's available. Monitor your plants. When you see the first flower bud formation — the early stages of the plant preparing to bolt — that is your signal to do a major harvest. Cut heavily, use or preserve what you've cut, and then cut the plant back hard to reset it for the next growth cycle.
The Daily Harvest Window
For regular kitchen use, harvest in the morning after the dew has dried but before the heat of the day. Essential oil concentration is highest in the morning hours. Afternoon harvesting in hot weather yields mint that has already partially off-gassed its volatile compounds through the heat of the day.
Harvest by cutting stems to just above a leaf node — the point where a pair of leaves attaches to the stem. The plant will branch from that node, generating two stems where there was one. Regular harvesting this way, every week or two, produces a progressively bushier plant with more harvestable stems over the course of the season.
Do not harvest more than one-third of the plant at a single time. The plant needs its foliage to photosynthesize and drive continued growth.
Preserving the Harvest
Fresh mint keeps for about a week in the refrigerator, stored stems-down in a glass of water with a loose plastic bag over the leaves — treat it like cut flowers. For longer storage, drying and freezing are both effective.
To dry mint, cut stems in the morning and hang them upside down in small bundles in a warm, dry, well-ventilated location out of direct sunlight. Leaves will dry completely in one to two weeks. Strip dried leaves from stems and store in an airtight container away from heat and light. Dried mint retains reasonable flavor for six to twelve months.
For freezing, the two effective methods are: blanching briefly (30 seconds in boiling water, then immediate ice bath) before freezing on a tray and storing in bags, or simply pureeing fresh mint with water and freezing the mixture in ice cube trays. Frozen mint loses the fresh texture that makes it useful as a garnish but retains flavor well for cooked applications, beverages, and sauces.
Companion Planting: Where Mint Helps and Where It Needs Walls
Mint has a reputation as a beneficial companion plant. That reputation is partly deserved and partly overstated. The important caveat with any companion planting involving mint is that the companion relationship only functions when the mint is properly contained. An uncontained mint plant competing directly with its supposed companions for space, water, and nutrients is not a companion — it's an aggressor.
Plants That Benefit From Nearby Mint
Brassicas — cabbage, broccoli, kale, Brussels sprouts — are frequently cited as benefiting from mint's proximity. The essential oils released by mint foliage have documented repellent effects on several brassica pest insects, including cabbage loopers and flea beetles. The effect works at moderate distances; mint doesn't need to be directly interplanted to provide some benefit. Contain the mint, position it near the brassica bed, and you get the pest deterrence without the invasion.
Tomatoes benefit from mint planted nearby for similar reasons — mint's scent deters aphids and certain other pests that frequently target tomato foliage. Grow contained mint at the perimeter of tomato beds rather than interplanted directly.
Peas and beans tolerate mint's proximity without pH or fertility conflicts and may see some pest benefit from the essential oil deterrence.
Pollinator-attracting value of mint in flower is real and significant. If you have fruit crops or vegetables requiring pollination nearby — squash, cucumbers, berries — allowing some of your mint to flower periodically (rather than cutting it all back simultaneously) provides valuable nectar and pollen for bees. Time this deliberately rather than through neglect.
Plants to Keep Away From Mint
Other herbs with different water needs — rosemary, thyme, oregano, sage — prefer dry, well-drained conditions that mint doesn't share. Interplanting them is a setup for compromise care that serves neither plant well. Grow moisture-preferring herbs together and drought-tolerant Mediterranean herbs separately.
Chamomile and mint are sometimes suggested as companions, but the growth habits create practical problems. Both spread assertively, and without careful management, they compete directly with each other in a way that reduces the productivity of both.
The blunt summary on mint companionship: it works best as a neighbor, not an interplanted partner. Contain it, site it near plants that benefit from pest deterrence, and manage the boundary between the mint planting and everything else with physical barriers.