Shrubs

Gardenias: Everything You Need to Know Before You Plant One

Tom Bridger

Tom Bridger

Tree & Shrub Specialist · Updated April 2026

How to grow gardenias — vintage botanical illustration showing the plant in detail

Gardenias at a Glance

Sun

Sun

Full sun in zones 7-8

Soil pH

Soil pH

5.0-6.5

Water

Water

1 inch per week minimum

Spacing

Spacing

4 ft

Height

Height

5-8 feet for vigorous varieties like 'First Love'

Soil type

Soil

Well-drained

Lifespan

Lifespan

perennial

Get your personalized growing data

Enter your zip code for frost dates, growing season, and soil type.

Let me tell you about a call I get every summer. A homeowner planted a gardenia two springs ago. It was beautiful in the nursery — glossy dark leaves, a fat white bloom, that unmistakable fragrance. They paid good money for it. Planted it in a spot by the patio where they could smell it through the window. And for two years, it has sulked: yellowing leaves, no flowers, and now a slow, general decline they cannot explain.

Nine times out of ten, I know the answer before they finish describing the problem. The soil pH is wrong. It was wrong when they planted it, and nothing they have done since — the fertilizer, the iron supplement, the extra watering — has come close to addressing it.

Gardenias are not difficult plants. I want to say that plainly, because their reputation for finickiness discourages people who would otherwise succeed. What gardenias are is specific. They have four non-negotiable requirements, and when those requirements are met, they reward you with some of the most intensely fragrant flowers in the American garden. When those requirements are not met, the plant makes its displeasure known in every possible way — bud drop, yellow leaves, root rot, and a gradual decline that no amount of well-intentioned intervention will reverse until you fix the underlying cause.

This guide is about getting those fundamentals right the first time. The right variety for your zone. The right soil, amended properly before you plant. The right watering approach. The specific pruning window that most gardeners miss by months. And the handful of mistakes that account for the vast majority of gardenia failures — mistakes that are completely avoidable once you know what to watch for.

Let's get your gardenia right from the start.


Quick Answer: Gardenia Growing at a Glance

USDA Zones: 7-11 outdoor; zone 6b possible with cold-hardy varieties and protection; container growing for zones 6 and below

Sun: Full sun in zones 7-8; morning sun with afternoon shade in zones 9-10

Soil pH: 5.0-6.5 (test before planting — this is non-negotiable)

Drainage: Excellent drainage required; gardenias will not survive standing water

Water: 1 inch per week minimum; consistent and even, not feast-or-famine

Humidity: 50%+ required; critical for indoor plants and arid-climate growers

Fertilizer: Acid-forming formula with micronutrients (iron, manganese, zinc); azalea or rhododendron fertilizer is appropriate

Temperature for bud set: 60-65F nights; above 90F days increases bud drop risk

Pruning window: Immediately after flowering finishes — never in fall, winter, or early spring

Most popular variety: August Beauty (zones 7-10; blooms spring through fall)

Coldest-zone variety: Chuck Hayes (zones 6b-10; the hardiest gardenia available)


The Soil pH Problem (This Is the Whole Game)

I am going to spend more time on this section than on anything else in this guide, because it is where nearly every chronic gardenia problem originates.

Gardenias require soil pH between 5.0 and 6.5. The optimal range is 5.0 to 6.0. Most garden soil in the Midwest, Northeast, and Southwest sits at pH 7.0 to 8.0 or higher. That is not a minor gap to paper over with fertilizer. On a logarithmic pH scale, the difference between 6.0 and 7.5 represents a tenfold change in soil chemistry — and at the alkaline end of that range, iron becomes chemically bound to soil particles and completely unavailable to gardenia roots, regardless of how much iron is actually in the soil.

Here is what that means in practice. Iron is essential for gardenias to produce chlorophyll. When pH climbs above 6.5, that iron is locked away. The plant starts showing the classic symptom: yellow leaves with green veins — what plant scientists call interveinal chlorosis. New growth is affected first, because iron cannot move within the plant from old leaves to new. Gardeners see the yellow leaves, assume a nutrient deficiency, and add iron fertilizer. The iron goes into the soil and immediately becomes unavailable again, because the pH is still wrong. The plant continues to decline. The gardener tries more fertilizer. Nothing changes.

This is the cycle. It is entirely preventable with a $15 soil test before planting.

Amending Your Soil Before You Plant

If your soil pH is outside the 5.0-6.5 range, you have two realistic options: amend the soil before planting, or grow in containers with acidic potting mix.

For in-ground planting, the amendment protocol involves three materials working together. Mix peat moss and composted pine bark into the planting area — use roughly equal parts of each mixed with your native soil. This immediately improves both the pH and the drainage structure. Then apply elemental sulfur based on your soil test results. Sulfur reacts with soil bacteria to produce sulfuric acid, permanently lowering pH — but it takes 3 to 6 months for the full effect. This means you need to plan ahead. Amend in fall before spring planting, or earlier if you can.

After planting, mulch with 2 to 3 inches of pine bark, pine needles, or oak leaves. These acidic organic materials slowly lower pH as they decompose and act as a long-term buffer against pH drift.

The Alkaline Water Problem Nobody Mentions

Here is the slow-motion version of the pH mistake: you amend your soil correctly, test it at planting, confirm it is at 5.5 — and then water faithfully with municipal tap water for two years. Most US municipal water is treated to pH 7.5 to 8.5 to prevent pipe corrosion. Every watering event deposits a small alkaline load into your soil. By year two, your carefully amended pH 5.5 soil has drifted back above 6.5, and the chlorosis begins. The gardener cannot understand why — the soil was fine at planting.

Test your tap water with a pH strip. If it reads above 7.0, consider alternatives: collecting rainwater (naturally pH 5.5 to 6.5), using distilled water for container plants, or acidifying tap water with 1 tablespoon of white vinegar per gallon. For most gardeners with one or two plants, the vinegar method is the simplest fix. For larger plantings, a rain barrel provides a free, naturally acidic supply.

Also watch for nearby concrete. Lime leaches from foundations, sidewalks, and retaining walls into surrounding soil over time, pushing pH steadily upward. Keep gardenias away from concrete structures wherever possible.

What to Avoid

Never add lime, wood ash, bone meal, fresh manure, or mushroom compost to gardenia soil. These are all alkaline amendments that move the pH in exactly the wrong direction. Avoid any general-purpose fertilizer — many contain lime or are formulated with nitrate nitrogen that does not acidify as it breaks down. Use fertilizers specifically labeled for azaleas, rhododendrons, or gardenias. These are formulated for acid-loving plants and include the micronutrient package (iron, manganese, zinc) that gardenias specifically need.

If chlorosis has already appeared, chelated iron in the EDDHA form provides fast relief — it is available to the plant at any pH and can reverse yellowing within one to two weeks. But this is a band-aid, not a solution. Fix the underlying pH. Chelated iron buys you time while elemental sulfur does its work over the following months.


Best Gardenia Varieties by Zone

Variety selection is where you make or break a gardenia planting before the first shovelful of soil is turned. The wrong variety in the wrong zone will limp along, struggle through winters, and demand constant attention. The right variety in the right zone settles in, establishes, and flowers reliably for decades. The decision takes five minutes and saves years of frustration.

What zone are you in?

Enter your zip code for frost dates, growing season, and soil type.

Cold-Zone Varieties (6b-7): Pushing the Northern Boundary

Gardenias are fundamentally warm-climate plants, and zones 6b and 7 represent the northern edge of where they can survive in the ground. Only a handful of varieties have been bred or selected for this tolerance, and choosing from outside this group is an expensive experiment with predictable results.

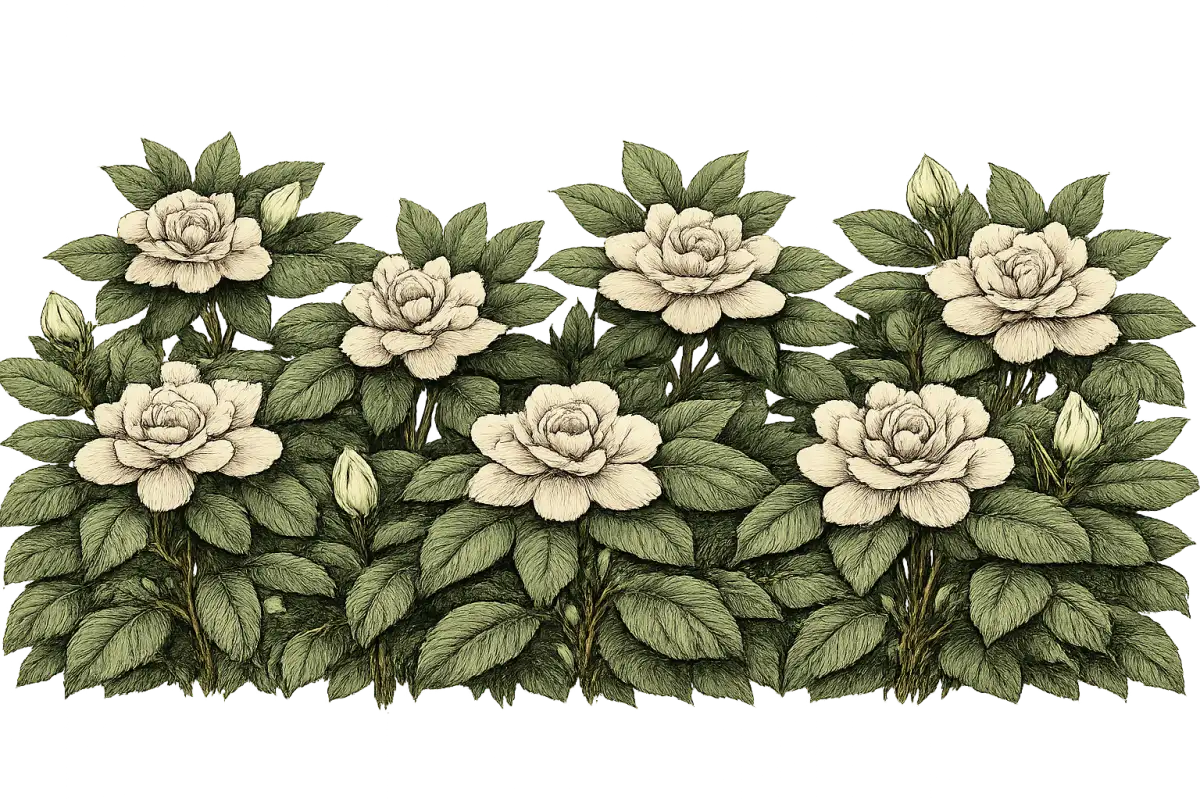
Chuck Hayes is the one I recommend without hesitation for the coldest gardenia zones. Its hardiness rating of zones 6b through 10 makes it the most cold-tolerant gardenia widely available. It grows to about 4 feet in a compact habit, produces double white flowers with good fragrance in spring, and reliably reblooms in fall — a trait that most gardenias simply do not have. In zone 7, that fall rebloom is a particular pleasure because you get a second wave of fragrance just as the season winds down. If you are in zone 7 and someone at the nursery tries to sell you a different variety, ask specifically whether it matches Chuck Hayes for cold hardiness. Usually it does not.

Frost Proof is the second strong option for zone 7 landscapes. It grows 3 to 5 feet tall, carries double white flowers with strong fragrance, and blooms heavily from spring through summer. It tolerates cold better than most gardenias, though its name is somewhat aspirational — it is not truly frost-proof and will sustain damage in hard freezes below 15°F. Plant it on the south or east side of buildings where it gets wind protection, and mulch heavily before winter.

Jubilation, from the Southern Living Plant Collection, earns its place in zone 7 through an exceptional bloom season — May through November in warm zones. At 3 to 4 feet with a compact habit, it fits well into smaller gardens and foundation plantings. It has good disease resistance and performs well across zones 7 through 10.

Zone 7 strategy, regardless of variety: mulch 3 to 4 inches deep before the first hard freeze, plant on the sheltered south or east side of structures, avoid low-lying frost pockets where cold air pools, and in zone 7a, seriously consider container growing so you can move plants under cover during the coldest snaps. Even the hardiest varieties can suffer bud damage when a late spring frost hits during the bloom period.

The Sweet Spot (Zones 8-10): Where Gardenias Belong

Zones 8 through 10 — the American South, Gulf Coast, and Florida — are where gardenias thrive without apology. Warm summers, mild winters, and naturally acidic soils across much of the Southeast remove many of the obstacles that make gardenias difficult elsewhere. Your biggest decisions here are about size and bloom season, not survival.

August Beauty is the default recommendation, and it earns that status. It grows 4 to 6 feet tall and wide, produces double white flowers with heavy fragrance, and blooms from spring through fall — the longest bloom season of any standard gardenia variety. It is the most popular gardenia in the United States, and it is popular for the reason things become popular: it works. If you are in zones 7 through 10 and want one variety that will not give you grief, this is it.

First Love (also sold as Aimee) is for gardeners who want to make a statement. It grows 5 to 8 feet tall, has an upright, vigorous habit, and produces the largest flowers of any gardenia — 4 to 5 inches across, which is remarkable for the genus. The fragrance is intense. The bloom season runs from spring into early summer. It needs more space than other varieties and is best in zones 8b and warmer due to lower cold tolerance than August Beauty, but in the right spot it is genuinely spectacular.

In zones 9 and 10, a note on sun and pest pressure: full sun is appropriate in zone 8, but in zones 9 and 10 where summer temperatures regularly exceed 95°F, afternoon shade is not optional — it is protective. Gardenias in full sun in extreme heat will drop buds and scorch leaves. Morning sun with afternoon shade is the correct exposure. Also be aware that the warm, humid conditions of zones 9 and 10 favor whiteflies and scale insects year-round. Regular inspection of leaf undersides during the growing season is just part of gardenia ownership in these zones.

Compact and Dwarf Varieties: Small Spaces, Same Fragrance

Not every gardenia spot calls for a 5-foot shrub. These varieties work across all zones within the gardenia range and are particularly well-suited to containers, borders, and small gardens.

Radicans — sometimes called Prostrate Gardenia — is the only true ground-cover gardenia. It grows just 6 to 12 inches tall with a spread of 2 to 3 feet, produces small but fragrant double flowers, and creates a dense, low carpet that works at the front of borders, along low walls, or as a tidy edging plant. It is also excellent in tabletop containers. The form is completely different from every other gardenia, and it fills a design role that no other variety can.

Kleim's Hardy is the unusual one in the lineup: it produces single, star-shaped flowers rather than the classic double blooms every other gardenia carries. If you want something elegant and different rather than the traditional gardenia look, this is the variety. It grows 2 to 3 feet in a compact habit, works well in mixed borders and containers, and is hardy in zones 7 through 10.

Container and Indoor Varieties: Growing Where Gardenias Technically Should Not

For gardeners in zones 6 and below, containers are the only realistic path to growing gardenias. The plant comes inside for winter and goes back out after last frost.

Veitchii is the classic indoor gardenia, and it has a meaningful advantage over other varieties for this purpose: it blooms in winter. When grown as an indoor plant, you get flowers during the months you most appreciate them — not during summer when the plant could be outside anyway. It is compact enough to manage in a container and is the variety most commonly found in garden centers as a houseplant.

Radicans works well in tabletop containers indoors, both because of its small size and because it is less demanding of space than larger varieties.

A direct word about indoor gardenias: they are genuinely challenging, and the challenge is not the variety — it is the environment. Most homes in winter run at 30 to 40% humidity. Gardenias need 50% or more. Without a humidifier, indoor gardenias will drop buds, develop brown leaf edges, and eventually succumb to spider mite infestations, which thrive in exactly the dry air conditions that stress the plant. A humidifier is not a luxury for indoor gardenias. It is effectively mandatory.

Quick Reference Table: Top Picks by Zone

Zone GroupTop VarietiesTypeWhy
6b-7Chuck Hayes, Frost Proof, JubilationCold-hardySelected for northern tolerance; winter survival
8-10August Beauty, First LoveStandardProven performers across the South; longest bloom
All zonesRadicans, Kleim's HardyDwarf/compactSmall spaces, containers, borders
Containers/indoorVeitchii, RadicansContainerWinter bloom; manageable size

When and How to Plant

Timing by Zone

In zones 7 and 8, plant in early spring after the last frost date, or in early fall to give roots time to establish before winter. Spring planting is generally safer in zone 7, where fall-planted gardenias may not harden off sufficiently before cold arrives.

In zones 9 and 10, fall through early winter planting is ideal. The mild winters allow root establishment, and the plant enters its first hot season with an established root system rather than trying to establish one in the heat.

Site Selection

Light requirements depend on where you live. In zones 7 and 8, full sun improves flowering — gardenias need the energy from direct light to produce their heavy bloom load. In zones 9 and 10, morning sun with afternoon shade protects the plant from heat stress and bud drop during the hottest months.

Avoid low-lying spots where water collects after rain. Gardenias will not tolerate standing water, and a single season in a poorly draining location can establish root rot before you realize there is a problem. If you are unsure about drainage, do the test: dig a hole 12 to 18 inches deep, fill it with water, and time how long it takes to drain. Good drainage means the hole empties within 5 to 6 hours. If water is still sitting there after 12 hours, do not plant a gardenia there without building a raised bed.

Keep gardenias away from concrete foundations, sidewalks, and retaining walls. Lime leaches from concrete over time and steadily pushes soil pH in the wrong direction. A few feet of distance is not enough — give yourself a meaningful buffer.

Site gardenias near a patio, walkway, or window. The fragrance is the point. A gardenia planted where no one passes is a missed opportunity.

The Planting Process

Step 1: Test and amend. Test soil pH. If above 6.5, work in peat moss, composted pine bark, and elemental sulfur, and plan to wait 3 to 6 months for sulfur to fully lower pH. If planting immediately, at least amend with peat moss and pine bark, which lower pH and improve drainage immediately, and supplement with chelated iron while the sulfur works.

Step 2: Dig the hole. Make it 2 to 3 times wider than the root ball and the same depth. Wide holes matter more than deep ones — gardenia roots spread laterally.

Step 3: Amend the backfill. Mix the removed soil with equal parts peat moss and composted pine bark. This is the soil the roots will grow into, and it needs to be right.

Step 4: Plant at the correct depth. Set the plant so it sits at the same depth it was growing in the nursery container. Do not bury the crown. Burying the crown invites rot.

Step 5: Backfill and water. Fill in with your amended mix and water deeply to settle the soil and eliminate air pockets.

Step 6: Mulch immediately. Apply 2 to 3 inches of pine bark, pine needles, or oak leaves. Keep mulch 2 to 3 inches away from the trunk — piled mulch against the crown causes rot. Extend the mulch ring at least to the drip line of the plant. This is not decorative; it is moisture management, temperature regulation, and slow pH maintenance all at once.

Step 7: Water regularly through the first season. Gardenias spend their first year establishing roots, and consistent moisture during this period determines how well they perform in every subsequent year. Do not let them dry out, and do not let them sit in water. Find that middle ground and maintain it.


Watering: The Narrow Line Between Wet and Waterlogged

The core principle of gardenia watering is deceptively simple: keep the soil evenly moist. Not wet. Not dry. Moist, like a wrung-out sponge.

The reason this is harder than it sounds is that gardenias respond badly to both extremes and to the fluctuation between them. Too dry and they drop buds, wilt, and shed leaves. Too wet and the roots suffocate in anaerobic soil, root rot fungi take hold, and the plant wilts from root damage — a wilting that looks exactly like drought stress and will be fatally misdiagnosed by anyone who does not check the soil first. Wet-dry cycles — forgetting to water, then soaking the pot — may be the worst of the three, because the plant endures repeated stress events that compound over time.

Outdoor Watering

Outdoor gardenias need a minimum of 1 inch of water per week from rain and irrigation combined. In hot weather above 90°F, increase to 1.5 to 2 inches per week. Sandy soils drain quickly and may need more frequent watering; clay soils drain slowly and need careful monitoring to avoid waterlogging.

Water at the base of the plant, not overhead. Overhead watering promotes leaf spot diseases and can damage or spot flower buds. Early morning is the best time — foliage dries quickly in morning sun, reducing disease pressure.

Drip irrigation is the ideal delivery method for gardenias. It delivers water slowly and directly to the root zone, keeps foliage dry, and provides the consistent, measured moisture that gardenias prefer over irregular deep soakings.

Mulch is not optional. Two to 3 inches of acidic organic mulch buffers the soil against moisture fluctuations, keeps roots cool in summer heat, and slowly acidifies the soil as it decomposes. A gardenia without mulch on a hot August afternoon is fighting the weather with no protection.

Container and Indoor Watering

Container gardenias need a different approach because the limited soil volume dries out faster and is simultaneously more prone to waterlogging than in-ground soil.

Before every watering, check the soil with the finger test: insert a finger 1 to 2 inches into the soil. If it feels moist, wait. If it feels dry at that depth, water. Follow a fixed schedule at your peril — pot size, pot material, indoor temperature, humidity, and season all affect how fast the soil dries. A rigid once-a-week schedule will overwater in winter and underwater in summer.

When you do water, water thoroughly. Water until it flows freely from the drainage holes. Then let the pot drain completely. Never let a pot sit in a saucer of standing water for more than 30 minutes — that saucer becomes a reservoir of saturation against the drainage holes, and root rot follows.

Use room-temperature water. Cold water shocks roots that are adapted to warm soil temperatures.

The Overwatering Trap

Root rot from overwatering is the most serious disease gardenias face, and it is almost always fatal once it is established. The maddening thing about it is that the symptoms look like drought: the plant wilts, leaves droop, the gardener adds water, the rot accelerates. By the time mushy brown roots are visible, the plant is usually beyond recovery.

Prevention is the only reliable strategy. If you suspect root rot — the plant is wilting despite wet soil, the leaves are soft and yellowing rather than crispy, there is a foul smell from the root zone — stop watering immediately and unpot the plant to check the roots. White, firm roots are healthy. Brown, mushy roots confirm the diagnosis. At that point, remove affected roots, repot in fresh acidic mix with excellent drainage, and cut back watering severely. Plants caught early sometimes recover. Plants with widespread root decay usually do not.

Watering and Iron Availability

There is a secondary effect of overwatering that most gardeners never connect: waterlogged soil becomes anaerobic, and in anaerobic conditions, iron is converted to a chemical form that roots cannot absorb. This causes iron chlorosis — yellow leaves, green veins — even when the soil pH is perfectly correct. If your gardenia shows chlorosis and your pH tests fine, check your drainage and watering habits before adding more iron treatments. Fix the watering first. Then reassess the chlorosis.


Fertilizing: Getting the Micronutrients Right

Gardenias are moderate-to-heavy feeders during the growing season, but the type of fertilizer matters as much as the amount. Generic balanced fertilizers — the 10-10-10 or similar formulations found on every garden center shelf — are wrong for gardenias. Many contain lime as a filler or are formulated without the micronutrients that gardenias specifically require. Use a fertilizer formulated for acid-loving plants: products labeled for azaleas, rhododendrons, or gardenias will carry the right nutrient profile, including chelated iron, manganese, and zinc.

Cottonseed meal is an excellent organic alternative — it releases nutrients slowly, is naturally acidifying, and fits well into an organic gardening program.

Feeding Schedule

In spring, resume regular feeding as new growth appears, applying every 2 to 4 weeks through summer. Pull back in early fall and stop entirely by early October for outdoor plants in colder zones. Late fertilizing stimulates tender new growth that will not harden off before frost, making it vulnerable to cold damage.

For indoor plants, feed monthly with acid-forming fertilizer through spring and summer. Reduce to every 6 to 8 weeks in fall and winter, at half strength during the coldest months when the plant is in semi-dormancy.

Avoid high-nitrogen formulas without phosphorus and potassium — excess nitrogen pushes the plant into foliage growth at the expense of flowers. Avoid over-fertilizing in general. Salt buildup from fertilizer residue damages roots; flush containers with plain water every 2 to 3 months to prevent this accumulation.


Pruning: The Timing Window Most Gardeners Miss

Gardenias need less pruning than most landscape shrubs. They have naturally attractive, symmetrical form, and heavy-handed pruning does more harm than good. But there is one pruning rule that, if you get it wrong, will cost you an entire year of flowers — and it is the rule most people get wrong.

Gardenias set their flower buds for the next season in late summer and fall. Pruning after midsummer removes those buds. The plant does not flower the following spring. The gardener cannot understand why, because the shrub looks healthy and full. The answer is that the flowers were cut off in August.

The only safe window for pruning is immediately after flowering finishes — for most varieties, that is late spring to early summer, after the main bloom flush. Dead and diseased wood can be removed at any time, because dead branches are not carrying flower buds. But any shaping, thinning, or height reduction must happen in that post-bloom window, and it must be finished by midsummer.

For repeat-blooming varieties like August Beauty, Chuck Hayes, and Jubilation, prune after the first major spring flush and before fall rebloom buds begin to set. Enjoy the fall bloom, then wait again until the following spring bloom finishes before pruning.

Shaping and Thinning

When you do prune, be conservative. Remove branches that break the natural silhouette. Cut back to a lateral branch or leaf node, leaving no stubs — stubs die back and invite disease. Prefer thinning cuts (removing entire branches at their origin) over heading cuts (shortening branches midway). Take no more than one-third of the plant's total volume in a single season.

Opening up the interior of the plant with thinning cuts improves air circulation, which reduces fungal disease pressure. Crossing branches that rub against each other create wounds that become entry points for stem canker and other diseases; remove the weaker of the two.

Rejuvenation for Overgrown Plants

Older gardenias that have become leggy or sparse can be brought back, but it takes patience. The gradual approach: remove one-third of the oldest, woodiest stems at ground level immediately after flowering. Repeat for the next two years. By the third year, the plant is fully renewed with vigorous new growth from the base. This method keeps the plant in flower through the process and carries much less risk than cutting everything back at once.

Hard rejuvenation — cutting the entire plant to 6 to 12 inches — eliminates at least one full season of flowers and risks killing older, stressed plants that cannot recover from the shock. Use it only when gradual renovation is impractical.

The Pruning Calendar in Plain Terms

Do not touch a gardenia with pruning shears from August through March, except to remove dead or clearly diseased wood. April and May: enjoy the flowers and deadhead spent blooms. Late May through early July: your window. Shape, thin, and clean up the plant. After early July: put the pruners away until next summer.


Pests and Diseases: What to Watch For

What zone are you in?

Enter your zip code for frost dates, growing season, and soil type.

Healthy gardenias growing in the right conditions — correct pH, good drainage, consistent moisture, appropriate light — resist pests and disease far better than stressed plants. The first question when a pest or disease appears is not "what do I spray?" It is "what is wrong with the growing conditions that allowed this to take hold?"

Whiteflies: The Primary Pest

Whiteflies are the most common gardenia pest, especially on indoor and container plants. They are small — 1/16 of an inch — white flying insects that feed on leaf undersides and excrete a sticky substance called honeydew. When you disturb the plant or shake the leaves, they fly up in a visible white cloud. That is usually the first sign most gardeners notice.

The visible damage is gradual: yellowing, weakened leaves over time, and a black sooty coating that develops on leaves where honeydew collects. This coating — sooty mold — is not a disease of the plant itself. It is a secondary fungal growth that feeds on the honeydew. The mold blocks sunlight and looks alarming, but the actual problem is the whitefly producing the honeydew. Treat the pest, and the mold clears on its own. Treating the mold with fungicide while leaving the whiteflies in place accomplishes nothing.

For whitefly control, escalate through these approaches: yellow sticky traps for monitoring and partial control; insecticidal soap or neem oil applied directly to leaf undersides where the insects feed; horticultural oil to smother all life stages. Repeat applications every 5 to 7 days for at least 3 weeks. A single application will not break the reproductive cycle. For severe indoor infestations, a systemic insecticide (imidacloprid as a soil drench) is a last resort — it is absorbed by roots and kills insects feeding on the plant.

Scale Insects and Aphids

Scale insects appear as small, hard or soft bumps on stems and leaf undersides, often mistaken for part of the plant until the population has grown large. Soft scale produces honeydew and attracts sooty mold; armored scale does not. Horticultural oil is the most effective treatment — it smothers insects under their protective covering. Manual removal with a soft brush or cotton swab dipped in rubbing alcohol handles smaller infestations.

Aphids cluster on new growth tips and developing flower buds, distorting the tissue as it emerges. A strong blast of water knocks them off effectively for mild infestations. Insecticidal soap handles heavier populations.

Spider Mites

Spider mites are an indoor gardenia problem, and they are directly connected to the humidity challenge. They thrive in hot, dry air — exactly the conditions that prevail in homes during winter. The first sign is usually stippled, faded-looking leaves; fine webbing between leaves and stems appears later in heavy infestations. Raise the humidity and the mite population typically drops. Water spray on leaf undersides removes them physically. Insecticidal soap or neem oil handle persistent infestations.

Root Rot

Root rot — caused by Phytophthora or Pythium fungi — is the most serious gardenia disease and is almost always fatal once well-established. It is covered in detail in the watering section, but the short version: it is caused by waterlogged soil, the symptoms mimic drought, and prevention through excellent drainage is the only reliable strategy. Once mushy brown roots are visible, recovery is unlikely.

Stem Canker

Dark, sunken lesions on stems that cause dieback above the damaged point are symptoms of stem canker (Phomopsis). Prune below the canker into healthy wood, at least 2 to 3 inches below the visible edge of the lesion. Sterilize your pruning tools between cuts with rubbing alcohol or a 10% bleach solution. Wounds from cultivation tools are the primary entry point for canker — be careful when working near gardenia stems.


The Mistakes That Cost Gardeners the Most

I have ranked these by the frequency with which they cause serious, often irreversible, plant problems. The first two on this list account for the majority of gardenia failures I see.

Mistake 1: Planting Without Testing Soil pH

This one is so preventable that it is genuinely frustrating to encounter. A $15 soil test before planting tells you exactly what you are working with. Skipping it and assuming your soil is fine because other plants grow well is the single most common reason gardenias fail. Other plants grow fine at pH 7.0. Gardenias do not. Test before you plant.

And then test annually. pH drifts. Alkaline irrigation water, natural soil buffering, and decomposing mulch all shift the numbers over time. Watch for the early warning sign — yellow leaves with green veins on new growth — and test immediately when it appears rather than assuming it is a watering or nutrition problem.

Mistake 2: Planting in Poorly Draining Soil

The drainage test described above takes ten minutes and tells you everything you need to know about a planting site. A hole that still holds water after 12 hours is not a gardenia site without intervention. In heavy clay, build raised beds 8 to 12 inches above grade with amended soil. In low-lying areas, choose a different location. Root rot established in its first season will kill a gardenia before the homeowner realizes what is happening, and there is no reliable treatment once the roots are gone.

Mistake 3: Inconsistent Watering

Both extremes cause serious problems, but the fluctuation between them may be the most damaging pattern. Gardenias cannot adapt to a wet-dry rollercoaster the way tougher shrubs can. Consistent, even moisture — maintained with the help of mulch and a simple checking routine before each watering — is achievable without complex irrigation setups. The finger test costs nothing and takes five seconds.

Mistake 4: Ignoring Humidity

Outdoor gardenias in the Southeast are usually fine — ambient humidity during the growing season meets their 50% minimum requirement naturally. But gardenias grown in arid climates or indoors during winter face 30 to 40% humidity in typical home conditions. The result is bud drop, brown leaf edges, and spider mite infestations. A hygrometer costs less than ten dollars and tells you exactly what the air humidity is near your plant. A humidifier is the most effective remedy. Pebble trays and grouping plants together provide supplemental help. Misting foliage is acceptable; misting flower buds causes spotting and should be avoided.

Mistake 5: Pruning at the Wrong Time

This is the mistake that causes a season of no flowers rather than plant death, but it is an expensive mistake in its own way — a year of waiting for blooms that were cut off in fall is a real loss. The rule is simple: prune immediately after flowering finishes. Never in fall, winter, or early spring. If you are unsure whether the window is open, the safest default is to wait. Gardenias have naturally good form and rarely need heavy shaping.

Mistake 6: Moving the Plant During Bud Formation

Indoor and container gardeners cause bud drop this way more often than any other single action. Gardenias that have formed buds become acutely sensitive to environmental change — different light levels, temperatures, air circulation. Moving the plant, even across a room, can trigger mass bud drop within days. Once buds appear, the plant stays put until they have fully opened and finished blooming. Plan seasonal indoor-outdoor transitions for before bud formation or after flowering is complete.

Mistake 7: Using the Wrong Fertilizer

Generic balanced fertilizers are formulated for a broad range of plants. Gardenias need specifically acid-forming fertilizers with a micronutrient package that includes iron, manganese, and zinc. The wrong fertilizer leaves the plant technically fed but deficient in the elements it most needs. Check labels. If it says azalea, rhododendron, or gardenia, it is probably right. If it says all-purpose, put it back.


Frequently Asked Questions

Can I Grow Gardenias in a Container Indoors?

Yes, but commit to the environment it requires. Gardenias as houseplants need 6 or more hours of bright light daily from a south-facing window or supplemental grow lights, 50% or higher humidity maintained by a humidifier and pebble tray, cool nights between 60 and 65°F to trigger bud set, and acidic potting mix with good drainage. Use rainwater or distilled water, or acidify tap water with white vinegar. Veitchii is the best indoor variety because it blooms in winter — which is when you most want fragrance from a houseplant. Radicans works well in small containers. Any dwarf variety adapts to container culture with the right conditions.

Why Are My Gardenia Leaves Turning Yellow?

The most likely cause — by a significant margin — is soil pH above 6.5. Yellow leaves with green veins on new growth is the classic presentation of iron chlorosis caused by pH-locked iron. Test your soil before doing anything else. If pH is above 6.5, apply elemental sulfur and use chelated iron (EDDHA form) for immediate relief while the sulfur works over the following months. If pH is correct, check your irrigation water pH — alkaline tap water steadily raises soil pH over time. If yellowing is on older leaves rather than new growth, manganese or magnesium deficiency is more likely, both of which are also triggered by high pH. Fix the pH and the deficiencies resolve.

When Do Gardenias Bloom?

Most standard varieties bloom primarily in spring, with August Beauty and repeat-blooming varieties like Chuck Hayes and Jubilation continuing into fall. Veitchii grown indoors blooms in winter. The exact timing in your garden depends on your zone, the specific variety, and whether conditions during bud set — 60 to 65°F nights — were met in the preceding weeks. Insufficient light, incorrect pruning timing, and bud drop from environmental stress can all suppress or delay flowering in an otherwise healthy plant.

How Do I Stop Bud Drop?

Work through the checklist: temperature first (nights between 60 and 65°F, days below 90°F), then watering consistency (soil evenly moist), then humidity (50% or higher), then movement (has the plant been moved since buds appeared?), then drafts (AC vents, heating vents, exterior doors). Bud drop is almost always caused by environmental stress during the bud formation period. Gardenias shed energy-expensive flower buds when they are stressed. Identify and eliminate the stressor, and buds will develop normally in the next cycle.

What Is the Easiest Gardenia to Grow?

In zones 8 through 10, August Beauty is the reliable default — widely available, long-blooming, and proven across a broad range of Southern garden conditions. In zone 7, Chuck Hayes is the choice because its cold tolerance is simply superior to alternatives at the northern edge of the hardiness range. For container or indoor growing, Veitchii is the most appropriate variety because it blooms in winter when indoor growing actually makes sense.


The Bottom Line

Gardenias are not difficult. They are specific. Get the soil pH right — test before you plant, and maintain it annually. Choose a variety that belongs in your zone. Keep the moisture consistent without waterlogging the roots. Prune only in the narrow window after flowering, and leave the plant alone the rest of the year. Do these things and gardenias will reward you with decades of extraordinary fragrance.

The payoff is real. A mature gardenia in the right conditions is a garden centerpiece — glossy evergreen foliage year-round, and in bloom, one of the most intensely fragrant shrubs in the landscape. There is a reason they have been grown in Southern gardens for centuries and coveted everywhere else.

A soil test, a good sulfur amendment, and the right variety for your zone. That is where it starts. Get those three things right and the rest is maintenance.

What zone are you in?

Enter your zip code for frost dates, growing season, and soil type.


Research for this guide draws from county extension service resources, university cooperative extension programs, and horticultural research institutions. Variety hardiness data is based on USDA zone ratings from trial records. Soil amendment and pH management recommendations reflect standard extension service protocols for acid-loving landscape shrubs.

Where Gardenias Grows Best

Gardenias thrives in USDA Zones 8, 9. Explore each zone's complete guide for growing tips, companion plants, and seasonal advice.

Also possible in: Zone 7, Zone 10 (challenging but possible with the right conditions).

Not sure of your zone? Look it up by zip code →