Vegetables

Cantaloupe: The Heat-Hungry Melon That Rewards Gardeners Who Pay Attention

James Calloway

James Calloway

Vegetable & Edibles Specialist · Updated April 2026

How to grow cantaloupe — vintage botanical illustration showing the plant in detail

Cantaloupe at a Glance

Sun

Sun

8+ hours full sun

Soil pH

Soil pH

6.0-6.8

Water

Water

Reduce by 50-75% in final 7-10 days before harvest

Spacing

Spacing

36-48"

Days to harvest

Days to Harvest

65-100 days

Height

Height

Trailing vine

Soil type

Soil

Well-drained soil

Lifespan

Lifespan

annual

Get your personalized growing data

Enter your zip code for frost dates, growing season, and soil type.

Pick up a grocery store cantaloupe. It was harvested early — before peak sugar developed — because it had to survive a truck ride. That is the standard you're competing against, and it is an embarrassingly low bar. A home-grown cantaloupe, harvested at full slip, eaten within 24 hours, is a different fruit entirely. Dripping, fragrant, genuinely sweet. Most people have never eaten one.

Here's the deal: cantaloupe is not a casual garden crop. It is tropical in origin — evolved in the hot, dry conditions of Central Asia and Africa — and it has not forgotten that. It demands full sun, warm soil, good drainage, and a season long enough for fruit to mature. Push it into cold ground too early, give it too much nitrogen, water it wrong in the final week, or pick it three days short of ripe, and you will wonder what all the fuss is about.

Do it right and you will understand immediately why people dedicate raised beds to this plant.

What follows is everything that separates a melon patch that produces fruit worth eating from one that produces a lot of beautiful vines and disappointment.


Quick Answer: Cantaloupe Growing at a Glance

USDA Zones: 3 through 10 (with the right variety and technique)

Sun: 8 hours of direct sunlight daily — minimum, not target

Soil pH: 6.0-6.8

Soil Temperature to Plant: 65F+ for transplants; 70F+ for direct seeding

Spacing: 18-24 inches between plants; 4-8 feet between rows; 3-4 feet between hills

Water: 1-2 inches per week during active growth; reduce 50-75% in the final 7-10 days before harvest

Fertilizer: 5-10-10 pre-plant; two nitrogen side-dressings during the season

Pollination: Requires bees — 8-12 visits per female flower; do not spray insecticides during bloom

Fruit per vine: Thin to 1-2 melons per vine for best size and sweetness

Days to harvest: 65-90 days depending on variety

Harvest signal: Stem slips cleanly from the vine with gentle pressure; strong aroma at blossom end


The Heat Problem (Why So Many Vines Produce Nothing)

Cantaloupe is not merely a warm-season crop. It is an extremely heat-demanding crop that will punish you for ignoring its temperature thresholds at every stage of its life.

Let me give you the numbers, because they matter.

Seeds need 70F soil — at 2-inch depth — to germinate reliably. Below 65F, seeds rot before they sprout. Transplants tolerate 65F soil, but growth essentially stalls below 50F air temperature. Fruit development is best at 80-90F daytime temperatures. Light frost kills the plant outright, at any stage. And for the whole enterprise to work, you need 80-100 warm days from transplant to harvest.

This is why "planting by the calendar" is how cantaloupe gardens fail. The date does not matter. The soil temperature does. A soil thermometer costs less than a six-pack of transplants and will save you far more than its purchase price in dead seedlings and wasted seasons. Stick it in the ground at the 2-inch mark. When it reads 65F consistently, transplants can go in. When it reads 70F, direct seed. Not before.

What happens if you ignore this? A transplant set into 55F soil goes into a kind of suspended animation. Roots stop functioning. The plant cannot take up water or nutrients. It sits there looking yellow and sickly while a plant set out two weeks later in warm soil blows past it. The early planting gains nothing. I've seen this pattern hundreds of times. Patience here is not a virtue — it's a yield strategy.

The other heat trap is zone-to-zone season math. Zones 3-4 may have 90-120 frost-free calendar days. But cantaloupe roots don't function below 60F, and soil doesn't warm to cantaloupe-friendly temperatures for two to four weeks after your last frost date. That shrinks your actual usable growing window considerably. A 90-day variety planted with a mid-June start in zone 4 may simply not finish before September frosts arrive. The fix is choosing the right variety — which we will cover in depth — and stacking season-extension techniques that buy you real growing time.


Best Cantaloupe Varieties by Zone

Variety selection is where the cantaloupe harvest is won or lost before you ever put a plant in the ground. Days to maturity is the number that matters most. Choose a variety whose days to maturity fits your frost-free window with at least 10-14 days of cushion. Then add season-extension techniques to create more margin.

What zone are you in?

Enter your zip code for frost dates, growing season, and soil type.

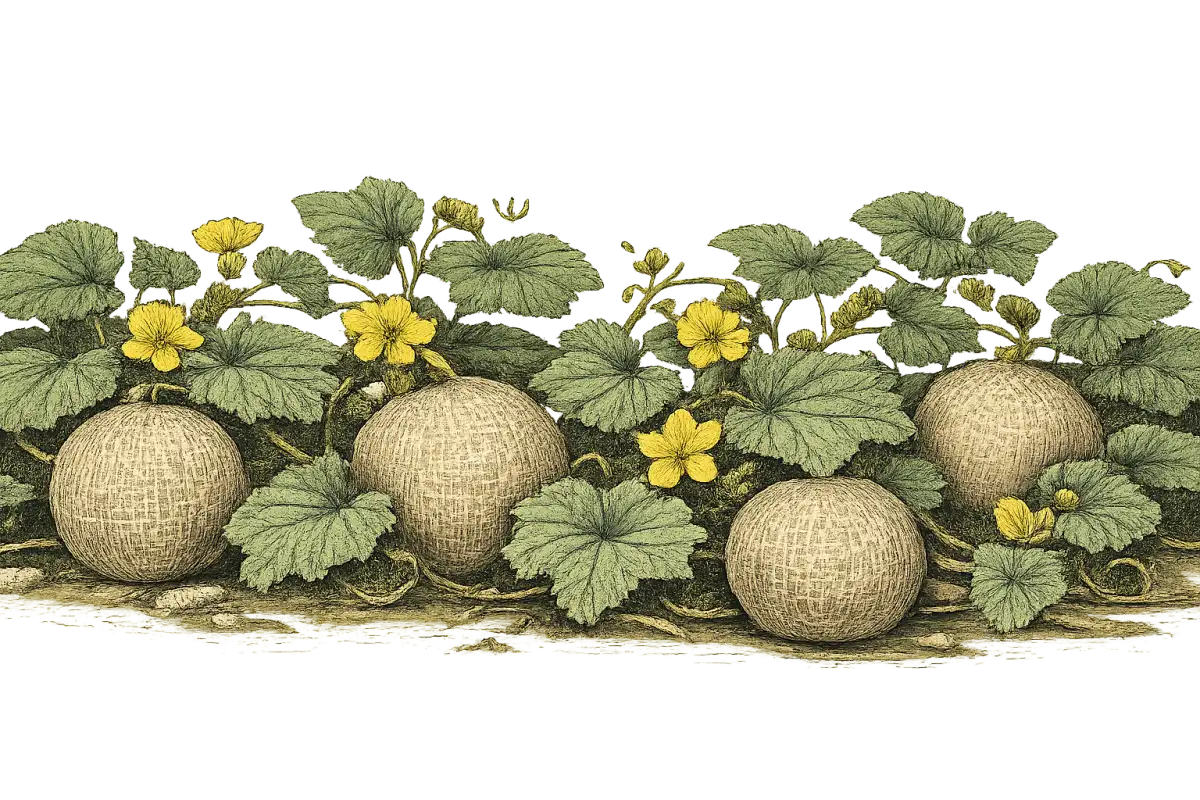
A quick note on terminology: what Americans call "cantaloupe" is botanically a muskmelon (Cucumis melo var. reticulatus) — the netted-rind, orange-fleshed melon that slips cleanly from the vine when ripe. True European cantaloupe has a rough, warty rind and is rarely grown in US home gardens. All variety recommendations below are for the muskmelon type unless otherwise noted.

Short-Season Zones (3-5): Where Variety Choice Is Everything

In zones 3-4, you are working with 90-120 frost-free days — and soil warmth lags behind calendar dates by two to four weeks in spring. The math is tight. Only the fastest-maturing varieties have a realistic chance here, and even they require aggressive season extension. (More on that below.)

Minnesota Midget (68 days) is the right answer for zones 3-4. Developed specifically by the University of Minnesota for short northern seasons, it has compact 3-4 foot vines (versus the 6-10 feet of standard varieties), which makes it practical under row covers and in small spaces. The fruit is small — about 4 inches across — but genuinely sweet and aromatic. It is the gold standard for northern cantaloupe growing, full stop.

Alaska (65-80 days) is one of the earliest maturing cantaloupes available anywhere. Cold-tolerant, bred for northern success, smaller fruit — a true zone 3-4 candidate if you can find it at your local seed supplier.

Earligold (73 days) rounds out the zone 3-4 arsenal: round fruit, firm orange flesh, excellent early-season flavor.

Zone 5 gives you more breathing room — 120-150 frost-free days — and opens the door to better flavored varieties while still demanding you think carefully about days to maturity.

Sarah's Choice (76 days) is the variety I'd pick first in zone 5. It is a hybrid with good disease resistance (important in humid northern summers), sweet and aromatic fruit, and reliable performance in cooler conditions. It is an excellent all-around choice.

Sweet 'N Early (75 days) delivers consistent sweetness with a compact growth habit that works well in smaller gardens. Sweet Granite (80 days) was bred specifically for New Hampshire's climate by the University of New Hampshire, so it has genuine credentials for short New England seasons. Sugar Cube (80 days) produces personal-sized 4-5 inch melons that are very sweet, disease-resistant, and compact enough for containers.

Standard Zones (6-7): More Room, More Disease Pressure

Zone 6-7 growers have enough season length for a wide range of standard varieties. The primary challenges shift from calendar math to disease pressure — powdery mildew, downy mildew, and Fusarium wilt in wet summers, particularly in the Mid-Atlantic and Great Lakes regions. Disease resistance is worth paying attention to when choosing varieties here.

Sarah's Choice (76 days) carries over from zone 5 as an excellent first pick — consistent flavor, good disease resistance, reliably productive.

Athena (79 days) is the commercial standard and widely available. It has some Fusarium tolerance and firm flesh that gives you a couple of extra days of eating window compared to softer varieties. Not the most intensely flavored melon, but an extremely reliable producer.

Ambrosia (86 days) is the home garden favorite for good reason: exceptionally sweet, beautiful fruit. The tradeoff is softer flesh — eat it within a day or two of harvest. If you want the melon that makes guests ask what it is, Ambrosia is it.

Hale's Best Jumbo (86 days) is a classic variety that has been producing reliably in American home gardens for generations. Widely adapted, consistent, proven.

Zone 6 growers should still consider black plastic mulch, particularly in years with cool springs. Transplants remain worthwhile.

Warm Zones (8-9): Heat Tolerance and the Fall Planting Window

These zones have ample season length — 180-240 frost-free days — but the challenges change. Intense summer heat, high humidity in the Southeast, heavy cucumber beetle and aphid pressure, and serious Fusarium wilt risk in the South (South Carolina, Georgia, Alabama, Mississippi, Louisiana) mean disease resistance moves to the top of the priority list.

Athena (79 days) is the workhorse here: good Fusarium tolerance, handles humid conditions, consistent across the Southeast.

Ambrosia (86 days) is Clemson Extension's recommended home garden variety for the region — exceptional flavor when conditions cooperate.

Scoop II (~78 days) and Burpee Hybrid (~80 days) round out the Southeast-adapted options. Clemson Extension recommends Scoop II specifically for southeastern conditions.

For South Carolina specifically, Clemson Extension gives planting windows: Piedmont, April 15 through June 5; Coastal Plain, March 15 through May 15 for spring, July 1 through July 30 for a summer/fall crop.

The fall planting strategy in zones 8-9 is underused and worth taking seriously. A planting in late July that matures in September and October often produces sweeter melons than the spring crop. Cooler temperatures during fruit fill concentrate sugars naturally. If you've been disappointed by spring melons in the South, try the fall window.

Hot Zones (9-10): Plant Around the Heat, Not Into It

Extreme summer heat — daytime temperatures regularly exceeding 95F — causes female flowers to drop without setting fruit. The crop window in these zones is spring (plant February through March, harvest before peak summer heat) or fall (plant July through August, harvest September through October in cooler conditions). Attempting to ripen cantaloupe through the peak of a zone 10 summer is a losing proposition.

Black plastic mulch, which is invaluable in cooler zones, can actually overheat soil in zones 9-10 during midsummer. Switch to white or reflective plastic mulch in those conditions.

Athena (79 days) performs consistently in heat with a good disease package. Hale's Best Jumbo (86 days) has a long track record as a desert Southwest performer. Ambrosia (86 days) produces its best flavor in the fall crop, when temperatures moderate. Drip irrigation is not optional here — surface temperatures during summer make overhead watering far less efficient.

Quick Reference Table: Top Picks by Zone

Zone GroupTop VarietiesDays to MaturityWhy
3-4Minnesota Midget, Alaska, Earligold65-73 daysBred for short seasons; compact vines; reliable in cold
5Sarah's Choice, Sweet 'N Early, Sugar Cube75-80 daysDisease resistance; proven short-season performance
6-7Sarah's Choice, Athena, Ambrosia76-86 daysWide variety selection; flavor + reliability balance
8-9Athena, Ambrosia, Scoop II78-86 daysFusarium tolerance; Southeast-adapted; fall crop options
9-10Athena, Hale's Best Jumbo79-86 daysHeat tolerance; plant spring or fall to avoid peak heat

How to Plant Cantaloupe (And the Soil Work That Makes It Succeed)

Site Selection

Cantaloupe is not a plant that tolerates a compromised location. It needs full sun — 8 hours minimum, not 6, not "mostly sunny." Below 8 hours, plants grow slowly, pollination suffers, and fruit ends up small and underflavored. South-facing slopes that warm earliest in spring are ideal. If your garden doesn't have an 8-hour sun spot, cantaloupe is the wrong crop for that garden.

It also needs excellent drainage. Roots sitting in saturated soil rot quickly and create ideal conditions for Fusarium wilt and other soilborne diseases. Raised beds are excellent where drainage is marginal. A simple drainage test: dig a hole 12 inches deep, fill it with water, and time how long it takes to drain. More than 4 hours indicates a drainage problem that needs addressing before you plant.

Standard vines spread 6-10 feet in every direction. Plan for this.

Soil Preparation

The target soil is sandy loam — well-drained, loose, and fast to warm in spring. Heavy clay needs substantial amendment: work in 3-4 inches of coarse compost or aged manure across the top 12 inches of soil. In serious clay situations, build raised beds filled with a blend of topsoil, compost, and coarse sand. Do not add fine sand to clay soil — that combination creates concrete-like conditions.

Target pH is 6.0-6.8. Below 6.0, aluminum and manganese become soluble and toxic to roots. Phosphorus availability drops. Calcium deficiency risk increases, which leads to blossom end rot. Above 7.0, iron, manganese, and zinc become less available and growth slows. Test your soil if you haven't recently — it takes five minutes and removes the guesswork.

For pre-plant fertility, Clemson Extension recommends incorporating a 5-10-10 fertilizer at 30 pounds per 1,000 square feet into the top 6 inches of soil before planting. The lower nitrogen ratio relative to phosphorus and potassium matters here — it sets up strong root development without pushing the excessive vine growth that excess nitrogen causes later. This is the right ratio for planting time.

Transplanting vs. Direct Seeding

In zones 6-10 with long warm seasons, direct seeding is straightforward. Wait until soil reaches 70F at 2-inch depth. Plant seeds 1-2 inches deep, either in the hill method (mounds spaced 3-4 feet apart, 4-6 seeds per hill, thin to the 2-3 strongest) or in rows (18-24 inches apart, rows spaced 4-8 feet apart). Germination takes 7-10 days in warm soil.

In zones 3-6, transplanting is the smarter approach. Start seeds indoors 4-6 weeks before your planned outdoor transplant date. Use individual peat pots or deep cell trays — cantaloupe roots are extremely sensitive to disturbance, and seedlings pulled from shared trays and root-separated at transplanting frequently go into severe shock. The peat pot goes directly into the soil; roots grow through the walls naturally. Germinate at 75-85F; a heat mat is useful here.

Transplant outdoors 2-3 weeks after your last average frost date when soil has reached 65F. Seedlings should have 2-3 true leaves — not more, or they become root-bound and the transplant shock worsens. Harden off over 7-10 days before planting out.

Spacing

Give cantaloupe room. Standard varieties need 18-24 inches between plants in rows spaced 4-8 feet apart, or hills 3-4 feet apart. Compact short-season varieties like Minnesota Midget and Sugar Cube can be grown at 3 feet between plants. Crowding creates poor air circulation (which drives disease), makes pollination harder, and shifts the plant's energy toward vine rather than fruit.


Season Extension for Northern Zones (Zones 3-6)

The fundamental math of northern cantaloupe growing is this: you need 80-100 warm days from transplant to harvest, and your effective warm season is shorter than the calendar suggests. The solution is to stack multiple techniques that together add 4-6 weeks of usable growing time. Each technique compounds the others.

Black plastic mulch is the most impactful single tool available to northern cantaloupe growers. It is not optional in zones 3-5. Laying 1-1.5 mil black polyethylene over a prepared bed raises soil temperature 5-10F compared to bare ground, allows transplanting 2 weeks earlier than bare-ground planting, and hastens final maturity by 7-10 days — significant when fall frost is your deadline. Install drip irrigation tape on the soil surface first, then lay the plastic over it and anchor edges with soil. Lay it 10-14 days before planting to pre-warm the soil, then cut X-shaped slits for transplant sites.

Row covers and low tunnels trap heat around plants and can raise nighttime minimum temperatures by 2-4F for floating spunbond fabric or up to 10-15F inside clear plastic low tunnels. They add 2-4 weeks of effective growing time. The critical management note: row covers exclude bees, and cantaloupe cannot be pollinated without them. Remove row covers completely when the first female flowers appear — recognizable by the tiny melon swelling at the base of the flower — or remove them in mornings to allow bee access and replace in evenings.

Wall O' Water plant protectors — double-walled tubes filled with water placed around individual transplants — can allow planting 2-3 weeks before the last average frost date, effective down to approximately 16F outside when properly installed. They are designed for the seedling stage only and are not practical for mature sprawling vines.

For zones 3-4, the maximum season extension sequence looks like this: start seeds indoors in individual peat pots 6 weeks before the outdoor planting date; lay black plastic mulch to pre-warm soil 2 weeks before transplanting; transplant through slits in the plastic and install Wall O' Water protectors; transition to row covers when plants outgrow the Wall O' Water; and remove row covers at first female flowering. Used together, this approach can add 4-6 weeks of effective growing time.


Pollination: The Hidden Reason Your Vines Don't Set Fruit

If you get nothing else from this guide, understand this section.

Cantaloupe is monoecious — it produces separate male and female flowers on the same vine. Male flowers appear first, typically 1-2 weeks before any female flowers open. Every flower you see in the first couple of weeks is male. They open, drop, and produce no fruit. That is their job. This is not a problem. This is biology.

Female flowers come later and are identifiable by a small swelling at the base — a miniature melon shape even before pollination. That swelling needs pollen from a male flower, delivered by a bee, to develop into a full-sized melon.

Here is what most gardeners don't know: each female flower requires 8-12 separate bee visits to achieve complete pollination. Not one visit. Eight to twelve. Incomplete pollination produces misshapen or lopsided fruit, smaller melons than expected, poor flavor, or fruit that aborts and drops from the vine before sizing up. A female flower is open and receptive for one day — from shortly after sunrise to early afternoon. After that window closes, the flower is done.

This is why insecticide timing is so critical. A single daytime insecticide application during peak flowering — even organic options like pyrethrin or neem — can kill the majority of foraging bees in the area, eliminating fruit set for that entire flowering cycle. If pest treatment is absolutely necessary during bloom, spray only after 7 PM, when bees have returned to their hives. Use the least bee-toxic product possible. Plan your pest management calendar around the flowering window.

In zones 3-5, cool early-season temperatures suppress bee activity even when female flowers are open. Bees don't forage below 60F, significantly reduce activity in heavy rain or overcast conditions, and stay closer to hives in strong winds. A week of cool, cloudy weather during peak flowering can gut your fruit set regardless of everything else you've done right.

The backup strategy is hand pollination, and in northern zones it is worth doing routinely. Go to the garden in early morning, when flowers are freshest. Pick a male flower (straight stem, no fruit at base) and remove its petals to expose the pollen-covered stamen. Gently brush or dab the stamen directly onto the center of an open female flower. One male flower can pollinate 2-3 female flowers. Mark pollinated female flowers with a piece of yarn so you can track the harvest countdown.

To attract more pollinators naturally, plant companion flowers near the melon patch — zinnias, sunflowers, borage, basil allowed to flower, lavender. Bees that come for the companions will also visit cantaloupe blooms. Leave some bare soil in the garden for ground-nesting native bees. Provide a shallow dish of water with pebbles.

Once fruit sets and reaches golf-ball size, thin to 1-2 melons per vine. Remove the rest. A cantaloupe vine has a fixed photosynthetic capacity — spreading resources across 4-6 melons means each gets less sugar and develops less flavor than 1-2 melons would. It feels wrong to pull off developing fruit. Do it anyway.


Watering: The Sweet-or-Bland Decision Happens Here

Cantaloupe watering has two phases, and most gardeners only know about one of them.

Phase one is everything up to the final stretch before harvest: 1-2 inches of water per week, delivered deeply and infrequently. Deep, infrequent watering — enough to wet the soil 6 inches down per session — trains roots to grow downward and improves drought tolerance. Shallow daily watering keeps roots near the surface and makes plants more vulnerable. Drought stress during flowering causes flower drop and can eliminate an entire crop. Inconsistent moisture during fruit development causes blossom end rot and fruit cracking. Keep it steady.

Drip irrigation is the strongly preferred delivery method, for two reasons beyond just efficiency. First, it delivers water to the root zone without wetting foliage — and wet foliage is the primary driver of powdery mildew, downy mildew, Alternaria leaf blight, and anthracnose. In humid climates especially, switching from overhead sprinklers to drip can dramatically reduce disease pressure. Second, drip tape installs under black plastic mulch perfectly — water runs directly to roots with no waste. If overhead irrigation is your only option, water in early morning so foliage dries before evening. Never water in the evening.

Phase two is the final 7-10 days before harvest, and this is the part most home gardeners miss completely.

When melons approach full size, reduce water by 50-75%. Not to zero — complete drought for 2-3 days in hot conditions will abort fruit and damage the plant. But significantly less than the season-long rate. Vines will look slightly less perky. This is intentional and correct.

Why? As cantaloupe approaches maturity, the plant is concentrating sugars in the flesh. Excess water dilutes those sugars, producing a large but bland melon. Reducing water slightly concentrates sugars in the existing fruit volume, triggers the plant to push more photosynthate into fruit rather than vegetative growth, improves skin netting development, and enhances the musky aroma that makes a great cantaloupe. This is standard practice for experienced melon growers everywhere. The difference between a pre-harvest water-stressed melon and one grown with continuous watering is often dramatic.

What zone are you in?

Enter your zip code for frost dates, growing season, and soil type.


Feeding Cantaloupe: Less Nitrogen Than You Think

The fertilization mistake I see most often is not underfeeding — it is overfeeding nitrogen. Enormous, dark green, beautiful vines with few or no melons. That is excess nitrogen. The plant is doing exactly what you told it to do; you just accidentally told it to make leaves instead of fruit.

Cantaloupe fertilization works in three stages.

Pre-plant: Incorporate a balanced fertilizer such as 5-10-10 at 30 pounds per 1,000 square feet into the top 6 inches of soil. The higher phosphorus and potassium relative to nitrogen supports root development and future fruit quality without driving excessive early vine growth. Clemson Extension recommends this specific formulation and rate.

Side-dress 1 (before vine running): When plants have established but before runners fully extend — typically 2-3 weeks after transplanting — apply 1 pound of 34-0-0 (ammonium nitrate) per 100 feet of row, or 2 pounds of 15.5-0-0 (calcium ammonium nitrate). For individual plants, the Utah State University Extension recommendation is 3-4 tablespoons of 21-0-0 per plant, watered in immediately. Broadcast in a band 6-8 inches from the base of the plants — not against the stem, which can cause crown burn.

Side-dress 2 (after fruit set): Once the first fruits have set and are visibly growing — roughly golf ball size — apply the same nitrogen rate as the first side-dressing. This supports fruit fill. The critical caveat: if plants look very dark green and lush with fruit already setting well, skip or reduce the second application. Too much nitrogen at this stage redirects plant energy back into vine growth, produces watery fruit, and reduces sugar concentration.

After the second side-dressing, stop adding nitrogen unless plants show clear deficiency symptoms (pale green to yellow older leaves, slow growth). Potassium is associated with improved fruit quality and sweetness — if your soil tests low in potassium, incorporate potassium sulfate before planting or during fruit development.


Pests and Diseases: Know Your Enemies

Fusarium Wilt: The Silent Vine Killer

Fusarium wilt is the most serious disease of cantaloupe and the most insidious. The pathogen — Fusarium oxysporum f. sp. melonis — colonizes the plant's vascular system and cuts off water and nutrient transport. Plants wilt during the heat of the day and do not recover at night (unlike heat stress wilting, which reverses by morning). Cut the stem 3-4 inches above the soil line and look for brown discoloration of the vascular tissue inside — that is diagnostic.

Here is what makes it so difficult: Fusarium chlamydospores survive in soil for 20 or more years. They are essentially permanent once established. Crop rotation alone is insufficient where Fusarium is already present, though it helps. Resistant varieties are the primary and most effective defense. Look for "F" or "FW" in variety descriptions. Athena and Sarah's Choice both carry Fusarium resistance. Never plant cantaloupe (or any cucurbit) in the same bed more than once every 3-4 years. If you have an infested bed, solarizing — covering moist soil with clear plastic for 4-6 weeks during the hottest part of summer — can reduce inoculum levels significantly.

Cucumber Beetles: The Dual Threat

Striped and spotted cucumber beetles cause direct feeding damage, but the far more serious threat is what they carry: Erwinia tracheiphila, the bacterial wilt pathogen. When beetles feed on cantaloupe leaves, they introduce this bacterium into the plant's vascular system. Bacterial wilt moves fast — a plant can go from healthy to dead in 1-2 weeks.

Quick field test for bacterial wilt: cut a wilted stem and touch the cut ends together, then slowly pull apart. If you see thin, thread-like bacterial strands between the cut ends, it is bacterial wilt. There is no cure. Remove and destroy infected plants immediately.

Prevention is everything here. Row covers from transplanting until flowering physically exclude beetles during the most vulnerable period — the most effective early-season protection available. Yellow sticky traps monitor beetle populations. Kaolin clay spray makes plants less attractive to beetles. If populations are high and treatment is necessary, spray pyrethrin or neem in the evening, after bees are done foraging.

Powdery Mildew

The most common foliar disease of cantaloupe across most regions. White, powdery coating on upper leaf surfaces, starting as discrete spots and spreading to cover entire leaves. Reduces photosynthesis at the worst possible time — during fruit ripening. Unlike most fungal diseases, powdery mildew thrives in warm, relatively dry conditions. Late summer in every zone.

Choose varieties with powdery mildew resistance — look for "PM" in catalogs. Ensure proper spacing for air circulation; crowded vines are far more susceptible. At first sign of infection, apply potassium bicarbonate, neem oil, or sulfur sprays. Do not apply sulfur when temperatures exceed 90F or within 2 weeks of an oil application — risk of plant damage.

Aphids

Beyond direct feeding damage, aphids are vectors of mosaic viruses — Cucumber Mosaic Virus, Watermelon Mosaic Virus, Zucchini Yellow Mosaic Virus. A single infected aphid can transmit virus within minutes of feeding, producing distorted, crinkled, mottled leaves and ruining the planting. Early detection and control matter. Knock aphids off with a strong water spray early in an infestation. Insecticidal soap or neem oil applied every 5-7 days works for established colonies. Avoid excess nitrogen fertilization — lush, tender growth is aphid habitat.


Knowing When to Pick: The Slip Test Changes Everything

Cantaloupe gives home growers a ripeness signal that no other common garden crop offers, and it is nearly foolproof once you know what to look for.

When a cantaloupe reaches peak sugar content, the stem naturally separates from the fruit. This is called slipping. A ripe cantaloupe does not need to be cut; it separates on its own or with the lightest pressure. At half-slip, a slight tug creates a small crack at the stem attachment point — the melon hasn't fully separated on its own yet. Sugar is at or near peak; this is the ideal harvest stage if you plan to eat the melon in 1-2 days, or want a couple of days for it to soften slightly. At full slip, the stem separates completely and easily — the melon may fall into your hand with almost no effort, or may already be lying detached from the vine. This is peak ripeness and maximum aroma. Eat within 1-2 days.

Commercial cantaloupes are harvested at half-slip, or earlier, for shipping durability. Home gardeners who use the grocery store as their reference point for "ripe" cantaloupe consistently pick too early. You can harvest more ripe than that.

Use these secondary signals alongside the slip test:

Rind color transitions from green background to creamy yellow or golden as the melon ripens. Look at the skin between the netting — not the netting itself, which stays tan. Any green showing means it is not ready.

Aroma is one of the most reliable indicators. Hold the melon and sniff the blossom end (the end opposite the stem). If you can smell cantaloupe clearly, it is ripe or nearly so. No detectable aroma means not ready, regardless of size.

Blossom end softness — the end opposite the stem should yield slightly to gentle thumb pressure when ripe. Rock hard means wait. Soft or mushy means overripe.

Netting development — well-developed, heavily raised corky netting is a positive sign. Thin, barely visible netting on an otherwise large melon suggests under-ripeness.

Most cantaloupe varieties are ready 30-45 days after pollination. Once any melon on your vines shows color change and detectable aroma, switch to daily checks — every morning. In hot weather (90F+ days), a melon can move from under-ripe to full-slip in just 2-3 days. Miss that window and you find a mushy, fermented mess on the ground. The daily morning check habit during harvest season is not optional.

One last critical point: cantaloupe does not continue to develop sugar after harvest. It will soften slightly at room temperature, but the sugar is already set at the moment of picking. If you pick too early, no amount of counter-sitting will fix it. This is why picking at the right stage is the whole game for flavor.

For storage, whole uncut melons keep at room temperature for 1-3 days or refrigerated up to 5-6 days. Once cut, wrap tightly and refrigerate; use within 2-3 days. Cantaloupe absorbs refrigerator odors readily if not wrapped.


The Mistakes That Cost You the Harvest

These are ranked by how often they actually kill a crop.

Planting into Cold Soil

Already covered, but worth repeating as the number-one failure mode: seeds in cold soil rot, transplants in cold soil stall and become disease-prone, and early planting gains you nothing over planting into warm soil two weeks later. Use a soil thermometer. Wait.

Spraying Insecticides During Bloom

One daytime spray application during peak flowering can eliminate fruit set for that entire cycle. Even organic options. Spray in the evening only, after 7 PM, if treatment is absolutely necessary. Schedule pest management to avoid the flowering window entirely where possible.

Too Much Nitrogen

If your vines look magnificent and your melon count is low, this is probably why. Nitrogen drives vegetative growth. When excess nitrogen is available, the plant prioritizes vine production over reproduction. Use a lower-nitrogen pre-plant fertilizer (5-10-10), follow the two-stage side-dressing schedule rather than loading up nitrogen pre-plant, and skip or reduce the second side-dressing if plants already look lush and dark green.

Not Thinning Fruit

Four to six developing melons on a vine means four to six mediocre melons. One to two melons means one to two genuinely good ones. Thin to 1-2 melons per vine when fruit reaches golf ball size. Remove the rest. The plant concentrates its resources into the remaining melons, producing significantly larger and sweeter fruit. It is counterintuitive. It works.

Watering Heavily Right Before Harvest

The sugars that define a great cantaloupe concentrate in the final week. Excess water dilutes them. Reduce watering 50-75% when melons approach full size. Vines will look slightly less perky. This is correct.

Picking Too Early

The grocery store cantaloupe is not the ripeness reference. Wait for the slip. Wait for the golden rind, the aroma, the slight give at the blossom end. If in doubt, check again tomorrow. A cantaloupe picked a day too early is disappointing. One picked at full slip is exceptional.

Using Organic Mulch Too Early

Straw, hay, and wood chips insulate soil — which means they keep it cool in spring, exactly when cantaloupe needs warmth. Organic mulch applied in spring can keep soil temperatures 5-10F lower than unmulched ground. Use black plastic in cold periods; apply organic mulch only after soil temperature exceeds 75F.

What zone are you in?

Enter your zip code for frost dates, growing season, and soil type.


Frequently Asked Questions

Can I grow cantaloupe in zone 3?

Yes, but it requires intentional effort. Use only the fastest-maturing varieties — Minnesota Midget (68 days) or Alaska (65-80 days) — and stack every season-extension technique available: start transplants indoors in individual peat pots 6 weeks before outdoor planting, lay black plastic mulch 10-14 days before transplanting to pre-warm soil, use Wall O' Water protectors at transplant time, then transition to row covers. Remove row covers completely when female flowers appear to allow bee access. A cool, cloudy summer will still give you undersized melons. A warm summer with this technique stack will give you a genuine harvest.

Why do I have lots of flowers but no fruit?

Almost certainly a pollination problem. Check for these causes in order: (1) You may still be seeing only male flowers — female flowers appear 1-2 weeks after male flowers and have a tiny melon swelling at the base; wait and watch. (2) If you have seen female flowers but they're aborting, bee activity may be insufficient due to cool temperatures, overcast weather, or insecticide use. Hand-pollinate as described above and attract more pollinators with companion flowers. (3) Check that you haven't been spraying anything near the plants during bloom hours.

My melons taste bland. What went wrong?

Several culprits, usually in combination. Excess nitrogen is common — dark green lush vines, watery tasteless fruit. Too much water in the final week before harvest is the other major one — dilutes the sugars that should be concentrating. Picking too early is the third: cantaloupe does not continue to develop sugar off the vine. Check the slip, the aroma, and the rind color before you pick. If all three are right, the sugar is there.

Do I need to plant multiple varieties for pollination?

No — cantaloupe does not require cross-pollination between varieties. A single plant can pollinate itself, as long as bees are transferring pollen between male and female flowers on the same plant or across the planting. The pollination requirement is bee activity, not variety diversity.

What's the difference between cantaloupe and honeydew for growing purposes?

Honeydew (Cucumis melo var. inodorus) requires 10-14 more days of warm conditions than muskmelon cantaloupe, which limits it practically to zones 6-10 without aggressive season extension. The harvest indicator is completely different: honeydew does NOT slip from the vine. You judge ripeness by rind color transitioning from green to creamy white or pale yellow, a slight waxy texture, subtle aroma at the blossom end, and very slight yielding to pressure. Cutting is required at harvest. Honeydew has a longer storage life — 2-3 weeks versus 5-7 days for cantaloupe. The cultivation requirements (soil, water, fertilizer, sun) are similar, but the longer season and different harvest signals make it a harder crop for northern growers.


The Bottom Line

Cantaloupe rewards growers who pay attention and punishes those who guess. The things that matter are not complicated: soil warm enough before you plant, the right variety for your season length, bees protected during bloom, water reduced before harvest, and patience at picking time.

Get those right and you will grow melons that genuinely surprise people. The kind that make you realize everything you have eaten from a grocery store was a pale imitation harvested weeks before it was ready.

Plan for 3-4 plants per person for fresh eating through the season. Thin to 1-2 melons per vine for the best quality. Expect 1-2 large melons per plant with proper thinning, and a harvest window roughly 30-45 days after you saw the female flowers pollinated. Check every morning once any melon starts showing golden color and aroma.

The slip test is your friend. Use it. Wait for it. Trust it.

Research for this guide draws on extension service resources from Clemson University, Utah State University Extension, the University of Minnesota, the University of New Hampshire, and broad synthesis of university agricultural research on cucurbit production, variety trial data, and integrated pest management practices for muskmelon.

Where Cantaloupe Grows Best

Cantaloupe thrives in USDA Zones 6, 7, 8, 9. Explore each zone's complete guide for growing tips, companion plants, and seasonal advice.

Also possible in: Zone 5, Zone 10 (challenging but possible with the right conditions).

Not sure of your zone? Look it up by zip code →