Vegetables

Radishes Are Foolproof. Until They're Not. Here's How to Get Them Right.

James Calloway

James Calloway

Vegetable & Edibles Specialist · Updated April 2026

How to grow radishes — vintage botanical illustration showing the plant in detail

Radishes at a Glance

Sun

Sun

6 hours full sun

Soil pH

Soil pH

6.0-7.0

Water

Water

Consistently moist soil

Spacing

Spacing

2-3 inches"

Days to harvest

Days to Harvest

22-35 days

Height

Height

6-18 inches foliage height

Soil type

Soil

Loose

Lifespan

Lifespan

annual

Get your personalized growing data

Enter your zip code for frost dates, growing season, and soil type.

Radishes are supposed to be easy. Twenty-two days from seed to harvest. No transplanting, no trellising, no coddling. Most gardening books list them under "good for beginners" and move on. And yet every season, gardeners pull up flower stalks where roots should be, or pithy golf balls where crisp radishes should be, or a spectacular bush of leaves sitting on top of nothing at all.

The vegetable is not complicated. The mistakes are just very specific. And because radishes mature in under a month, a timing error or a single watering failure does not give you time to course-correct. You get what you planted into. If the conditions were wrong, you find out at harvest and it is too late.

Here is what actually matters: temperature, timing, and consistency. Radishes need cool weather -- they fail above 80°F. They need even moisture -- irregular watering splits or pithies the roots. And they need to be harvested at the right moment -- a 3-to-5-day window that passes fast. Get those three things right, and radishes genuinely are easy. Miss any one of them, and you will wonder why you bothered.

This guide covers everything from which varieties to plant in your zone to the specific mistakes that cause the most failures. We will tell you exactly when to plant, how to water, how to prepare the soil, and how to get months of continuous harvests from a single garden bed -- instead of one week of radishes followed by nothing.


Quick Answer: Radish Growing at a Glance

USDA Zones: All zones (timing shifts dramatically by zone)

Best Temperatures: 50-70°F -- cool season only

Bolt Threshold: Daytime temps consistently above 80°F

Sowing Depth: 1/2 inch

Initial Spacing: 1 inch apart; thin to 2-3 inches

Row Spacing: 12 inches

Germination: 3-5 days (optimal soil temp 55-65°F)

Spring Types (Harvest): 22-35 days

Winter Types (Harvest): 45-70 days

Water: 1 inch per week; even moisture is critical

Soil pH: 6.0-7.0

Fertilizer: Usually none -- excess nitrogen kills root development

Key Strategy: Succession plant every 10-14 days, not one large batch


The Temperature Problem (Why Most Radishes Bolt)

Before anything else, understand this: radishes are a cool-season crop. They perform best between 50 and 70°F. Above 80°F, the plant shifts its energy from developing a root to throwing up a flower stalk. The root stays thin, woody, and inedible. This is called bolting, and it is the single most common radish failure in the US.

It is not a failure of skill. It is a failure of timing. Gardeners see radish seeds at the garden center in late May, buy them, and plant them right alongside everything else. The problem is that radishes do not care that it is planting season. They care about temperature. And in most of the US, late May means daytime highs that are already flirting with 80°F.

Long days compound the problem. The combination of heat and extended photoperiod -- the June through July window -- is the most powerful bolting trigger radishes have. Water stress during hot weather accelerates it further. Once the flower stalk has initiated, you cannot save the plant. Pull it and compost it.

The fix is calendar-based, not technique-based. In zones 3-6, plant radishes in early spring (2-4 weeks before last frost) and again in fall (4-6 weeks before first frost). Stop planting when daytime highs approach 80°F. In zone 7, plant March through April and again September through October -- skip May through August entirely. In zones 8-10, radishes flip to a winter crop. Plant October through February when temperatures are in the right range. Do not attempt summer radishes in the South.

Fall plantings are, in many ways, better than spring plantings. Temperatures are cooling rather than rising, pest pressure drops, and the roots tend to come out sweeter. Gardeners who focus most of their radish production in fall consistently report better results than those who try to squeeze out a long spring season.


Best Radish Varieties by Zone

There are two fundamentally different categories of radish, and mixing them up causes a lot of frustration. Spring radishes mature in 22-35 days, grow small, and need cool weather. Winter and storage radishes -- daikon, watermelon radish, black Spanish -- take 45-70 days, grow large, and are almost always planted in late summer for a fall harvest regardless of zone. Know which type you are growing before you pick a planting date.

What zone are you in?

Enter your zip code for frost dates, growing season, and soil type.

Cold Zones (3-4): Every Day Counts

The short frost-free season in zones 3 and 4 means you want the fastest varieties you can find. There is no room for 60-day radishes in the spring window. Go fast, go early, go often.

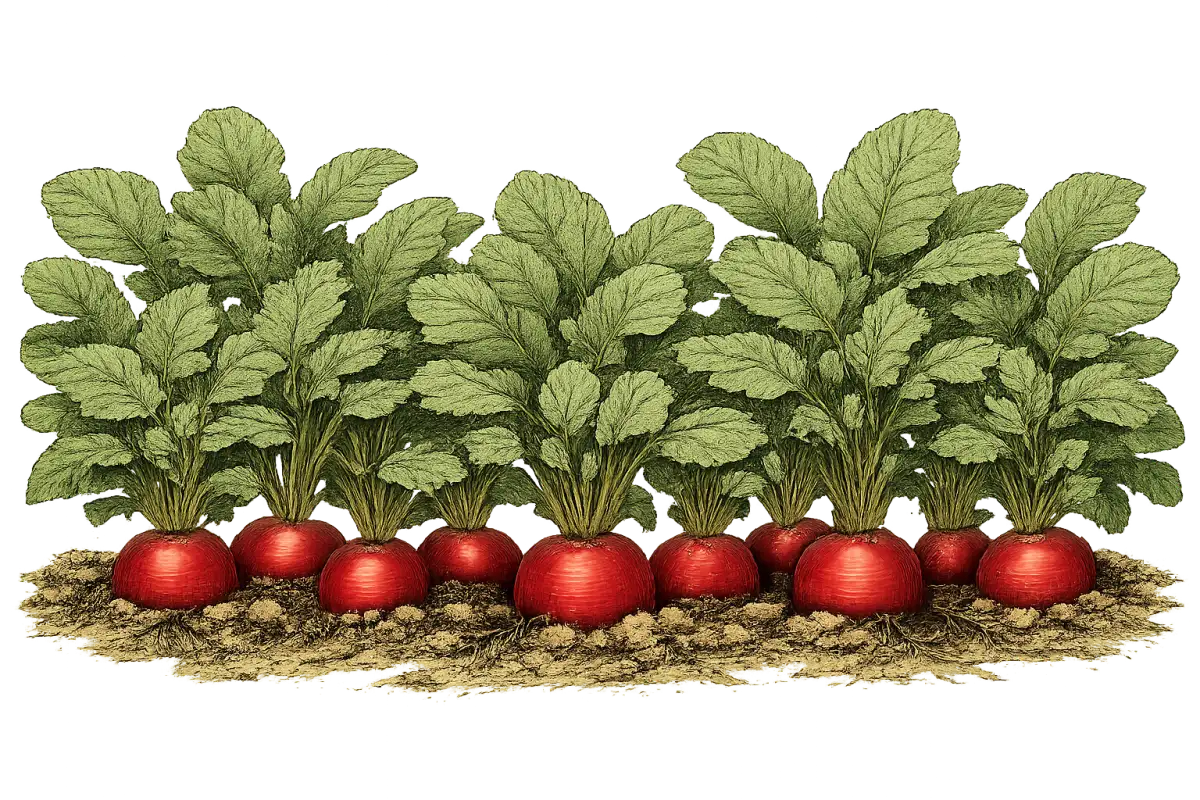
Cherry Belle is the right starting point. It matures in just 22 days -- that is the fastest common vegetable in the garden, full stop. Round, bright red skin, crisp white flesh, mildly peppery. It performs well in every US zone. This is the variety to reach for when you are starting your first succession planting as soon as the soil is workable in mid-April.

Sparkler is a solid companion at 25 days -- a bicolor red-and-white radish with a similar mild bite. French Breakfast rounds out the trio at 25-28 days with a cylindrical shape, mild flavor, and slightly more heat tolerance than other spring types, which matters when a warm week arrives early.

For winter types, plant daikon in late July to early August. Minowase and Miyashige are the standard edible daikon varieties -- long, mild, versatile in the kitchen, and both pull double duty as soil-building cover crops when their deep taproots decompose over winter. Black Spanish at 55-60 days is worth growing in zone 4 if you want a root cellar staple -- it stores 3-4 months and is significantly more assertive in flavor than anything else in the radish family.

Standard Zones (5-6): The Best Radish Zones in the Country

Zones 5 and 6 have the longest cool periods in both spring and fall, which means the most generous planting windows. These are simply the best zones for growing radishes in the US. You can run successive plantings from early April through early June in spring, pick back up in late August, and run all the way through early October in fall.

You also have the full variety selection available to you. Cherry Belle, Sparkler, French Breakfast, and Easter Egg all perform well here. Easter Egg is a colorful mix -- red, pink, purple, and white radishes from the same packet, all maturing around 28 days. The color surprise makes it excellent for children's gardens and market displays.

White Icicle is worth growing if you find red radishes too peppery. It is a long, tapered, pure white variety at 30 days with a notably milder flavor -- and it has one meaningful advantage over round types: it stays tender in the ground a bit longer, which gives you slightly more grace on the harvest window.

For winter types, zone 5-6 is ideal for Watermelon Radish -- white exterior with a stunning pink-red interior that is genuinely beautiful sliced thin for salads. At 55-65 days, it fits comfortably in an August planting before hard freeze. It stores for 1-2 months in cool conditions and has become popular at farmers' markets for a reason.

Zone 7: Fall Is Your Friend

Zone 7 is a transition zone, and it shows. The spring window is moderate but closes earlier than you expect as heat arrives. By mid-May in many zone 7 locations, daytime highs are already pushing into the upper 70s. The fall season is often more productive and more reliable.

French Breakfast is the spring pick of choice here because its modest heat tolerance buys you extra days when a warm week arrives. Cherry Belle is still your fastest option. White Icicle is again useful for its tolerance of slightly delayed harvest.

For fall, zone 7 is excellent for all three winter types: daikon planted in late August to early September has ample time for 60-70 day varieties before hard freeze. Watermelon Radish and Black Spanish both work well as a fall crop, and Black Spanish is worth growing just for the storage advantage -- if you have a cool basement or root cellar, a fall planting will keep you in radishes through winter.

Warm Zones (8-9): Winter Radishes, Not Spring Ones

In zones 8 and 9, radishes shift to a fall, winter, and early spring crop. Summer is completely off the table. The planting window runs October through February, with a brief extension through mid-March in some locations.

During this window, the full spring variety slate is available. Cherry Belle and French Breakfast both perform well. French Breakfast has the edge in zones 8-9 because any warmth in early spring is less disruptive to its flavor and root formation.

Daikon is well-suited to mild fall weather in these zones. Plant in October and November. Note that zones 8-9 often do not get hard freezes below 20°F, which means daikon will not winter-kill naturally if you intend to use it as a cover crop. Plan to pull it manually or mow it down before it bolts in the warming spring weather.

Zone 10: Cool Season Only, Watch the Thermometer

Zone 10 -- south Florida, the Southern California coast, Hawaii -- gives you a narrow window in the coolest months. November through February is the reliable planting period. Daytime highs above 80°F will cause bolting, and in zone 10 that threshold can arrive earlier than expected even in winter.

Cherry Belle and French Breakfast are the two varieties most worth growing here. Keep succession plantings short and frequent. If a warm stretch hits, accept the loss and replant when temperatures drop again.

Quick Reference Table: Top Picks by Zone Group

Zone GroupTop VarietiesTypeWhy
3-4Cherry Belle, Sparkler, French BreakfastSpringFastest maturity; short windows demand speed
5-6Cherry Belle, Easter Egg, Watermelon RadishSpring + WinterFull selection; longest cool windows
7French Breakfast, White Icicle, Black SpanishSpring + WinterHeat tolerance + strong fall/storage options
8-9French Breakfast, Cherry Belle, DaikonSpring + WinterWinter-only crop; daikon in mild fall
10Cherry Belle, French BreakfastSpringCool season only; short window, fast varieties

Soil Preparation: Loose, Clean, and Low-Nitrogen

Radishes are root crops. Everything that matters happens underground. Which means the state of your soil directly determines whether you get crisp, round, well-formed roots or a collection of forked, misshapen disappointments.

The target soil profile is loose, well-drained, and free of obstructions. Sandy loam is ideal. A soil pH of 6.0-7.0 is the target range -- radishes are not fussy about pH the way some crops are. If your soil grows other vegetables reasonably well, it likely falls in range.

Remove rocks and debris before every planting. This is not optional. When a developing radish root hits a rock or an old root fragment, it splits or bends around the obstruction. Rake and pick through the top 6 inches before sowing each succession. For daikon and winter types that root 12-24 inches deep, work the soil deeper.

Do not add fresh manure. This is a common and entirely avoidable mistake. Fresh manure -- even heavily composted manure applied at planting time -- provides excessive nitrogen. Too much nitrogen pushes the plant into producing spectacular leafy tops at the direct expense of root development. You will get a beautiful green rosette and essentially nothing underground. If you use manure, it should have been applied and worked in at least 3-4 months before planting radishes, or applied to the previous crop in that bed.

The same logic applies to high-nitrogen fertilizers. Radishes generally need no supplemental fertilizer at all if your soil has reasonable organic matter. If you must fertilize, use a balanced or low-nitrogen option and apply it sparingly. In most garden soils with regular compost additions, fertilizer for radishes is wasted effort and actively counterproductive.

Clay soil is the hardest case. It compacts, drains poorly, and physically restricts root expansion. The fix is to mix in 3-4 inches of compost to the top 8 inches, add coarse sand to improve drainage and texture, and seriously consider raised beds. Raised beds are the most reliable solution for clay soil radish growing. Fill them with a 50% topsoil / 30% aged compost / 20% coarse perlite or sand mix and the result is exactly what radish roots need: loose, nutrient-moderate, and well-drained.

Sandy soil is actually favorable for radishes. It is loose, well-draining, and easy for roots to push through. Just add 2-3 inches of compost for water retention and nutrient support, and plan to water more frequently since sandy soil dries fast.


Planting and Succession Sowing: The One Strategy You Cannot Skip

Radishes must be direct sown. Do not start them indoors and do not transplant them. Root crops do not survive transplanting.

Sow seeds 1/2 inch deep, 1 inch apart in the row, with rows 12 inches apart. Seeds germinate in 3-5 days at optimal soil temperatures of 55-65°F. Below 40°F they sit dormant but do not rot, so you can sow earlier than you might think in spring and trust the seeds to wait for warmth.

When seedlings are about 1 inch tall, thin them to 2-3 inches apart. This feels wasteful. Do it anyway. Overcrowded radishes produce small, misshapen, elongated roots, and crowded plants are more likely to bolt. Eat the thinnings -- they are excellent in salads as microgreens. For daikon and other winter types, thin to 4-6 inches with rows 18-24 inches apart. These are significantly larger plants and need more soil volume.

Now, the strategy that separates good radish growers from frustrated ones: succession planting.

One large planting of radishes produces 50 roots that all hit peak quality during the same 3-to-5-day window. Spring radishes go from perfect to pithy in 2-3 days past peak. You will eat some, give some away, and compost the rest. Then you have no radishes for the rest of the season.

Sow a short row -- 12 to 18 inches -- every 10 to 14 days during your zone's planting window. Each planting provides about 1-2 weeks of harvest. Six to eight succession plantings per season gives you months of continuous fresh radishes with no glut and no waste. Set phone reminders. This is easy to forget.

A typical spring succession in zone 5 looks like this: first planting three weeks before last frost, second planting two weeks before, and so on through the spring window, stopping when daytime highs approach 80°F. Resume the same pattern in late August for fall.


Watering: Even Moisture Is the Whole Game

Consistent soil moisture is the single most controllable factor in radish root quality. Radishes grow fast -- 22-35 days for spring types -- and during that compressed window any disruption in water supply directly affects the final root. Get watering right and you get crisp, mild, perfectly formed radishes. Get it wrong and you get pithy, split, or intensely peppery ones.

The target is 1 inch of water per week, including rainfall, delivered in frequent light waterings rather than one deep weekly soaking. In moderate weather, water every 2-3 days in-ground. In hot or windy conditions, daily watering may be necessary.

The germination stage is critical. During the first 3-5 days from sowing, keep the top inch of soil moist at all times. Radish seeds dry out quickly and will fail to germinate if the soil dries between waterings at this stage. Mist or light watering daily is appropriate here.

Inconsistent watering is the cause of split roots. After a dry period, a heavy rain or deep watering causes the root to absorb water rapidly and expand faster than the skin can stretch. The root cracks. It happens fast and there is no way to reverse it. The prevention protocol: never let soil dry out completely during root development (days 10 through harvest). After any dry spell of even 2-3 days, resume watering gradually rather than flooding the bed. Mulch lightly -- 1-2 inches of straw or shredded leaves between rows -- to buffer moisture fluctuations.

Drought stress, separate from the splitting problem, produces pithy, woody, hollow roots and intensely peppery flavor. The relationship between watering and heat is reliable: well-watered radishes in cool weather are mild and crisp. Water-stressed radishes are tough, dry, and fiercely hot. If your radishes are consistently too peppery despite growing in cool weather, insufficient watering is the most likely cause.

Drip irrigation or soaker hoses are the best approach. They deliver water directly to soil level without wetting foliage, provide the most consistent moisture delivery, and reduce the risk of fungal issues. Run for 15-20 minutes every 2-3 days and adjust based on soil type and weather. Hand watering with a gentle shower nozzle works well for small succession plantings. Avoid flood irrigation and infrequent deep soaking -- both create the wet-dry cycles that cause splitting.

Container radishes need daily attention. Pots dry out faster than garden beds. Check daily by inserting a finger 1 inch into the soil -- if it is dry at 1 inch, water. Water until it drains from the bottom holes. Small terracotta pots may need watering twice daily in warm weather. Self-watering containers with reservoirs are an excellent choice for radishes because they provide the consistent moisture the crop requires without daily monitoring.

What zone are you in?

Enter your zip code for frost dates, growing season, and soil type.


Pests and Diseases: Short Seasons Are Your Best Defense

Radishes have one significant advantage over most vegetables when it comes to pest and disease pressure: they grow so fast that most problems never have time to become severe. A spring radish planted today may be harvested before a developing pest population reaches damaging levels. It is not magic -- it is math.

That said, three pests cause the majority of radish problems in US gardens.

Flea Beetles: Annoying, Rarely Deadly

Flea beetles are the most common radish pest nationwide. They are tiny -- 1/16 inch -- dark, and jump when disturbed. They chew many small round holes in leaves, producing a distinctive shotgun pattern. Flea beetle pressure increases in warmer zones and during warm springs. Zones 7-9 during spring plantings are the worst case; fall plantings typically see less activity as populations decline with cooling temperatures.

Here is the key fact about flea beetles on radishes: the leaf damage is mostly cosmetic. The roots are almost always fine. The exception is heavy infestations on very young seedlings, which can kill plants before they establish. Mature plants tolerate significant flea beetle damage without any impact on root quality.

Row covers are the most effective control. Lightweight floating row covers placed over seeds immediately after planting physically exclude beetles entirely. Leave them on until harvest -- radishes do not require pollination. This is also the best solution for cabbage root maggots and aphids, so it is genuinely worth the minimal effort of laying covers at planting time.

Diatomaceous earth dusted on dry leaves provides some deterrent but must be reapplied after every rain. Neem oil spray applied every 5-7 days gives moderate deterrence. Fall plantings naturally avoid peak flea beetle season.

Cabbage Root Maggots: The One That Actually Hurts

This is the pest to take seriously. Cabbage root maggots -- white larvae of the cabbage root fly -- tunnel directly into the radish root. You often will not know they are there until harvest, when you pull up a root riddled with brown channels. Light infestations leave surface scarring; heavy infestations make the root inedible.

Root maggots are worst in spring, especially in northern zones 3-6 where cool, moist spring conditions favor the fly. Fall plantings often escape the worst damage because the spring generation peak has passed. If you are in a zone with reliable maggot pressure, shifting radish production toward fall is the single most effective change you can make.

Row covers, applied immediately at planting before flies can lay eggs, prevent the problem entirely. Crop rotation is also important -- do not plant radishes or any brassica crop in the same spot in consecutive years. Root maggots overwinter in the soil near their host plants.

Aphids: Rarely a Real Problem

Aphids cluster on leaf undersides and cause curling and yellowing. On spring radishes, they are rarely a significant issue -- the crop is often harvested before aphid populations build. Winter types in the ground for 50-70 days are more exposed. A strong blast of water from a garden hose knocks aphids off effectively. Insecticidal soap spray works for heavy infestations. Avoid broad-spectrum insecticides that kill beneficial predators like ladybugs and lacewings.

Disease

Radishes are remarkably disease-resistant given their short growing cycle. Downy mildew (yellow patches on upper leaves, gray fuzz underneath) can appear in cool, wet conditions with poor air circulation -- thin properly to prevent it. Clubroot causes swollen, distorted roots and is more common in acidic soils below pH 6.0; if it has been a problem, maintain pH above 6.5 and practice a minimum 7-year rotation in infected beds. Black rot produces V-shaped yellow lesions on leaf edges; avoid overhead watering and remove infected plants immediately.

The integrated prevention strategy that covers most scenarios: row covers at planting, crop rotation, fall planting emphasis, and prompt harvest. Each one individually helps. Together, they solve most pest problems before they start.


The Radish as a Garden Tool: Trap Crops, Row Markers, and Soil Builders

Here is something most gardening guides skip: radishes are genuinely useful to the rest of your garden, independent of whether you eat them.

The Flea Beetle Trap Crop

This is the most valuable companion planting use for radishes in US gardens. Flea beetles preferentially attack radishes over cabbage, broccoli, kale, and other brassicas. When radishes are planted nearby, beetles concentrate on the radish leaves and largely leave your more valuable crops alone.

The setup: plant a row of radishes 2-3 feet from your brassica transplants, 2-3 weeks before transplanting so the trap row is established and attractive to beetles when the main crop goes in. Place it on the windward side of the garden if possible -- beetles tend to arrive from upwind. The radish roots are still fully usable even with heavy leaf damage. Maintain the trap crop throughout the brassica season with succession plantings.

This strategy is most valuable in zones 5-8 where flea beetle pressure is highest and brassica crops are important garden staples.

Row Markers for Slow Germinators

Radishes germinate in 3-5 days. Carrots take 14-21 days. Parsnips take 21-28 days. During those weeks of waiting, the soil surface looks bare and gardeners accidentally cultivate or weed out the rows they planted.

The classic fix: mix a few radish seeds into your carrot, parsnip, or parsley seed before sowing. Radishes pop up within days, marking the row clearly. By the time the slow crop germinates, the radishes are nearly ready for harvest. Pull them before they compete with the main crop. The radish harvest also loosens the soil surface, which can benefit young carrot seedlings as they emerge.

This is the most widely recommended companion pairing in gardening for a reason. It actually works.

Space Fillers Between Slow Crops

Newly transplanted tomatoes, peppers, and squash occupy very little of the surrounding bed for the first 3-4 weeks. Planting radishes in the gaps between transplants puts that otherwise-wasted space to work. Harvest the radishes well before the main crop expands to fill the bed. This is a legitimate way to double food production per square foot with no additional bed space.

Daikon as a Soil Builder

Daikon radishes serve a completely different function from spring types. Their taproots grow 12-24 inches deep, physically penetrating compacted soil layers that other crops cannot reach. Plant daikon in late summer or early fall, let the roots grow through autumn, and when a hard freeze below 20°F kills the plant, the roots decompose in place over winter. They leave permanent channels in the soil for water infiltration, air circulation, and future crop roots -- no spring tillage required.

This is the "biodrilling" concept. One season of daikon cover cropping noticeably improves soil structure. Two or three seasons can convert a bed with compacted clay subsoil into genuinely workable ground. Seeding rate for cover crop use is 1/4 oz per 10 square feet.

The dual-purpose approach: plant edible varieties like Minowase or Miyashige, harvest some roots for eating, and leave the rest in the ground for soil building.


The Mistakes That Actually Ruin Radish Crops

We have covered most of these throughout the guide, but they are worth ranking directly. These are the failures that show up most often, in order of how frequently they destroy a crop.

Mistake #1: Planting Too Late in the Season

Air temperatures above 80°F cause bolting. The root stays thin, woody, and inedible. Once the flower stalk has initiated, the plant is finished. Pull it and compost it. Replant when temperatures cool.

The fix is planting on a calendar, not by feel. In zones 3-6, be done with spring radishes before daytime highs approach 80°F. In zone 7, stop by early May. In zones 8-10, do not plant spring types in spring at all -- they are a winter crop.

Mistake #2: Harvesting Too Late

Spring radishes have a peak window of 3-5 days. After that, the root becomes pithy, woody, hollow, or all three. Left 10 or more days past peak, they are completely woody. This is why succession planting matters -- a small batch every 10-14 days means you are never trying to harvest 50 radishes in one week.

Check daily once your planting approaches its days-to-maturity date. Gently brush soil away from the top of a root. If you see the shoulder at or near 1 inch diameter, pull a test radish. If it is crisp and the right size, harvest the rest of that planting within the next 3-5 days.

Mistake #3: Too Much Nitrogen (All Tops, No Roots)

Fresh manure, high-nitrogen fertilizer, or planting immediately after a heavily amended bed all produce the same result: spectacular leafy growth and a root so small it barely exists. Radishes do not need fertilizer in reasonable garden soil. If you are applying one, you are probably hurting more than you are helping.

Mistake #4: Not Thinning

Overcrowded radishes produce small, misshapen, elongated roots. None of them reach full size. Thin to 2-3 inches apart when seedlings are about 1 inch tall. Be ruthless. Eat the thinnings. They are good.

Mistake #5: Inconsistent Watering

Wet-dry-wet cycles split roots. Dry soil causes pithy, woody, intensely peppery roots. Even moderate inconsistency during root development -- days 10 through harvest -- shows up clearly at the table. Drip irrigation or soaker hoses, light mulch between rows, and daily monitoring of containers are the prevention strategy.

Mistake #6: Rocky or Compacted Soil

A developing radish root that hits a rock splits or bends around it. The result is forked, twisted, oddly-shaped roots that are still edible but look strange and develop unevenly. Remove rocks and debris from the top 6 inches before every planting. Use raised beds in rocky or heavy clay soil. For daikon types, prepare the soil 12-18 inches deep.

Mistake #7: Planting the Wrong Type

Winter types -- daikon, watermelon radish, black Spanish -- take 45-70 days. They will not produce useful roots in a 30-day spring window, and they are not planted for spring harvest anyway. Spring types planted in fall in zones 8-10 bolt immediately. Know which category your variety falls into before you set a planting date.


Harvesting and Storage: Small Windows, Long Shelf Life for the Right Types

Spring radishes are ready when the root shoulder is visible at the soil surface and approximately 1 inch in diameter. Pull a test radish. If it is firm, crisp, and the right size, harvest the rest of that planting within 3-5 days. Do not check once a week. Radishes will not wait.

Remove greens before storing. They draw moisture from the root and accelerate deterioration. Store in perforated plastic bags in the crisper drawer.

Spring types keep about 2 weeks in the refrigerator. They are not long-term storage vegetables. This is another argument for succession planting over one big harvest.

Winter types are a different category entirely. Daikon stores 2-3 months in the refrigerator or root cellar. Watermelon radish holds 1-2 months. Black Spanish is the keeper of the group -- 3-4 months in cool storage. If you have a root cellar or cool garage, a fall planting of Black Spanish gives you a genuinely useful winter vegetable.

Harvest winter types before a hard freeze below 25°F. They are more forgiving of timing than spring types -- they can stay in the ground somewhat past technical maturity without turning immediately woody -- but do not push it into a killing frost.

What zone are you in?

Enter your zip code for frost dates, growing season, and soil type.


Companion Planting: What Works and What to Keep Separate

The right companions share the same cool-season timing, contribute to pest management, or make efficient use of space. The wrong ones compete for the same resources or concentrate pest problems.

Best Companions

Carrots are the classic pairing -- row marking, different root depths, sequential harvest. Mix radish seeds directly with carrot seeds. You get the row marked while you wait for germination, and the radishes are harvested right around the time the carrot seedlings need the space.

Lettuce and spinach share the same cool-season timing and spacing requirements. They work together naturally.

Peas and beans fix nitrogen modestly and have compatible spring timing. Neither competes with radishes in a meaningful way.

Cucumbers, tomatoes, peppers, and squash all benefit from radishes planted in the gaps between transplants. Radishes are out of the ground before any of these crops need the surrounding space.

Nasturtiums attract beneficial insects and provide minor pest deterrence. A useful addition to any radish bed.

Keep These Separate

Turnips are in the same family and compete directly for resources. Do not grow them side by side.

Other brassicas planted among (not adjacent to) radishes concentrate pest and disease problems. The trap crop strategy works because radishes are in a dedicated row away from brassicas, drawing pests toward themselves. Interplanting radishes among your cabbages just means more pests in more places.

Hyssop may inhibit radish growth. Skip it near radish beds.


Frequently Asked Questions

Why are my radishes flowering instead of forming roots?

Bolting -- the plant has shifted energy to seed production instead of root development. The cause is almost always heat (daytime temperatures above 80°F) or the combination of heat and long summer days. Once a flower stalk has initiated, the root is finished. Pull the plant and compost it. For future plantings, move the planting date earlier in spring or shift to fall production. In zones 8-10, treat radishes as a winter crop and do not attempt spring planting.

My radishes are beautiful on the outside but pithy and hollow inside. What happened?

They were left in the ground too long past their maturity date. Spring radishes have a narrow peak window of 3-5 days. After that, the root degrades rapidly -- first pithy, then woody, then hollow. The fix is checking daily once radishes approach their days-to-maturity date (printed on the seed packet), harvesting promptly when the root shoulder reaches about 1 inch diameter, and succession planting in small batches so you never have more radishes peaking simultaneously than you can eat.

Do I need to fertilize radishes?

Almost never. Radishes grow in under a month. They do not have time to benefit significantly from supplemental feeding, and excess nitrogen -- from fertilizer, fresh manure, or a heavily amended bed -- actively harms root development by directing the plant's energy into leaf production instead. In reasonable garden soil with occasional compost additions, no fertilizer is needed. If your soil is genuinely poor, use a balanced or low-nitrogen option applied lightly.

Can I grow radishes in containers?

Yes, and they work well in containers. Use a quality potting mix with drainage holes, not garden soil (which compacts). Minimum depth is 6 inches for spring types and 12 inches or more for daikon and winter types. The main difference in container growing is watering frequency -- pots dry out faster than garden beds. Check daily by inserting a finger 1 inch into the potting mix. If dry at 1 inch, water. Self-watering containers are particularly effective because they provide the even moisture radishes need without constant monitoring.

What is the easiest radish for a first-time grower?

Cherry Belle. It matures in 22 days, tolerates a wide range of conditions within the cool-season window, is available everywhere, and its small round shape is forgiving of minor soil imperfections. Plant it 2-4 weeks before your last frost date, keep the soil consistently moist, thin to 2-3 inches when seedlings are 1 inch tall, and check daily once it approaches 22 days. If you want to extend beyond a single planting, start a second short row 10-14 days after the first. That is the whole system.

Why are my radishes extremely hot and peppery?

Two causes: growing in warm weather (heat stress makes radishes significantly hotter) or harvesting past peak maturity. Both redirect the plant's chemistry toward pungent compounds. The fix is planting strictly in cool weather within the 50-70°F range, maintaining consistent moisture (water stress also increases peppiness), and harvesting promptly at peak. If you prefer milder radishes regardless of timing, French Breakfast and White Icicle are noticeably less peppery than round red types like Cherry Belle.


The Bottom Line

Radishes are not complicated. The whole crop lives or dies by three decisions: planting at the right temperature, watering consistently, and harvesting on time. Nail those three and everything else is details.

The succession planting strategy is the one technique that separates gardeners who eat radishes all season from ones who eat them once in May and then forget about them until next year. Sow a short row every 10-14 days during your zone's cool window. Do not plant one big batch. That is genuinely the most important thing in this guide after temperature.

And consider the winter types. Gardeners who only grow Cherry Belle in spring are missing half the crop. Watermelon Radish, Black Spanish, and Daikon planted in late summer deliver a completely different vegetable -- bigger, milder, more complex in flavor, and in the case of Black Spanish, storable for months. Fall radishes in most zones also come out sweeter and less peppery than spring ones. The season most gardeners skip is often the better one.

Start with a short row of Cherry Belle, set a phone reminder to plant the next one in 12 days, and stop planting when it gets hot. You will have more fresh radishes than you know what to do with. Which is, frankly, the right problem to have.

Research for this guide was drawn from university extension service materials and published agronomic data. Sources informing variety performance, soil preparation standards, and pest management recommendations include practices established through extension services across multiple states and regions, covering cool-season brassica family crops, cover crop agronomy, and vegetable production systems in US hardiness zones 3 through 10.

Where Radishes Grows Best

Radishes thrives in USDA Zones 4, 5, 6, 7. Explore each zone's complete guide for growing tips, companion plants, and seasonal advice.

Also possible in: Zone 3, Zone 8 (challenging but possible with the right conditions).

Not sure of your zone? Look it up by zip code →