Season Extension for Cold Zones (And Why Most People Under-Invest Here)
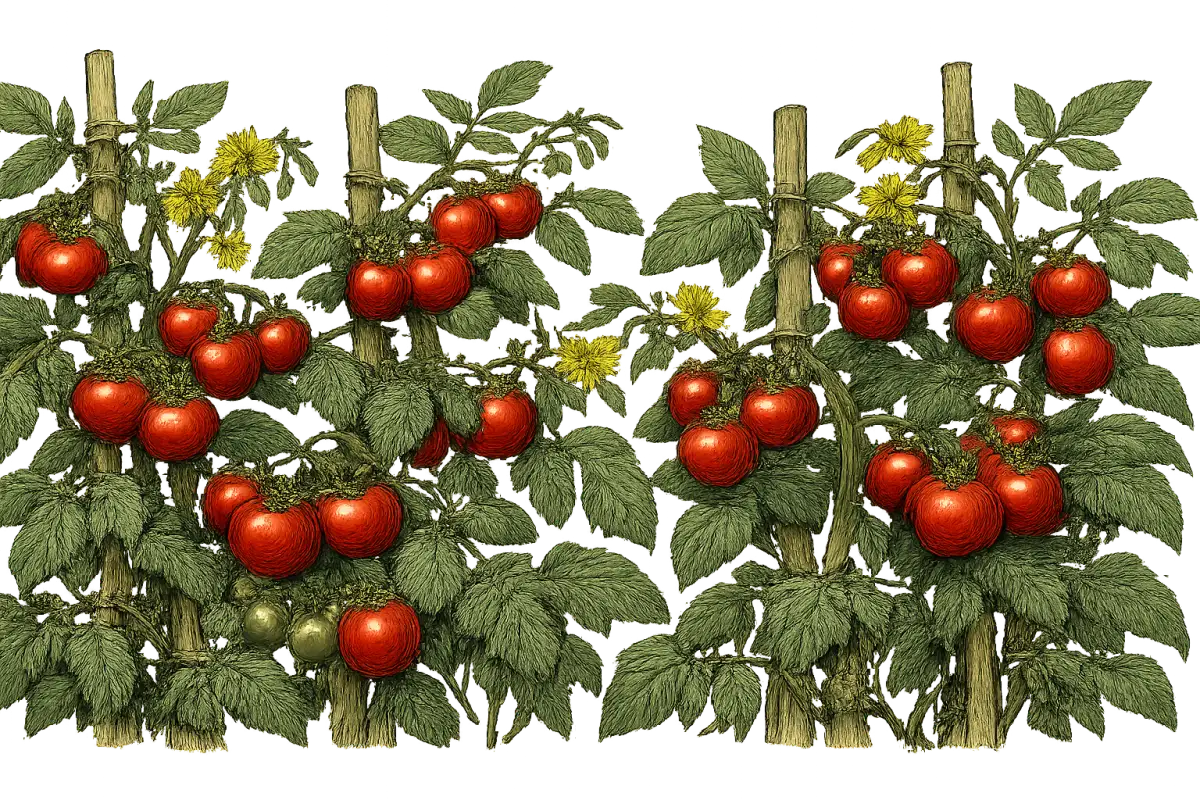
Zone 5 gardeners who do not use season extension are leaving 4 to 6 weeks on the table. That is the difference between barely getting ripe tomatoes before frost and harvesting beefsteaks in September.
Four tools. Use them together for maximum effect.
Wall-o-Water cloches are the most effective single tool. Water-filled plastic tubes surrounding the plant absorb solar heat during the day and release it overnight, protecting plants down to 16F (-9C) and warming the interior 8 to 12F above ambient. In zone 5, you can transplant in late April — two to three weeks earlier than bare-ground planting. Pre-warm the soil for a week before transplanting by placing the empty cloche in position first. They are reusable for multiple seasons.
Red plastic mulch increases tomato yields 12 to 20 percent according to Clemson University research. It warms soil 3 to 5F at root depth and reflects specific light wavelengths that promote plant growth. Lay it 2 weeks before transplanting to pre-warm the soil, with drip irrigation installed underneath. It outperforms black plastic for tomato yield specifically.
Floating row covers (1.5 oz/sq yd) create a 4 to 6F warmer microclimate. Use them in spring to protect newly transplanted seedlings and again in fall to extend harvest by 1 to 2 weeks when September frosts threaten. Remove during the day once temperatures exceed 70F — tomatoes need pollinators, and row covers block them.
Raised beds reach transplant-safe soil temperature 7 to 10 days earlier than ground-level beds and run 2 to 4F warmer overall. They are the passive foundation that makes every other technique more effective.
The most aggressive combination: raised bed plus red plastic mulch plus Wall-o-Water cloches. Zone 5 with this setup has an effective season of 150 to 160 days — enough for mid-season varieties that would otherwise be too slow.
For end-of-season management, about 6 weeks before your expected first frost, pinch the main growing tip to stop new vegetative growth. Remove any flowers that will not have time to develop into ripe fruit. Force the plant's remaining energy into ripening what is already on it.
When frost threatens, harvest all full-size green tomatoes. Ripen indoors at 65 to 70F — never below 50F, which destroys ripening enzymes. Keep them away from direct sunlight (counterintuitive but correct). Place a ripe apple nearby to release ethylene gas and trigger ripening. Expect 7 to 21 days depending on maturity at harvest.
Harvesting: Pick It Right or Waste the Season
Missouri Extension is direct on this: for optimal flavor, fruits should ripen fully on the vine but be harvested before they begin to soften. The ideal tomato is firm, fully colored, and just beginning to yield to gentle pressure.
The optimal ripening temperature is 75F average daily. Above 92F, fruit flavor, texture, and color degrade (Missouri, SDSU). Above 85F, lycopene — the red pigment — stops forming while carotene persists, causing the yellow shoulder discoloration you see on sun-exposed fruit in hot weather.
In hot climates where temperatures exceed 90F for extended periods, picking at the first blush of color and ripening indoors at 70 to 75F can actually produce better results than leaving fruit in extreme heat. Tomatoes are climacteric — they produce ethylene internally and will continue ripening after picking. You lose some complexity compared to full vine ripening, but you lose even more to sustained heat damage.
Do not refrigerate tomatoes. Ever. Refrigeration destroys volatile flavor compounds and produces the mealy texture of supermarket tomatoes. This is not a preference — it is chemistry. Store at room temperature, stem-side down, in indirect light. Use within 4 to 7 days of peak ripeness.
Cherry and grape types: harvest frequently. Picking encourages continued production and the fruit detaches easily with a light twist when ripe. Harvest every 5 to 7 days. Slicing and beefsteak types: one day past peak and the texture deteriorates rapidly. Check daily during the ripening window. Determinate varieties ripen their entire crop in 2 to 3 weeks — process quickly or have a plan.
For planning purposes: 3 to 5 plants per person for fresh eating, 5 to 10 if you intend to can or make sauce.
The Mistakes That Actually Kill Yields (Ranked by How Often We See Them)
Inconsistent watering. This is the top killer of fruit quality, not plants. Blossom end rot, fruit cracking, flavor that tastes watery — all trace back here. The fix is not complicated: consistent soil moisture via drip or soaker hose, plus 2 to 4 inches of mulch to buffer swings. Do not let plants go dry and then drown them.
Wrong variety for the zone. Zone 3 gardeners planting 80-day beefsteaks. Zone 9 gardeners planting low-vigor varieties through a Texas July. Zone 5 gardeners skipping season extension and then blaming the plants when they do not ripen. Match variety to zone first. Read the days-to-maturity on the label and compare it to your frost-free window.
Over-fertilizing with nitrogen. Huge, lush, beautiful dark green plants with no fruit is a classic nitrogen overdose. Excess nitrogen promotes vegetative growth at the expense of flowering and fruiting. It also diverts calcium to leaves and away from developing fruit, increasing BER risk. Use high-phosphorus fertilizer at planting. Use calcium nitrate for side-dressing. Do not exceed recommended rates.
Pruning determinate varieties. Every sucker you remove from a determinate is fruit you eliminated. This is not a subtle mistake — it is the difference between a productive harvest and a nearly empty plant. Check whether your variety is determinate before you pick up the scissors. If it is, put them down.
Buying bad transplants. You cannot compensate for a weak start. Reject leggy, yellowish, or flowering transplants. Rutgers specifically warns against transplants already setting fruit — they are already stressed and will establish poorly. Healthy transplants are 8 to 10 inches, dark green, with thick straight stems.
Applying foliar calcium or Epsom salt without testing. Foliar calcium does not fix blossom end rot — calcium cannot move from leaves to fruit. Epsom salt without a soil test risks tipping the calcium-to-magnesium balance in the wrong direction, potentially making BER worse rather than better. Both are widespread, confident, useless recommendations. Get a soil test. Amend based on actual data.
Ignoring crop rotation. Fusarium survives in soil for up to 10 years. Verticillium produces microsclerotia that persist indefinitely. Planting tomatoes, peppers, eggplant, or potatoes in the same bed year after year builds up exactly the pathogens that resistance codes are trying to protect against. Rotate on a minimum 2-year cycle — NC State recommends 3 to 5 for fusarium pressure.
Pests and Diseases
Tomatoes are not a low-maintenance crop. They attract a specific and well-established list of pests and diseases, and if you grow them long enough in the same region, you will eventually meet most of them. The honest framing: foliar diseases are the constant pressure for most US home gardeners, soilborne diseases are the long-term threat, and insects are manageable if you stay ahead of them. None of this should discourage you. It should encourage you to scout regularly, choose resistant varieties, and stop reaching for chemicals as a first response.
The good news is that stressed plants attract more pests than healthy ones. Clemson Extension makes this point explicitly: proper fertilization, consistent watering, and vigorous growth are your first line of defense. Fix the culture before you fix anything else.
Pests
Hornworms are the most dramatic pest you will encounter. Either species — tobacco or tomato hornworm — is three to three-and-a-half inches of green caterpillar that can strip a plant fast. A single larva can defoliate a vine in days according to UF/IFAS. Hand-picking works well in home gardens because these things are large and findable. If you see hornworms covered in small white rice-shaped cocoons, leave them alone. Those are braconid wasp pupae. The next generation of wasps will hatch and handle future populations for you. Tilling the soil between crops kills around 90% of overwintering pupae — that number comes from UF/IFAS and it is worth taking seriously as a preventive step.
Tomato fruitworm — also called corn earworm — is the most damaging tomato pest in South Carolina according to Clemson, and it earns that distinction by boring directly into fruit. The larvae enter near the stem end. By the time you see the damage, they are deep inside. NC State recommends harvesting before July 20 to minimize fruitworm damage. Early plantings get hit less than late ones. Early-season Bt applications work on young larvae; they are largely useless on mature caterpillars.
Aphids colonize growing tips and leaf undersides and cause mottling, curled new growth, and honeydew that leads to sooty mold. The bigger concern is that they transmit viral diseases including mosaics and leaf roll, per Clemson. A strong water spray dislodges them from plants. Avoid excess nitrogen — the soft, lush growth it produces is exactly what aphids prefer. Protect natural predators like lacewings and lady beetles rather than spraying broad-spectrum insecticides that eliminate the biological control doing the work for you.
Western flower thrips are nearly microscopic and feed inside flowers and buds where sprays cannot reach. The real danger is not the feeding damage — it is that they are the primary vector for tomato spotted wilt virus (TSWV). Cultural controls are difficult. UMN research supports basil and marigolds for reducing thrip populations in both field and greenhouse settings.
Root-knot nematodes are the most destructive pest in warm-climate sandy soils — Gulf Coast, coastal Southeast, Florida — and above-ground symptoms look like drought or nutrient deficiency: stunting, yellowing, plants that stop producing early. Dig up a root and look for galls. That is the diagnosis. Resistant varieties with the N code are the primary tool. The Mi gene protects against the three most common species, but breaks down when soil temperatures stay above 86F. Mulching helps keep soil cooler and maintains resistance through summer. No chemical nematicides are available for home garden use — this is a cultural and variety problem, not a spray problem.
Diseases
Early blight caused by Alternaria fungi is the most common foliar disease you will face. It starts on lower leaves as small dark spots with concentric target-ring patterns, then works upward. Lesions appear within five days of infection under favorable conditions — temperatures between 59 and 86F with high humidity. Mulch prevents soil splash to lower leaves, and removing infected lower foliage slows spread. Do not remove more than a third of the canopy at once. UNH makes a strong case for high tunnels or caterpillar tunnels, noting that keeping leaves dry dramatically reduces blight pressure. Mountain Magic carries the EB designation if early blight is a recurring problem in your garden.
Late blight is a different animal. It is caused by Phytophthora infestans, a water mold, not a true fungus — and that distinction is not academic. Standard fungicides do not work on it. The symptom is large brown blotches with a green-gray edge that spreads without regard for leaf veins, sometimes with white powdery growth on leaf undersides in high humidity. Under optimal conditions, a lesion produces thousands of sporangia in under five days, per UMN. In northern climates it does not overwinter in soil — it arrives via storms or contaminated transplants each year, according to UNH. Management requires oomycete-active fungicides applied preventively, not reactively. Monitor the USAblight website for outbreak alerts in your region.
Fusarium wilt announces itself with one-sided wilting — only half the plant, or half a branch, affected first. Cut the stem near the base and you will find light brown vascular streaking. It enters through roots and colonizes the vascular system. Soil pH below 5.5 favors it, so raising pH to 6.5 with lime reduces pressure. No homeowner fungicides are available for fusarium according to NC State — resistant varieties are the control. The F code on the seed packet indicates resistance, but race matters. Resistance to race 1 does not protect against race 3.
Verticillium wilt moves more slowly than fusarium and rarely kills plants outright — it just makes them unproductive. The hallmark symptom is V-shaped brown lesions extending inward from leaf margins. Plants may wilt in the afternoon and partially recover overnight early in the infection. Unlike fusarium, verticillium thrives at neutral to slightly alkaline pH. Target pH 6.5 as a compromise that disfavors both pathogens when you have uncertainty about which is present.
Septoria leaf spot is worth naming separately because Penn State identifies it as the primary disease concern for container-grown tomatoes. Spots appear on lower leaves and the plant progressively defoliates. Infected material should be removed. Drip irrigation is the preventive tool. For containers with active Septoria pressure, Penn State recommends chlorothalonil or copper solutions weekly beginning at first flower buds.
When to Intervene
Scout daily. Walk the garden, flip leaves, look at the soil line. Most problems are manageable when caught early and get ahead of you fast when ignored. Tolerate minor leaf damage — a few holes in foliage do not require action. Intervene when you see spread, when fruit is being damaged, or when you identify a vector pest like thrips or aphids that carries disease risk. Cultural controls and hand removal come first. Targeted low-impact products like Bt, insecticidal soap, and copper solutions come second. Broad-spectrum insecticides come last, if at all — NC State's observation about spider mites is instructive here: damaging mite infestations often follow pesticide applications that killed the parasitic wasps keeping them in check. Spraying your way into a worse problem is a real outcome.
Companion Planting
Tomatoes benefit most from companions that address their two biggest vulnerabilities: pest pressure and soil competition. The best pairings either deter or confuse insects targeting tomato foliage, or attract the beneficial insects that prey on them.
Best Companions
Basil: The most popular tomato companion, and one of the few with research to back it up. University of Minnesota Extension found that basil intercropped with tomatoes can reduce thrip populations and may enhance tomato growth directly. Plant basil at the base of tomato plants where its volatile oils provide the most benefit.
Marigolds: Field and greenhouse studies support marigolds as a genuine thrip deterrent for tomatoes—one of the more evidence-backed claims in companion planting. The mechanism is likely odor-based, with marigold scent disrupting pest host-finding. French marigolds are most commonly used for this purpose.
Garlic: Garlic's sulfur compounds are thought to deter aphids, which are a persistent tomato pest. Plant garlic around the perimeter of tomato beds rather than crowding the root zone.
Cilantro: Cilantro in flower attracts parasitoid wasps and predatory insects that feed on aphids and spider mites—two common tomato pests. Let a few cilantro plants bolt to keep beneficial insect populations in the area.
Celery: A practical spatial companion; celery tolerates partial shade and can fill gaps without competing aggressively, particularly useful in warmer climates where tomatoes cast afternoon shade.
What to Keep Away
Strawberries: Tomatoes and strawberries share Verticillium dahliae, the soil-borne fungus responsible for Verticillium wilt. Planting them together—or rotating tomatoes into beds that previously held strawberries—increases disease pressure on both crops.
Broccoli and brassicas: Brassicas compete heavily for nutrients and research suggests they can inhibit tomato growth when planted in close proximity. Keep these families in separate beds.
Dill: Mature dill is antagonistic to tomatoes and can suppress growth. Young dill may be tolerable, but allowing it to go to seed near tomatoes is inadvisable. Use cilantro instead if you want to attract beneficial insects.
Fennel: Fennel is broadly allelopathic and inhibits most garden vegetables, including tomatoes. Keep it isolated at the garden's edge.
Frequently Asked Questions
What is the single best tomato variety for a beginner?
Celebrity (VFN/T, 70 days, semi-determinate). It sets fruit across a wide temperature range, carries resistance to verticillium, fusarium, nematodes, and tobacco mosaic virus, produces reliably in zones 5 through 10, and does not require aggressive pruning. It is not the most exciting tomato you will ever eat. It is the one that will actually be there in August when others have failed. Start with Celebrity. Once you know what you are doing, branch out.
Why are my tomatoes dropping flowers without setting fruit?
Temperature. Blossom drop occurs when night temperatures drop below 55F, day temperatures exceed 95F, or night temperatures stay above 75F (Missouri). The damage happens 7 to 15 days before flowering — by the time you see flowers falling, those blooms were already compromised. In cold zones, do not transplant too early. In hot zones, this is why the two-window strategy exists: you cannot will a tomato to set fruit in a 100F afternoon.
Should I grow heirlooms or hybrids?
Both. Grow Celebrity or Big Beef for reliable production. Grow Brandywine or Mortgage Lifter because they taste the way tomatoes are supposed to taste. Grow Sun Gold cherry because it consistently ranks in the top 10 percent for flavor preference and produces prolifically from July through frost. The either-or framing is a false choice.
Can I grow tomatoes in containers?
Yes, and for zones 9 to 10 where native soils can be challenging, containers give you complete control. Use pots at minimum 14 inches in diameter with drainage holes, and use potting media formulated for large containers — composted pine bark blended with peat moss and perlite (Penn State). Never use regular garden soil or homemade compost in containers. Penn State-tested container varieties include Bush Early Girl (excellent flavor, needs support), Patio Princess (good salad-size fruit), Window Box Roma (paste type, no support needed), and Tumbler (very compact). Install support structures shortly after planting and water more frequently than in-ground — containers dry faster.
How do I know when a tomato is actually ready to pick?
Color first, then give. The fruit should be fully colored across the entire surface with no green patches. Then apply gentle pressure — a ripe tomato yields slightly without being soft. Cherry types release with a light twist; if you have to tug, wait. For fall harvest in cold zones, pick any fruit showing a color change before temperatures regularly dip below 50F. They will finish ripening indoors more reliably than on a stressed, cold plant.
My tomatoes have black bottoms. What do I do?
Stop reaching for calcium spray and fertilizer. What you have is blossom end rot, and the cause is almost certainly inconsistent watering, not low soil calcium. MSU, Wisconsin Extension, and UGA all confirm that BER is a calcium transport problem, not a soil calcium deficiency. The black-bottomed fruit is already lost — cut off the affected portion and eat the rest. Fix the watering going forward: consistent moisture, organic mulch, drip irrigation. Side-dress with calcium nitrate. Your next set of fruit will be fine.